Azure for AWS professionals - Auto Scaling - Azure - 03 Updating the Scaling policies of VMSS
@20aman Jul 18, 2019Note that this post is a part of the series. You can view all posts in this series here: Azure for AWS professionals - Index
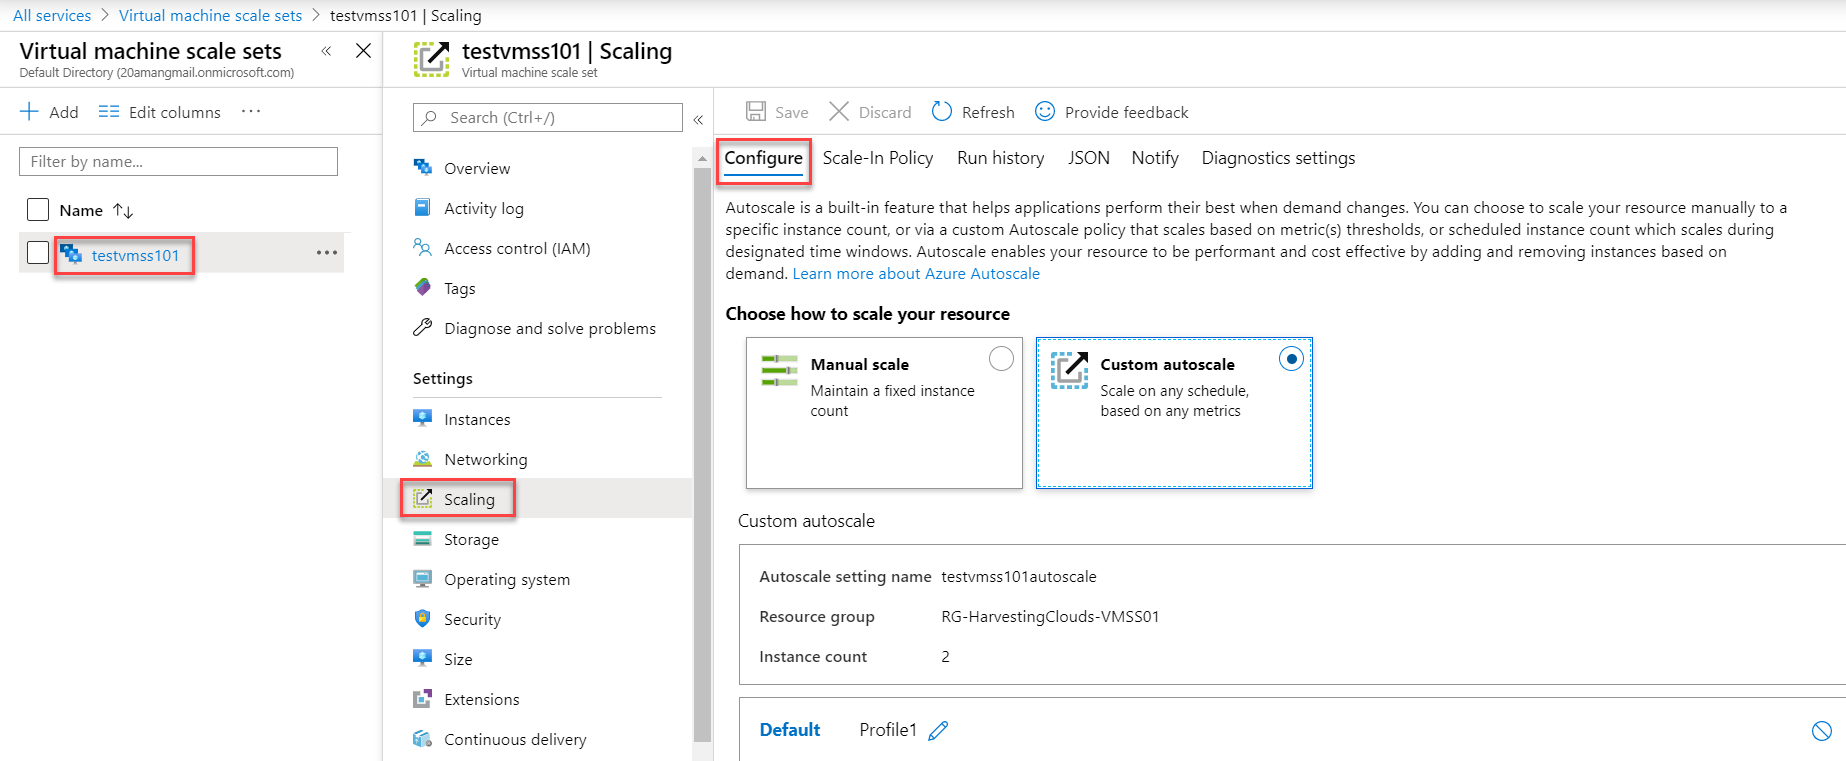
In Microsoft Azure Virtual Machine Scale Sets or VMSS, understanding and setting up appropriate scaling settings is paramount. You have the option to either set the scaling settings manually or set them to auto-scale based on different criteria.
To access these settings, navigate to your VMSS and go to the Scaling option under Settings. Ensure that "Custom autoscale" is selected. Then click on the "Configure" button from the top.
In the next screen, you can "scale based on a metric" to scale based on different metrics on the VM. Examples of such metrics include CPU percentage, Memory consumption, etc. Here you define:
- Scale out - This is the setting for how the instance count should increase. E.g. if the Average CPU percentage increases beyond 75% then increase the count by 1.
- Scale in - This is the setting for how the instance count should decrease. E.g. if the Average CPU percentage decreases below 25% then decrease the count by 1.
You also have the option to scale to a specific instance count based on a time schedule.
Another setting you have control over here is to set the Instance Limits. You define a minimum and a maximum number of instances with what the default or an initial number of instances is going to be. Note that the default value can only be between a minimum and a maximum number of instances.
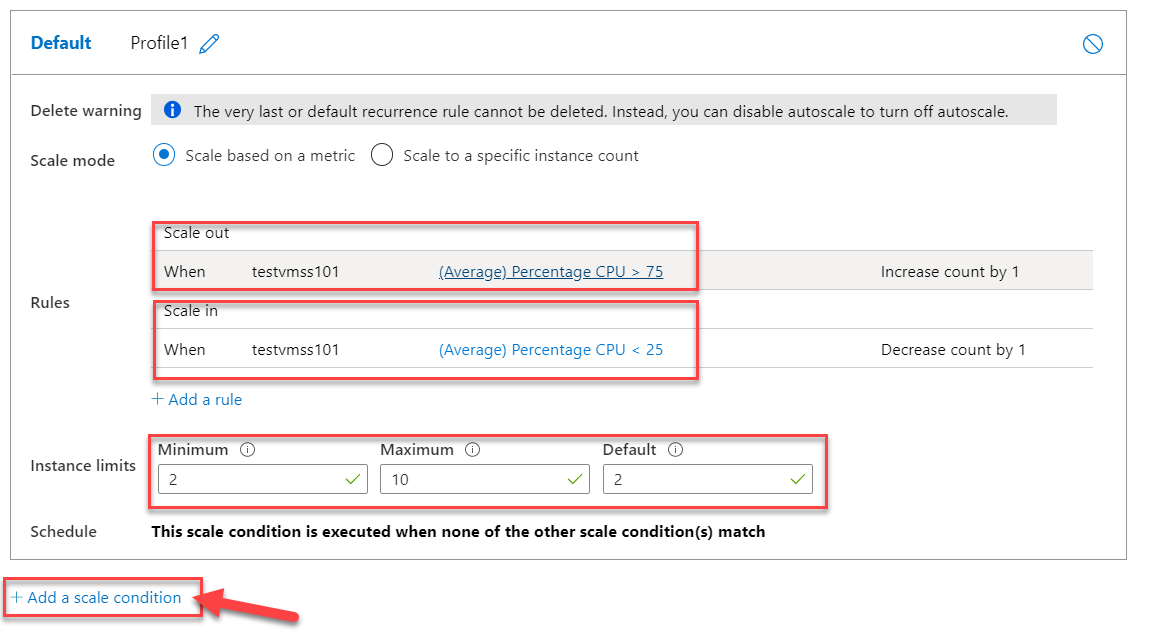
Another key point to note is that you can add multiple scaling conditions to ensure autoscaling occurs as you require. Now that you have the autoscaling set up, next you should simulate load on your application running on VMSS and validate that you are not facing any performance issues. If you do then you should tweak the autoscaling numbers.