Azure for AWS professionals - Auto Scaling - Azure - 04 Viewing the Run History of VMSS
@20aman Jul 20, 2019Note that this post is a part of the series. You can view all posts in this series here: Azure for AWS professionals - Index
When you have an active Microsoft Azure Virtual Machine Scale Set or VMSS it is imperative that you monitor how your VMSS has been running over the period of time. This helps you tweak the autoscaling settings of your VMSS. You should monitor this continuously for any critical applications in your environment. Ideally, to begin with, this should be done in a test or QA environment with a simulated load on your application running for a long period of time. And then you should keep doing this in upper environments as a best practice.
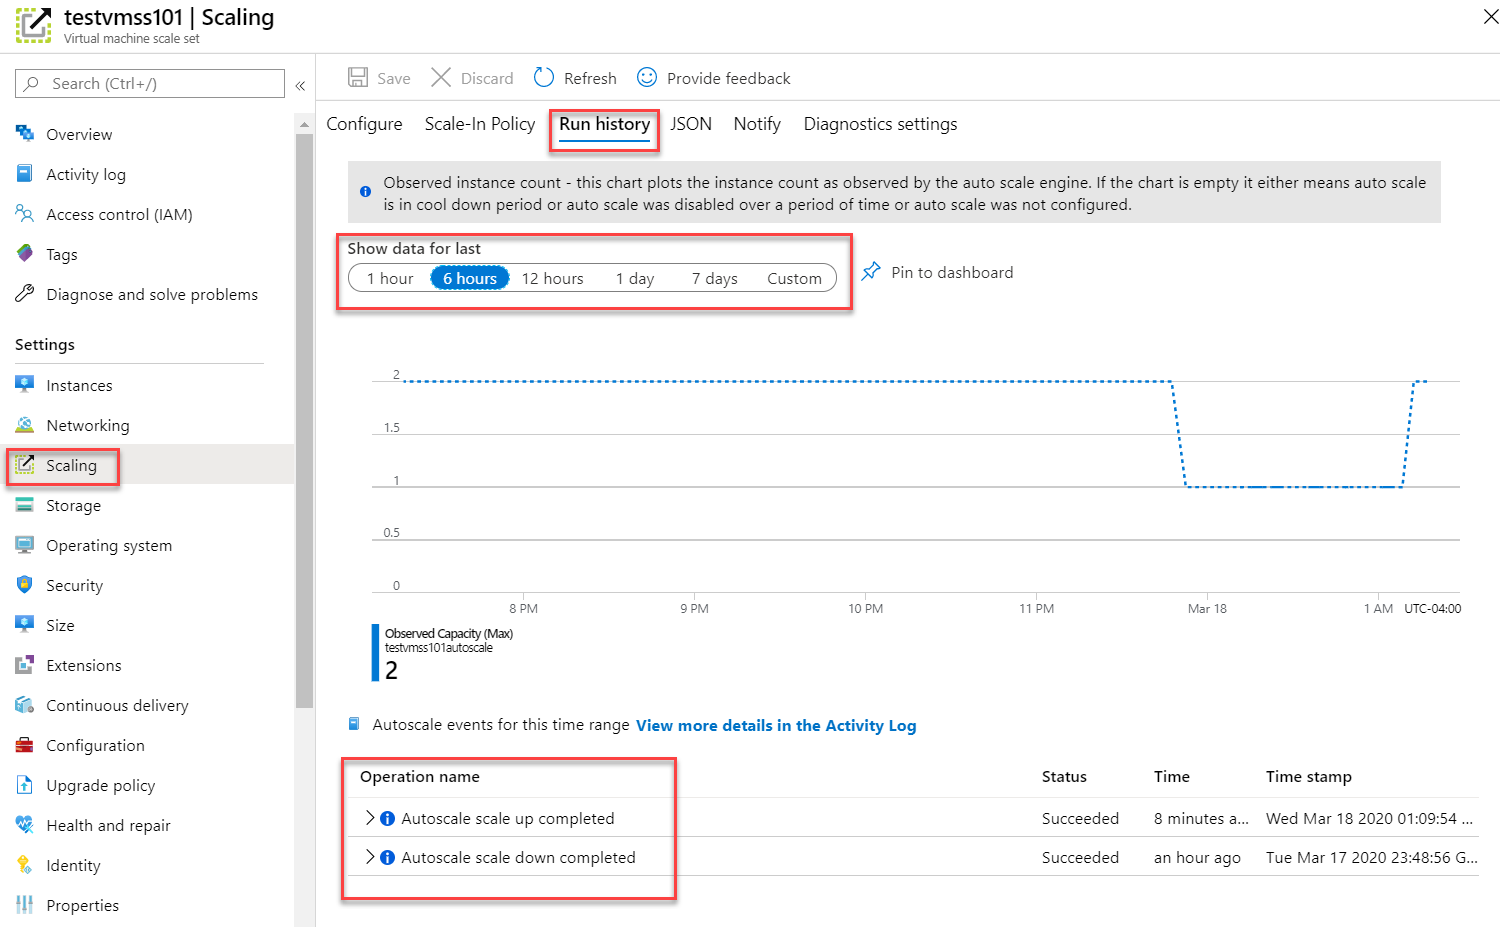
To access this setting, navigate to your VM scale set and navigate to the "Scaling" option under the Settings menu. Here click on the "Run history" tab. All the history for how the instances were scaled up and down will be visible here. You can filter the data based on time to reduce the window. At the bottom you also have Operations list view what operations occurred on the VMSS and at what times.
This option should be used in conjunction with the performance data for the app or workloads running on your VMSS for a complete picture. If you view any performance drops, you should tweak the settings to scale out earlier than what it is configured. E.g. If the scale out operation is configured if the Average CPU percentage goes above 75% and you still see performance hits, then you should tweak that setting from 75% to a lower value like 65%.
There may also be some times during the day or week when there will be more load on your application. To ease this, you can add a schedule for scaling based on time. Note that there is no single best combination. The best settings for you depends upon your application.