Azure for AWS professionals - Storage - AWS - 05 Adding Lifecycle Rules for S3 buckets
@20aman Sep 21, 2019Note that this post is a part of the series. You can view all posts in this series here: Azure for AWS professionals - Index
When you have object i.e. files in your S3 bucket, you are essentially paying for the space that these objects take up. After a certain period of time, you will either no longer need these objects or you may want to archive these. If we keep them lying and take actions manually then there are chances that we forget about these and end up paying for the extra space. Lifecycle within S3 buckets is a way to set an expiration date to the files and take automated actions at the expiration.
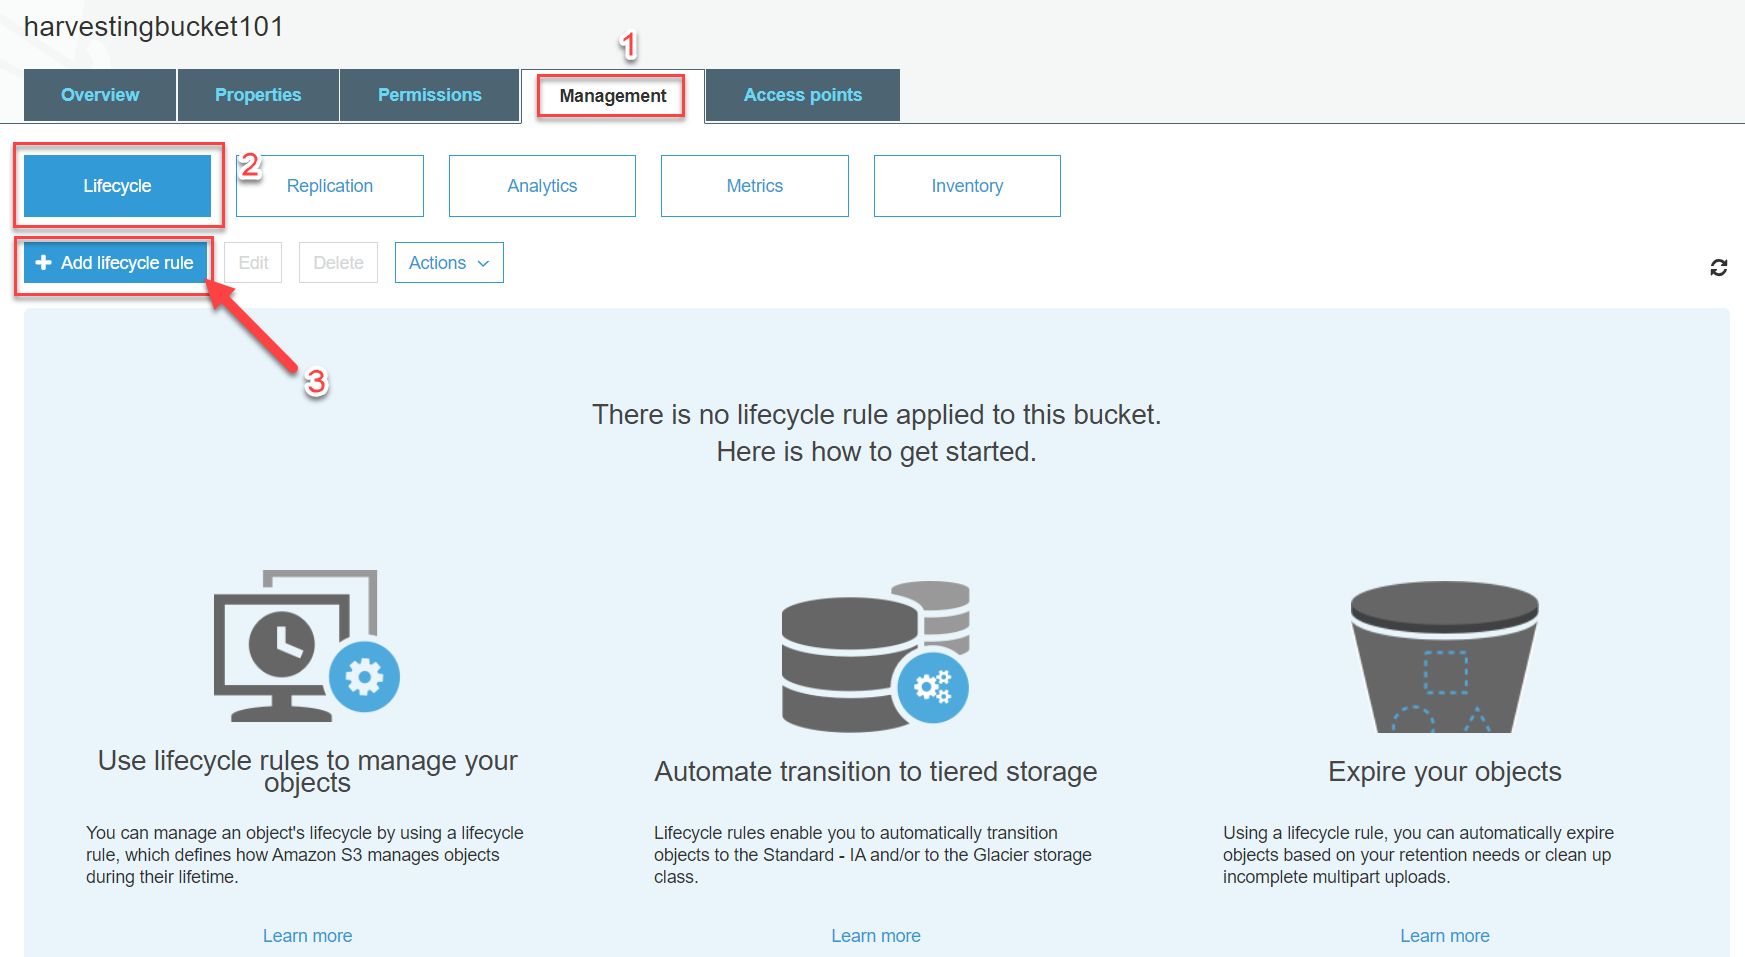
To start you navigate to your S3 bucket and go to the Management tab. Click on the Lifecycle here. To create a new lifecycle rule click on the "+Add lifecycle rule" button. A new popup launches to set up a new rule. You can have as many rules as you want.
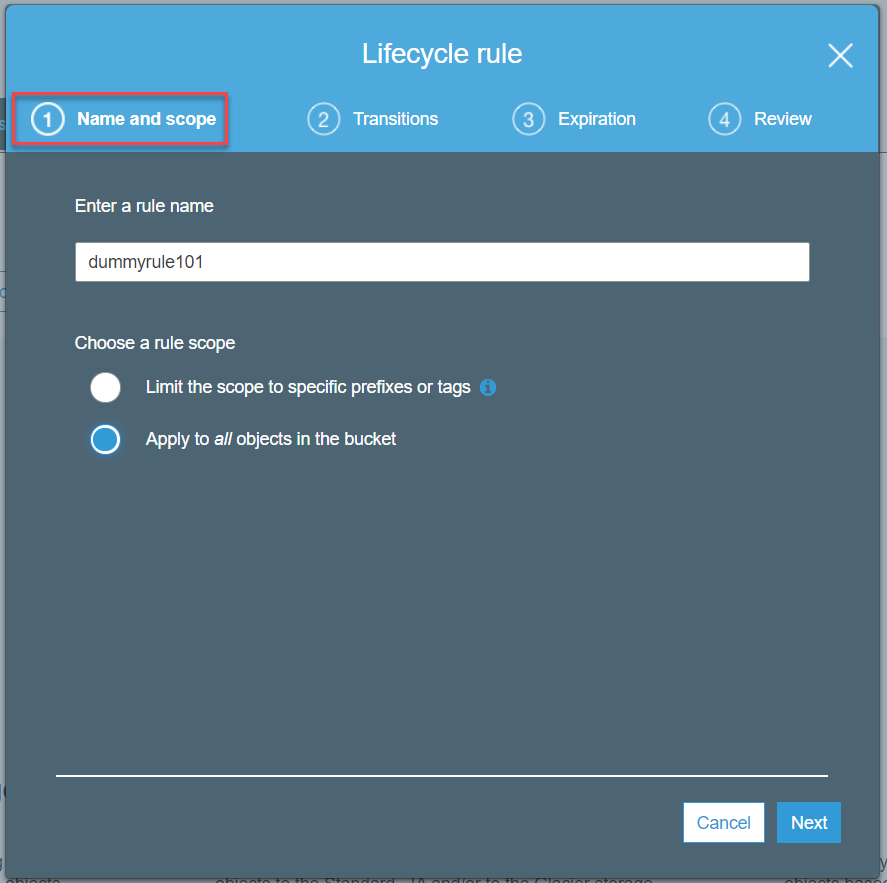
To set up a lifecycle rule, set up a name for this rule. Also, set up a scope for this rule. You can either apply this rule to all objects in the S3 bucket or reduce the scope by using prefixes for the names or leveraging tags.
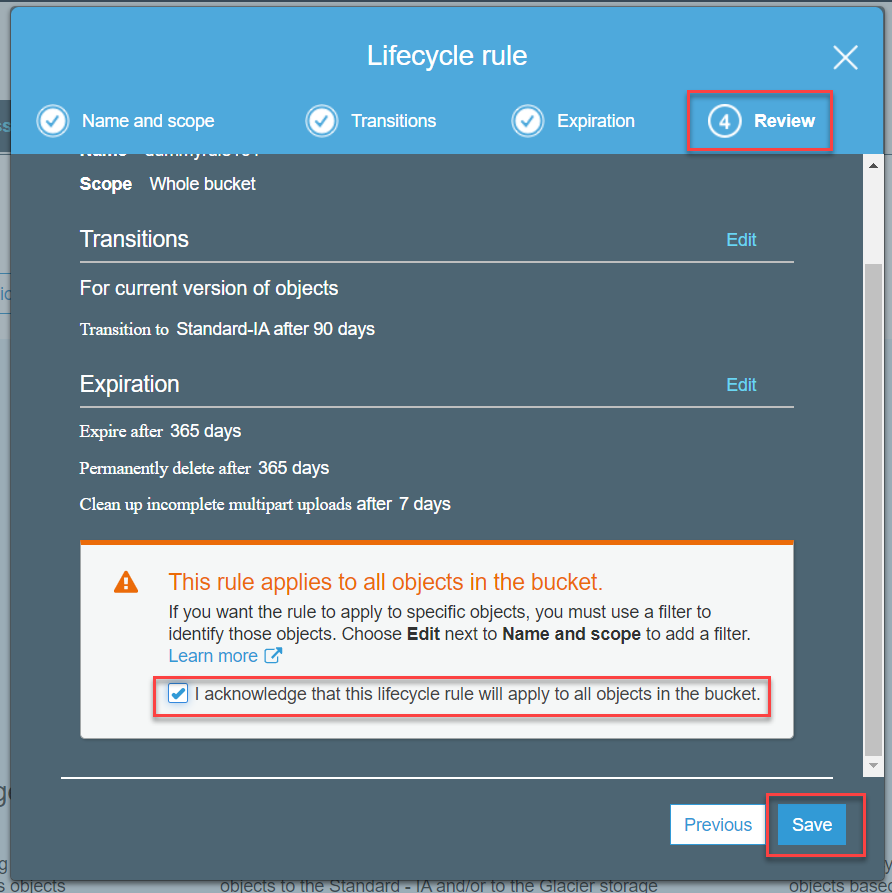
Transitions is the setting for moving the storage objects from one storage class to another. In the example below, the transition is set from Standard storage to Standard-IA after 90 days. You can set more transitions here. E.g. you can move the data to Glacier storage after 180 days.

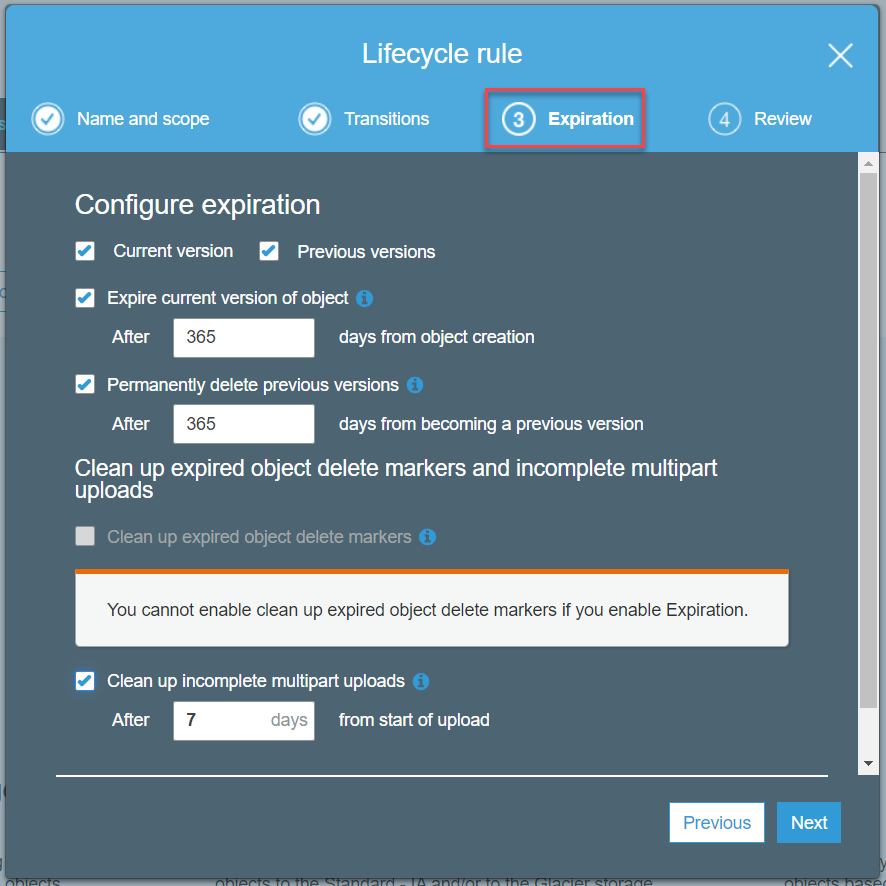
Under Expiration settings, you can set the objects to delete after a certain period of time.
Finally, review the settings and create the lifecycle rules.
Setting up lifecycle rules is a great way to optimize costs in the longer run. It is a best practice to set up a policy at your organization and adhere to that for every bucket. It may seem like an extra but can help save costs big time.