Azure for AWS professionals - Virtual Machines vs EC2 instances - 02 - Creating EC2 Instances
@20aman Apr 29, 2019Note that this post is a part of the series. You can view all posts in this series here: Azure for AWS professionals - Index
In this post, we will look at how to create EC2 instances in Amazon Web Service (AWS).
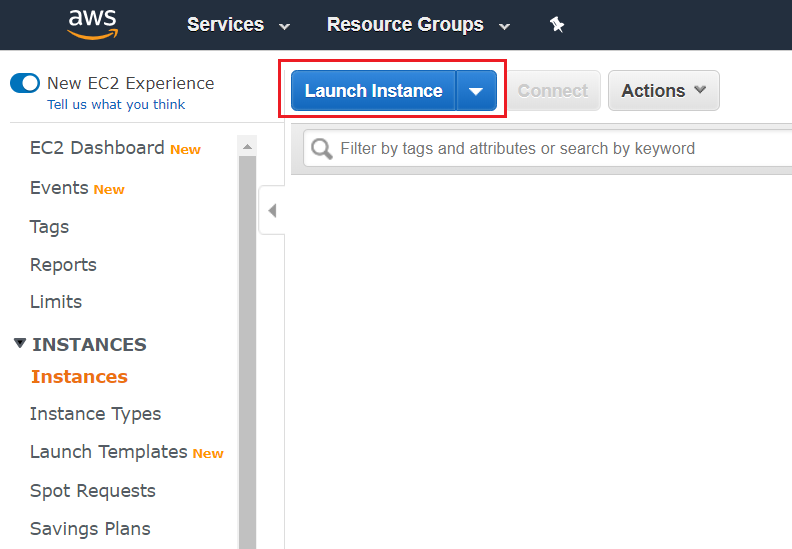
You start by selecting the option to create or launch the instances.
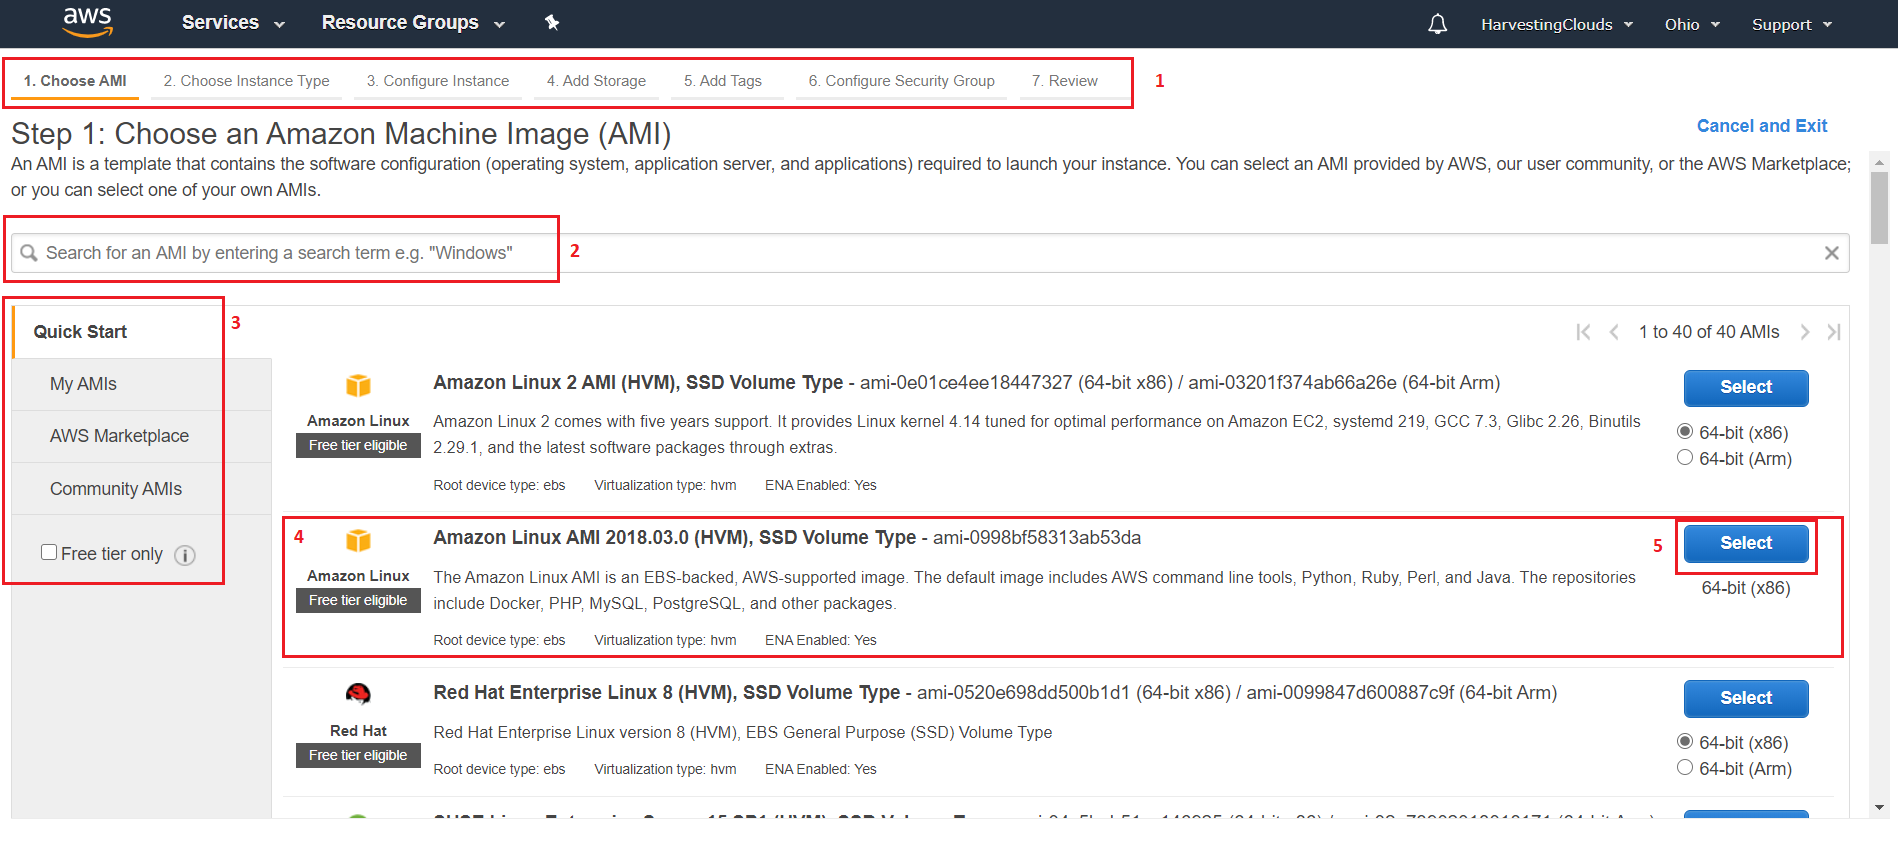
In the Instance creation wizard, the breadcrumb at the top show you where in the wizard you are currently at. The first screen is to choose an image for the VM or EC2 instance. The image is called an Amazon machine image or AMI. You can also search for an AMI. Under the image name, you can view the details of the image. Make sure you select the right image. Click on the Select button once decided.
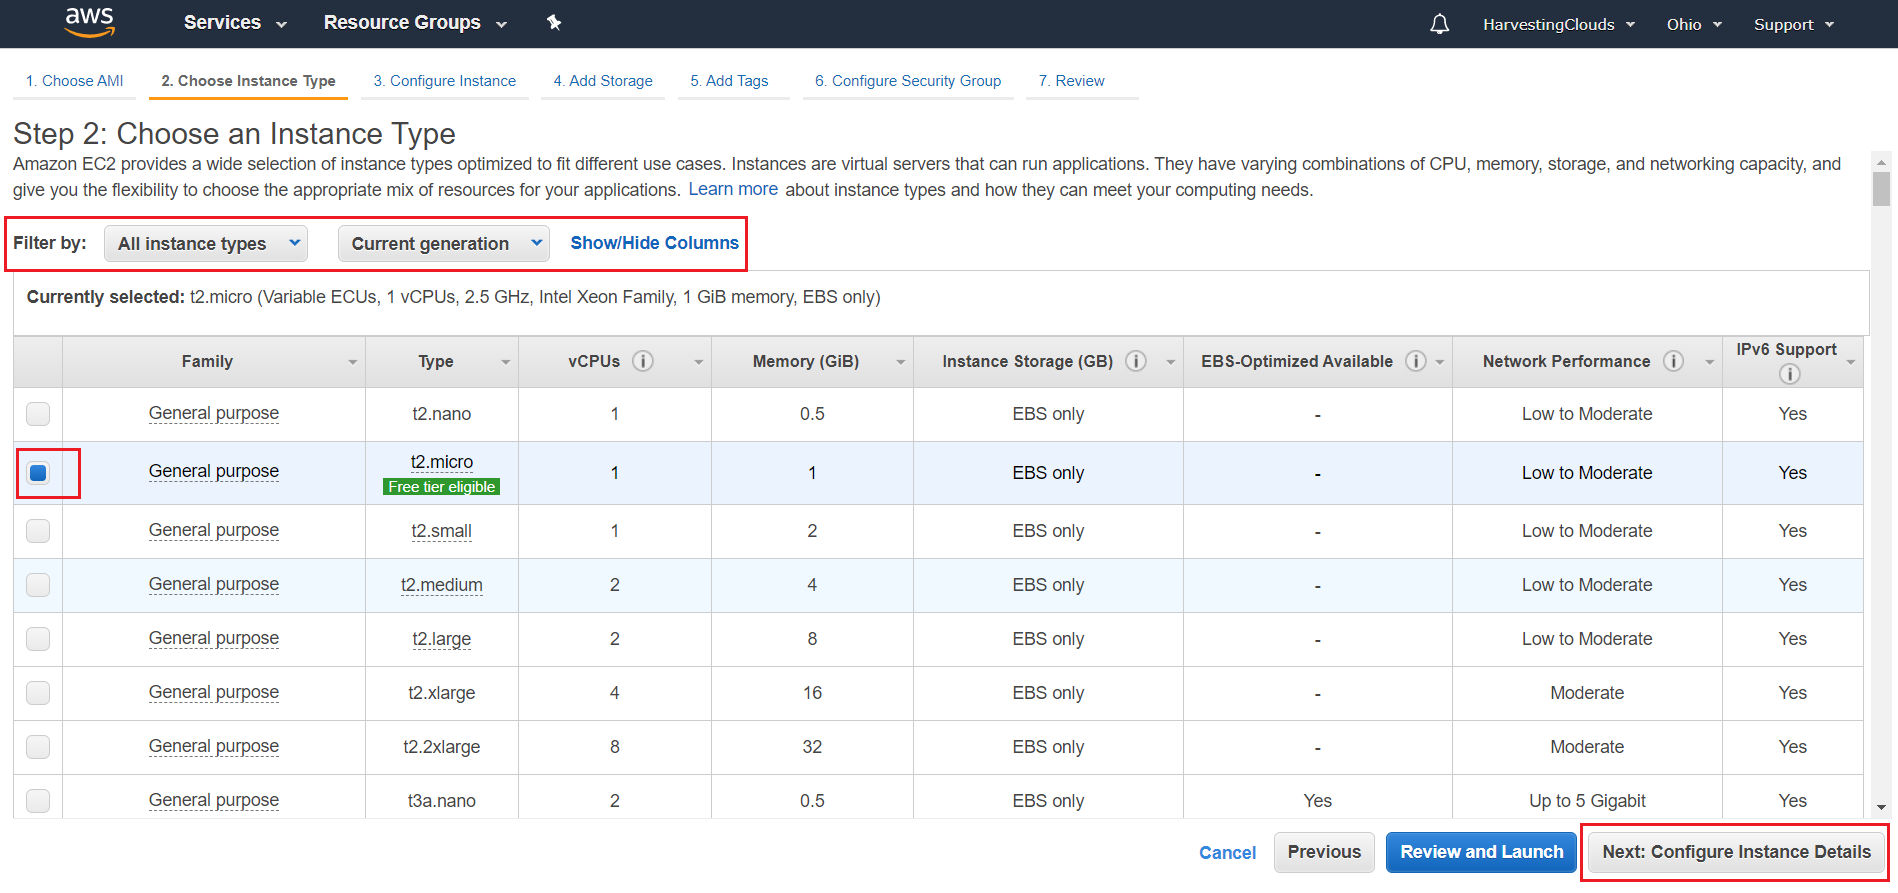
Next, select the instance type. Here you are selecting the actual compute details i.e. the number of vCPUs and the Memory in GiB. You are billed as per the instance type you select.
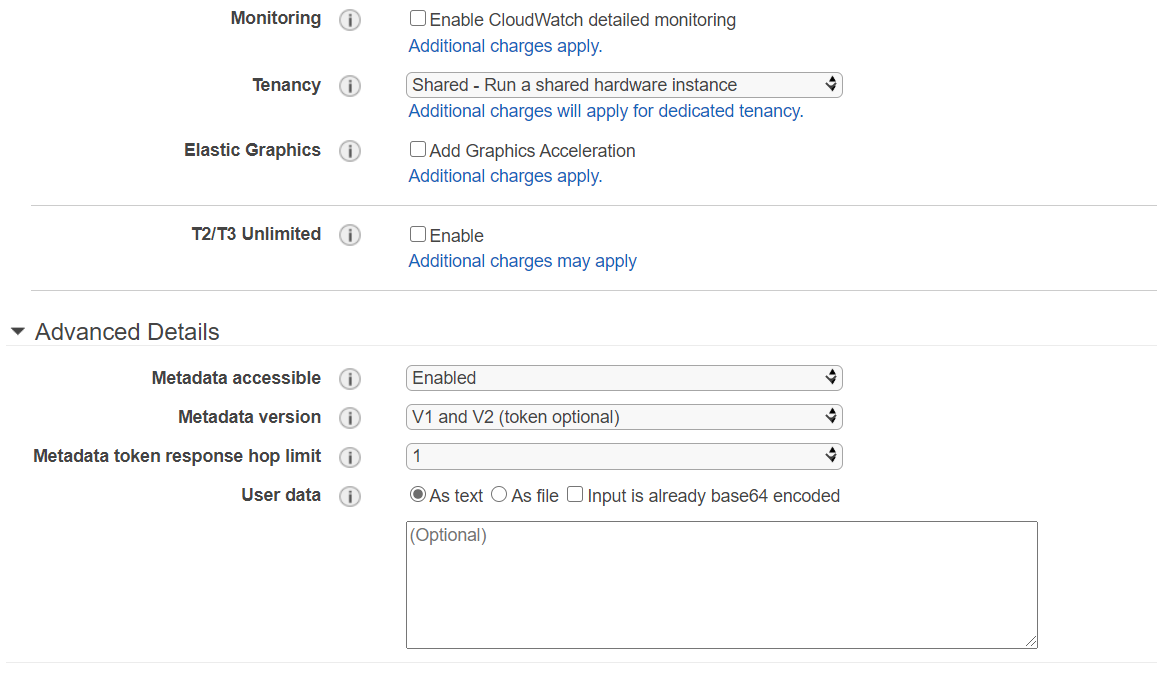
Next, you select various Instance details. This screen is very vast and makes your deployment very configurable. In this post we will not go into each of these settings. Here you can decide to create an Auto Scaling Group, request spot instances, add placement group, select domain join directory, decide shutdown behavior etc. One key setting that you select here is the Networking details. You select your VPC (Virtual Private Cloud) network and the subnet for the instance.

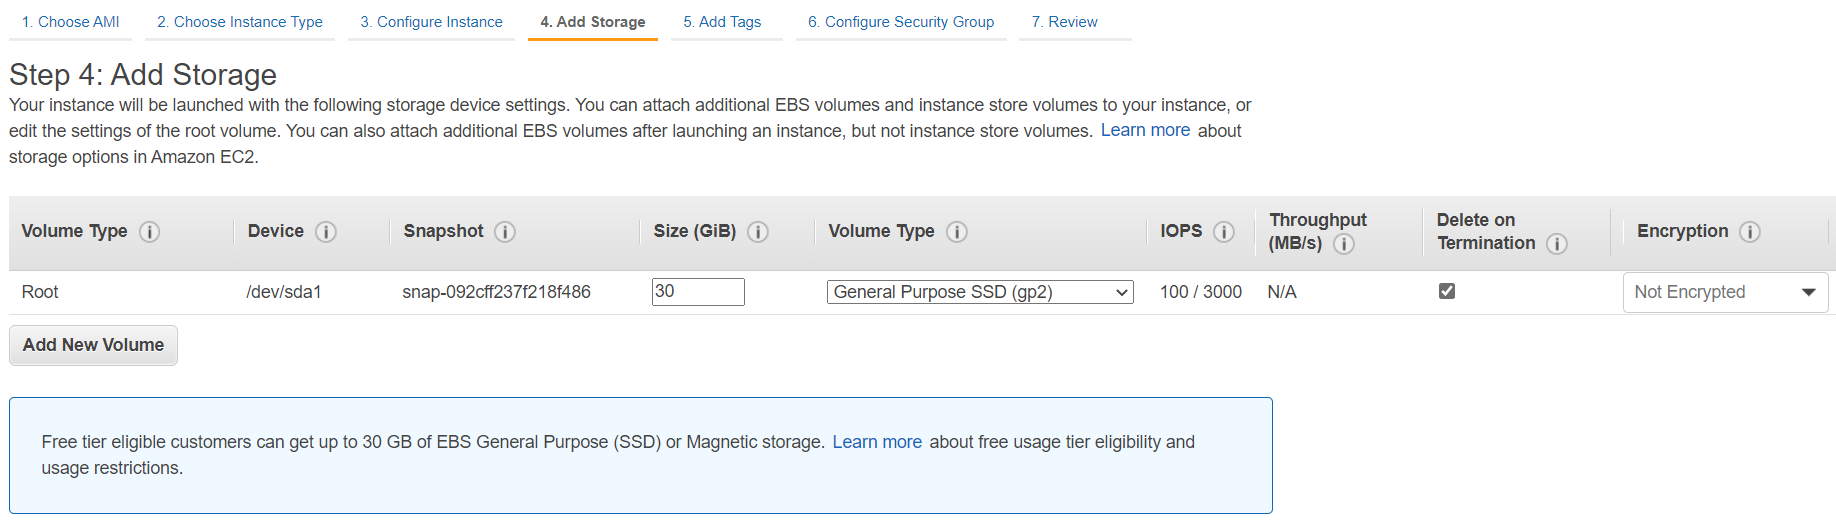
Next, you configure the Storage details. You can tweak the default storage assigned and can also add more storage. Based on the IOPS requirements you select the Volume type. You can encrypt the storage as well.
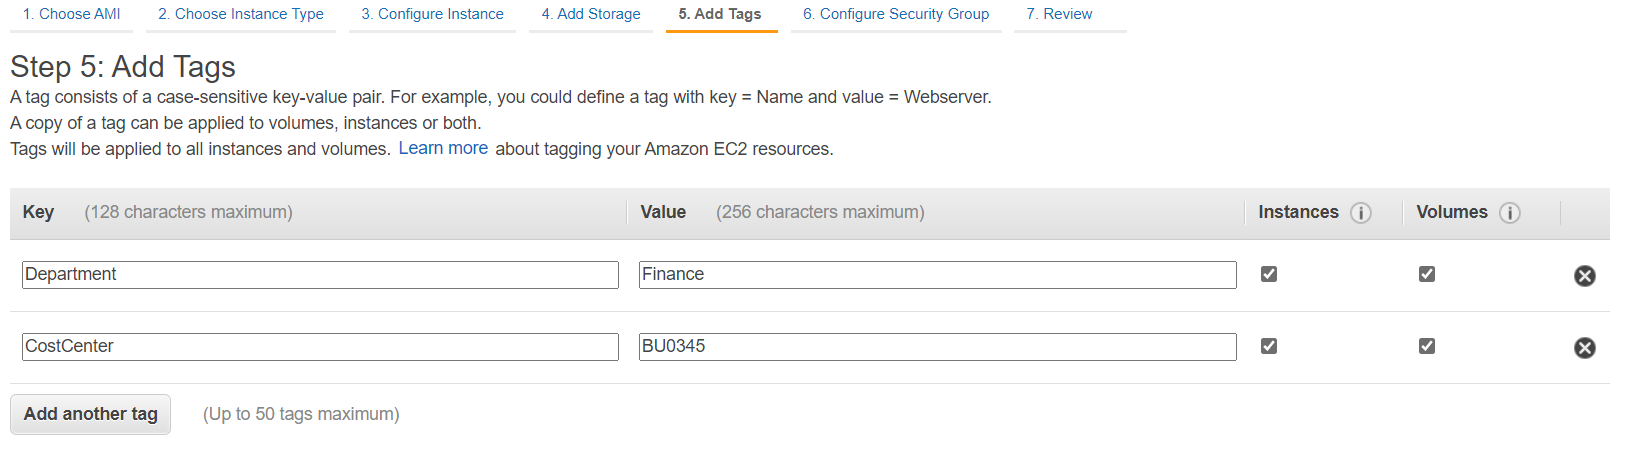
Next, you add tags to your instance and underlying volumes. Tags are a great way to categorize resources. Below is just an example of a couple of tags assigned to the instance and underlying volumes.
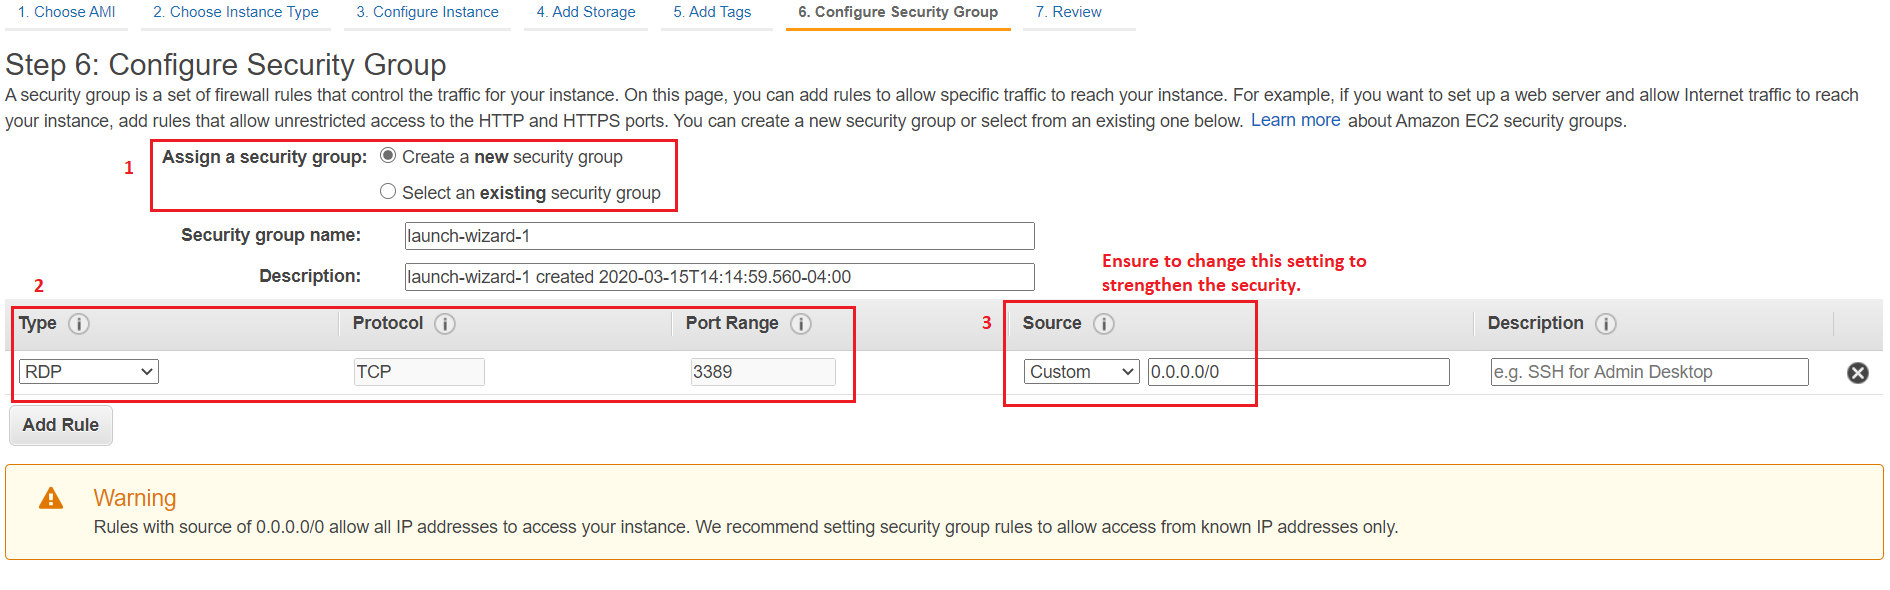
Now you configure the firewall on the Instance via Security Groups. You can create a new one or select an existing one. This is where you decide what can connect to your instance and what can not. In the screenshot below the RDP connectivity on port 3389 is open. Please note that the Source of "0.0.0.0/0" means that it is open for all internet. It is highly recommended that you change this setting to only your IP addresses from where you will connect.
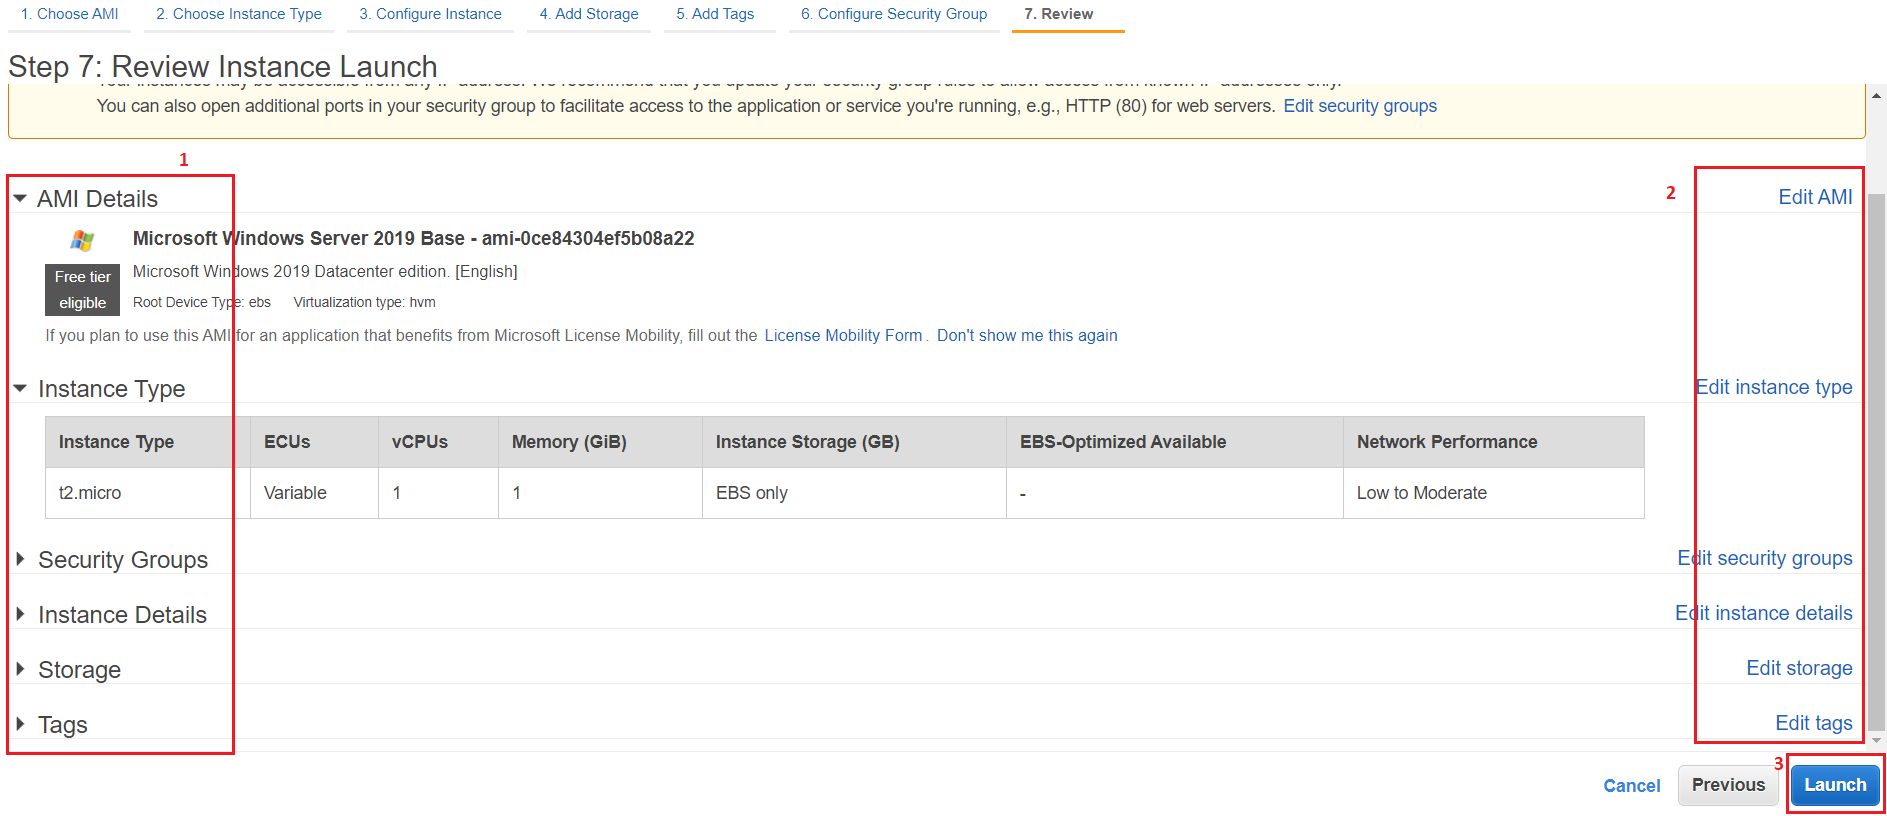
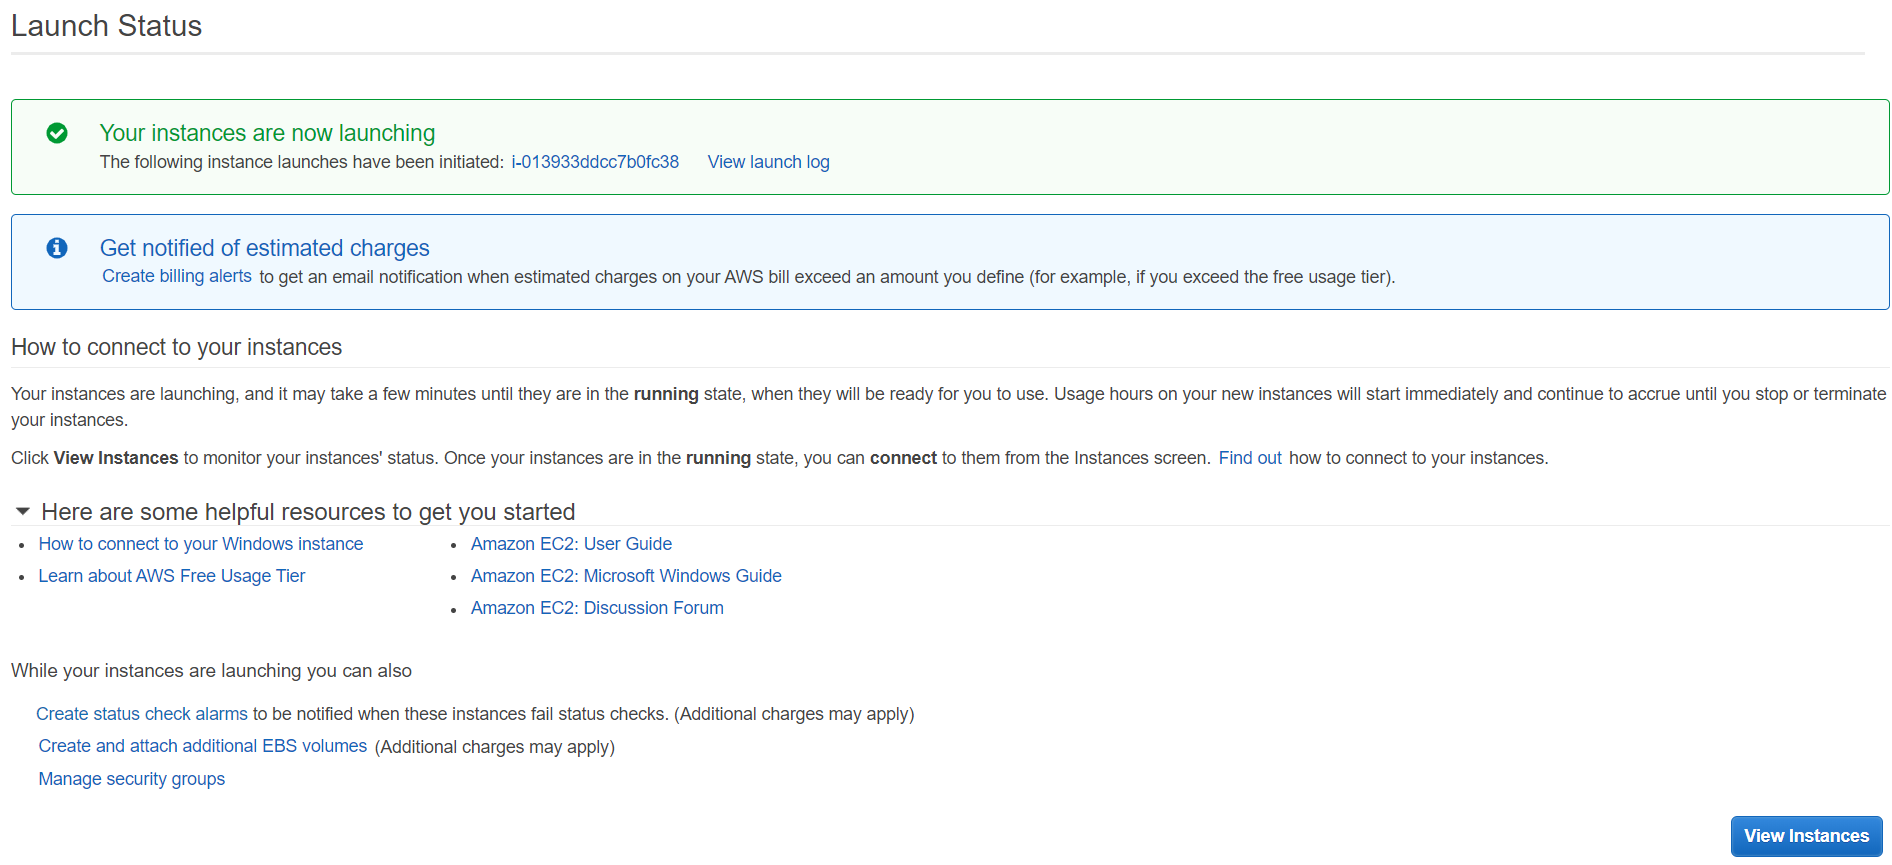
Finally, you review the details. If you need to view the details in detail just expand that category. Click the Edit buttons on the right to edit that setting. Hit Launch to trigger the instance provisioning.
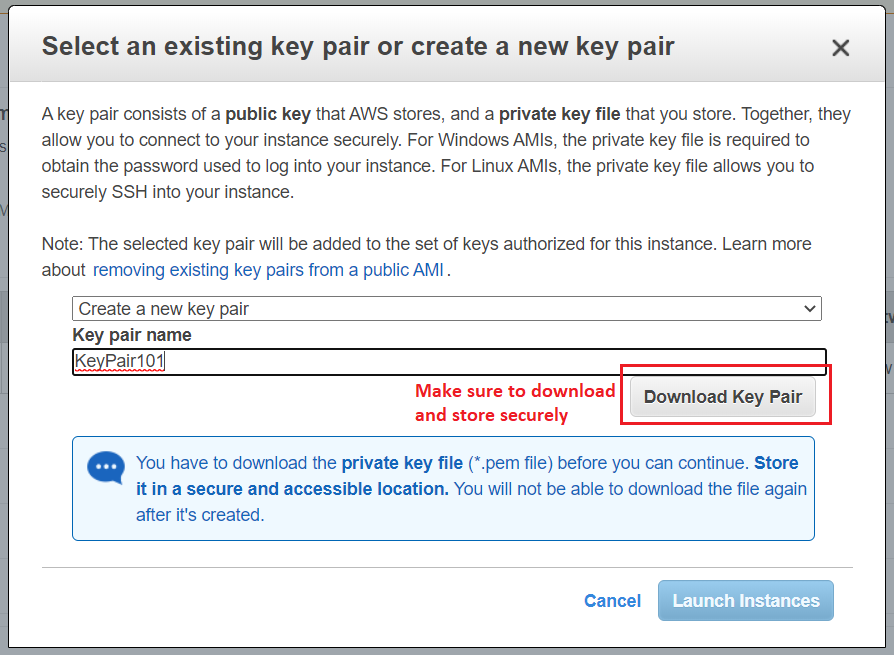
Before the instance can be provisioned, you are prompted with a popup to select a key pair or create a new one. This is a Private and Public key pair that is used to authenticate. You download and keep the Private key. Note that you can only download the Private key at the time of creation. You will not be able to access it later.
You can check the launch status on the next screen.
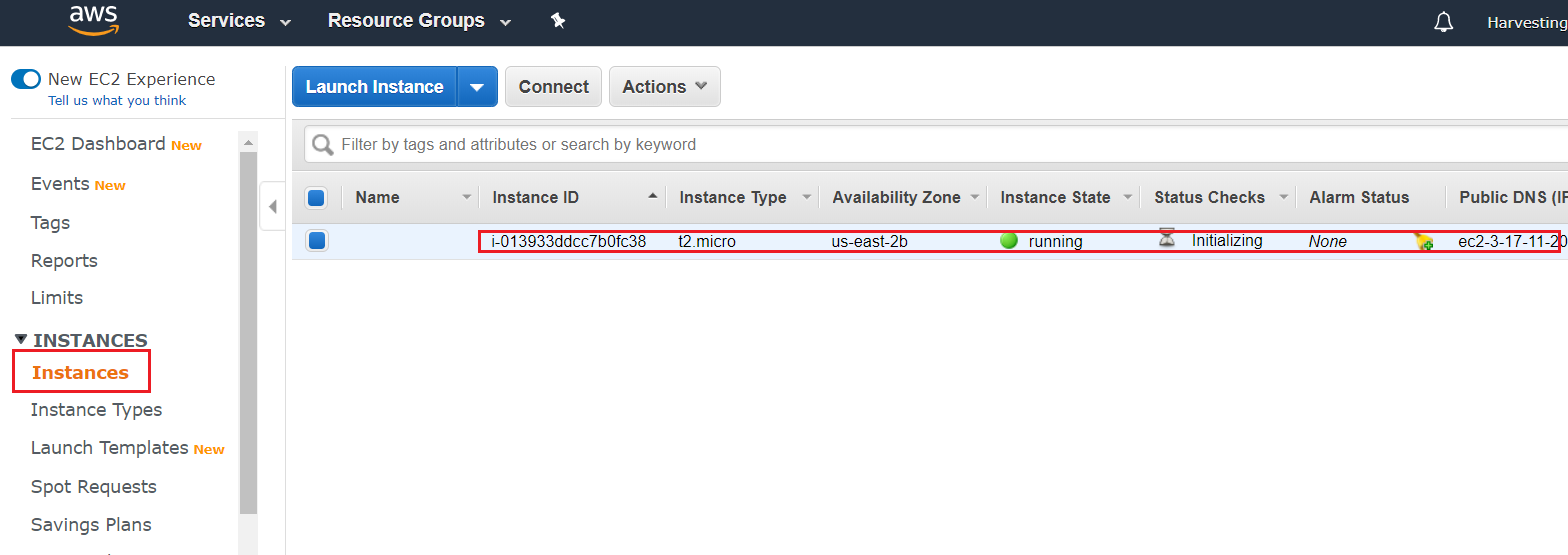
Finally, you can view and check your instance. It will be listed in the list under the Instances section under EC2 service.
For more information, refer to the below links: Amazon Elastic Compute Cloud (EC2)