Azure SQL Basics - Managing Backups for Azure SQL Database
@20aman Nov 29, 2019Note that this post is a part of the series. You can view all posts in this series here: Azure SQL and Data Factory Basics - Index
In this post, we will discuss managing the backup for the Azure SQL database. Azure takes the back up at the most convenient time when the database is not much in use. We can’t control at what time the back up took but we can set up the days/week/years for how long we want to keep the backup files.
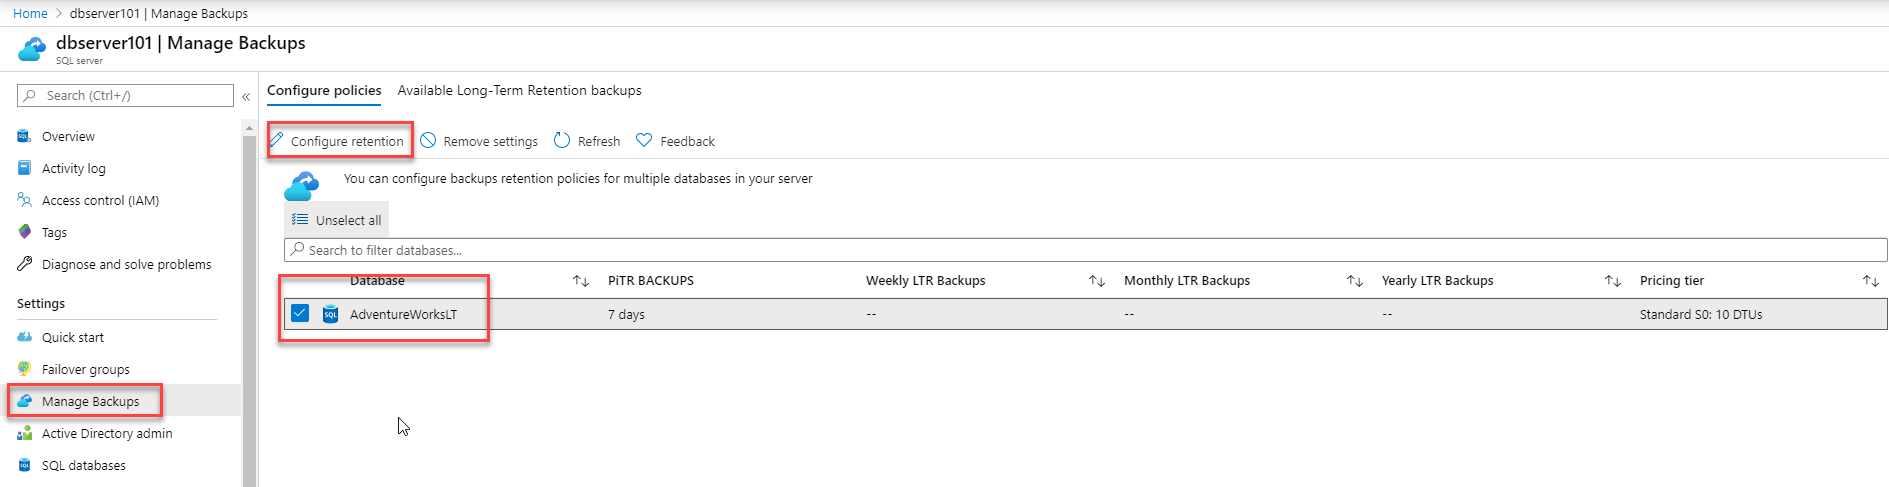
To manage the backup setting, go to the Azure SQL Server under which our Azure SQL Database has been created. Navigate to the "Manage Backups" option under the Settings. Select the Azure SQL database from the list. Once you select the Database, it will enable the "Configure retention" button.
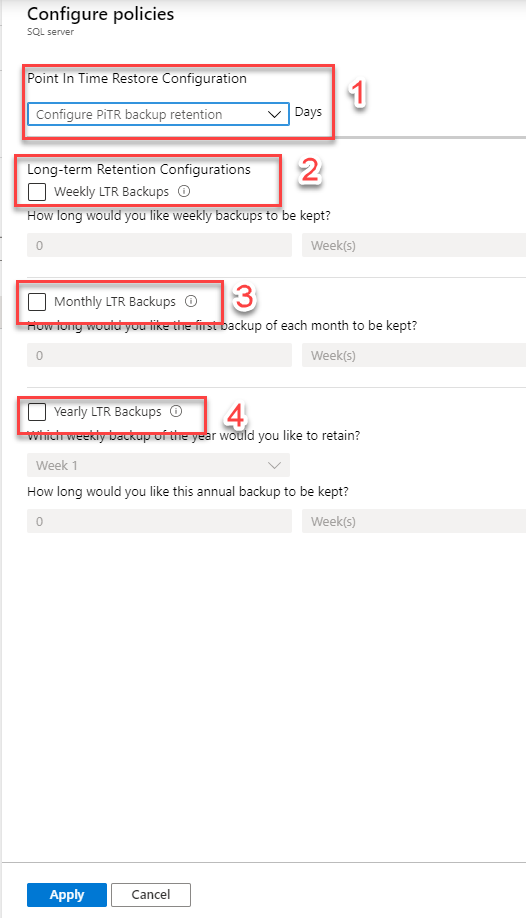
The configurations have mainly four types of retentions configurations settings.
- PITR – Point in time restore configuration – This allows you to set the number of days you want to keep the backup. All Azure SQL databases (single, pooled, and managed instance databases) have a default backup retention period of seven days. You can change it to 14/21/28/35 days.
-
Long-Term Retention Configurations
- Weekly LTR backups – You can specify the number between 1 and 520. This is for how many weeks you want to retains the backup.
- Monthly LTR backups – You must specify the number between 1 and 120 month(s) and select the Months from the dropdown.