Demystifying Azure Security - Just In Time VM access
@20aman Jan 10, 2018This blog post is part of the Demystifying Azure Security series. All posts in the series can be found here: Demystifying Azure Security - Series Index
Just in time VM access is a feature under Azure Security Center. In simple terms it allows you to control access to a VM. When you enable JIT, all access is locked down on the VM on all ports. This is done via Network Security Group (NSG) rules. The access is granted only for the duration allowed and also only on the ports requested. And then everything is locked down again at the end of the duration.
The attackers are leveraging various ways to get into your environment. One such way is using Bots to automate and Brute Force method to attempt entering in your environment. If you need to access a VM, in your environment, from Internet without VPN (e.g. to change some files on a Web app VM) then you are potentially opening up 3389 port on the VM and that can become a target for the attackers. Locking down the VM except when you need it and only for the duration of the requirement, reduces these risks significantly.
Pre-requisites
The key pre-requisites to be able to use this feature are:
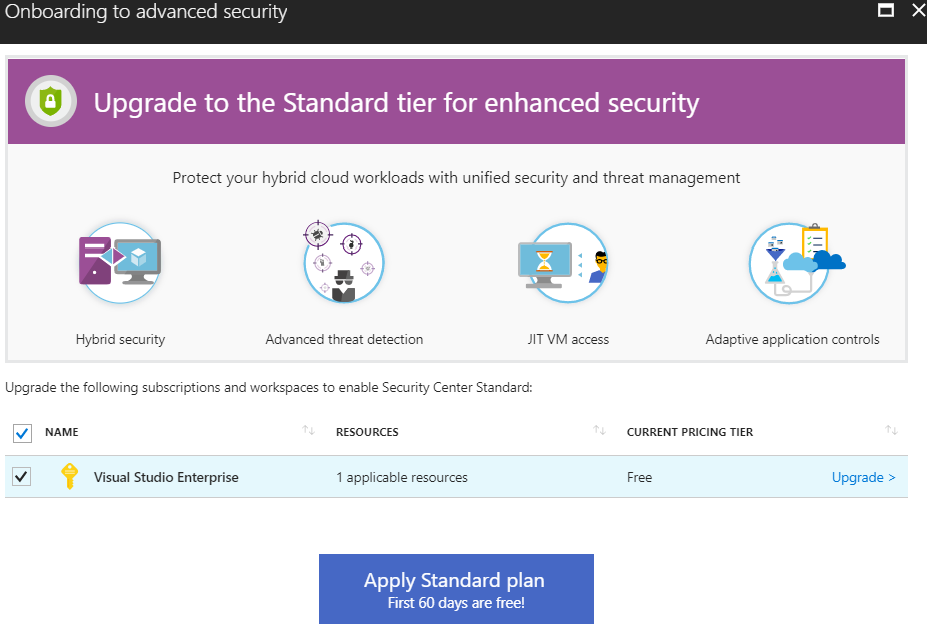
- The Azure Security Center needs to be upgraded to Advanced Security as shown below
- The VM on which you want to configure JIT access should have a Network Security Group (NSG) linked to it. If it doesn't have any then you can create one and associate it with the network interface of the VM.
The first pre-requisite requires you to upgrade the Security Center to Advanced Security that comes with Standard Tier. You can upgrade from any of the advanced features. The portal will automatically prompt you to upgrade as shown below:
How to Access and Configure it
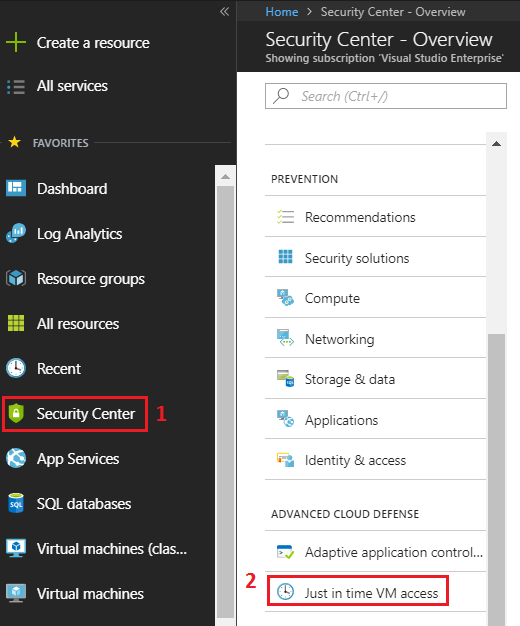
To configure this go to Azure Security Center. Within Security Center go to the "Advanced Cloud Defense" category and then click on "Just in time VM access" link as shown below:
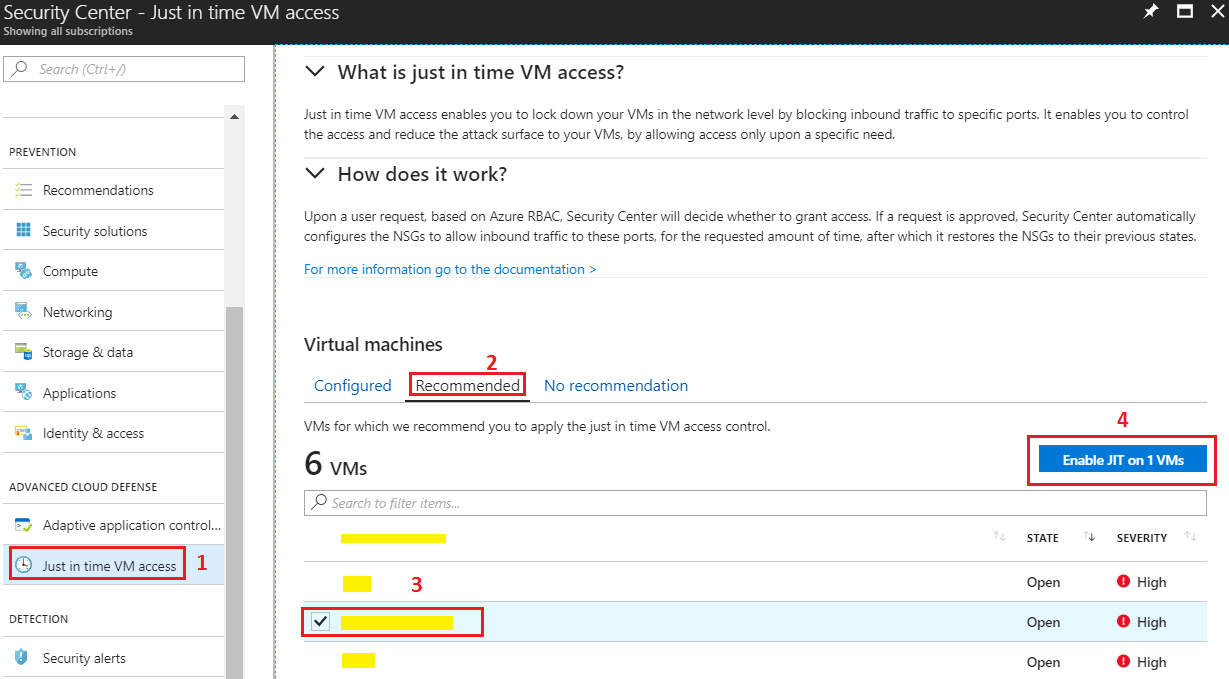
Next follow the below steps to enable JIT on a VM:
- Ensure that you are in the JIT section of Security Center
- Go to the "Recommended" tab. This will show you all the VMs in your environment.
- Click on the VM for which you want to enable Just in Time access. You can select multiple VMs here.
- Click on the "Enable JIT on x VMs" button
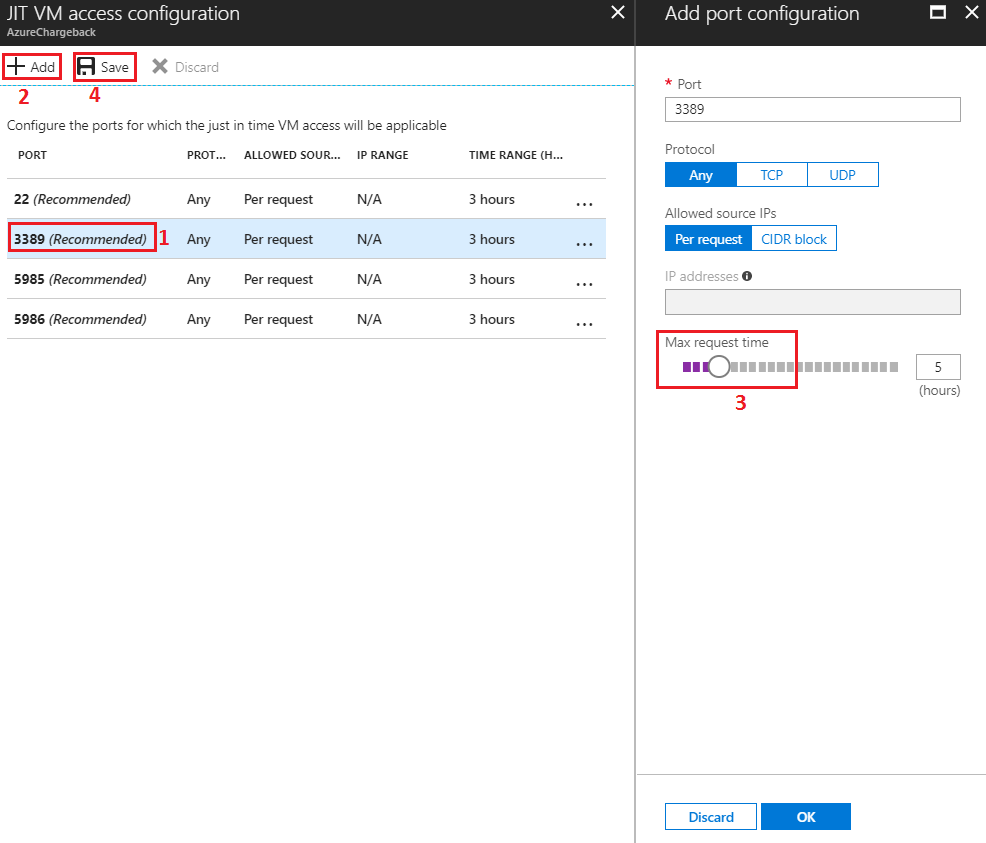
You will be presented with various settings for enabling JIT. These settings can be configured as:
- By default, various common ports are configured for JIT access with 3 hours time range. E.g. 3389 for RDP. Click on any of the default ports to tweak the settings.
- You can add more ports and protocols by clicking on the "Add" button at the top.
- Tweak the settings on the new blade that opens up.
- Click on "Save" to save your settings.
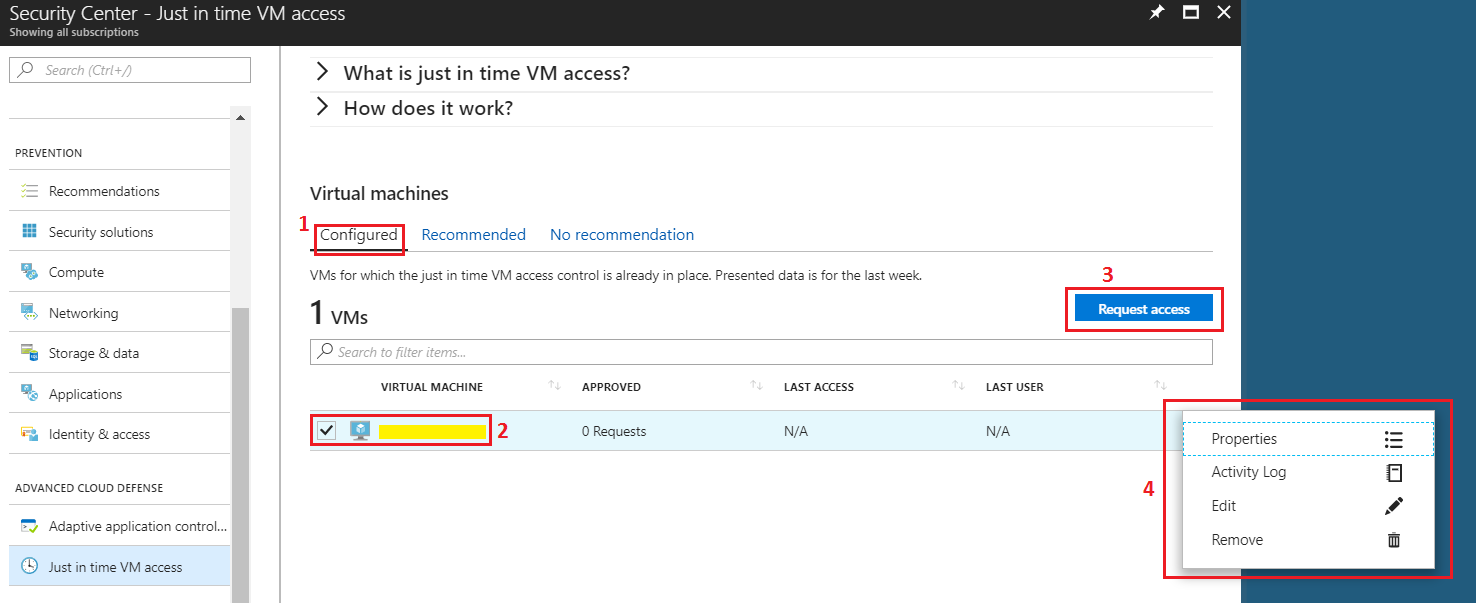
That's all there is to it. Once JIT is configured you can view the VM in the "Configured" tab.
Requesting access and activity log in JIT
You can request access and perform various other management operations by following below steps:
- Once the JIT is configured, the VM will show up in the "Configured" tab as shown below.
- Click on the VM that you want to manage or request access to.
- As soon as you click, "Request access" button will start showing. You can click the button and it will ask for the number of hours that you need the access and the corresponding ports on which you need the access. Please note that only ports configured earlier can be granted access.
- Click on the ellipse i.e. 3 dots in front of the VM record and you will see various options. Using these options you can view Properties. You can view the Activity log for previous requests and any attempts on attack. You can also Edit or Remove the access.
Adding non-Azure computers
You can add non-Azure computers for an extra fee per Node. Cost is calculated based on 15 USD/Node/Month. Resources that count as a node are VMs and computers. The selected security tier will be applied to current and new resources. For more information, visit Microsoft Security Center's Standard tier for enhanced security information page.
Ensure that you have onboarded the non-Azure computers to a linked Azure Log Analytics workspace. This is required in order to onboard non-Azure computers to Security Center.