Azure Data Factory Basics - Creating a Data Factory
@20aman Jan 04, 2020Note that this post is a part of the series. You can view all posts in this series here: Azure SQL and Data Factory Basics - Index
Azure Data Factory is a cloud-based ETL service to run the SSIS packages. You can lift and shift the existing SSIS packages in Azure and run them fully in ADF. It is code-free UI to run, monitor and manage the packages.
Using the Azure Data Factory, you can create and schedule data-driven workflows (called pipelines) that can ingest data from disparate data stores.
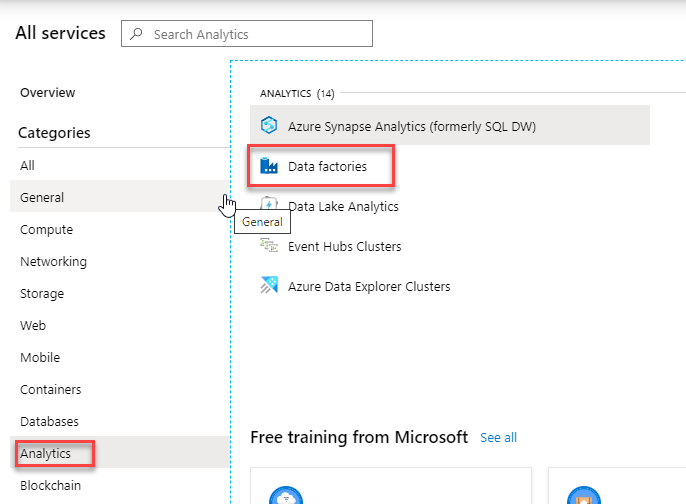
To start, navigate to All services - > Analytics -> Data Factories.

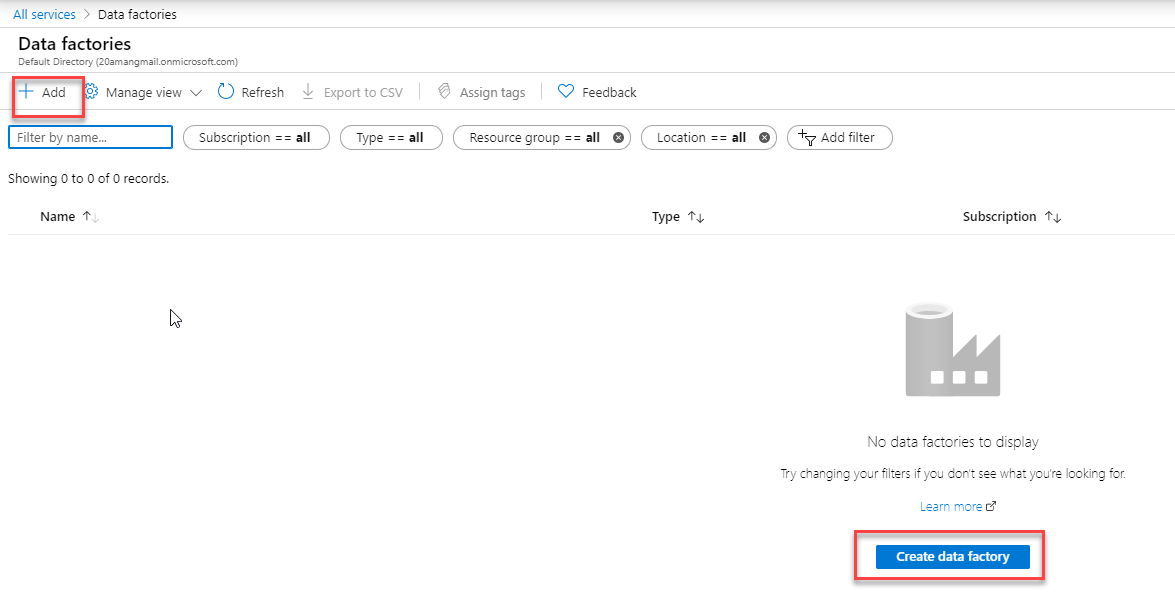
Click Add or Create Data Factory as highlighted below.

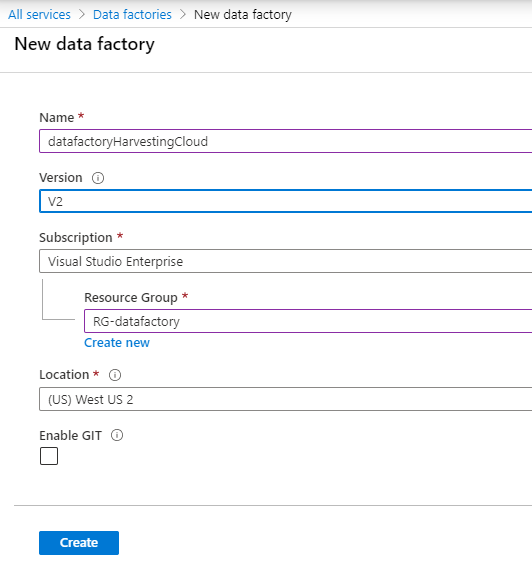
Provide the following details in the below screen:
- Appropriate name to your data factory
- Select the v2 version. This is the latest version which includes the latest features of Azure data factory
- The next one is to select the subscription and resource group. Here you can create a new resource group in case you don’t want to use the existing resource group.
- Select the Location
- Enable GIT: If you have checked this option, you will need to provide the additional details about the GIT URL, repo URL, Branch Name and Root URL.
Click Create. The deployment will be done in a couple of mins or so to get this done.

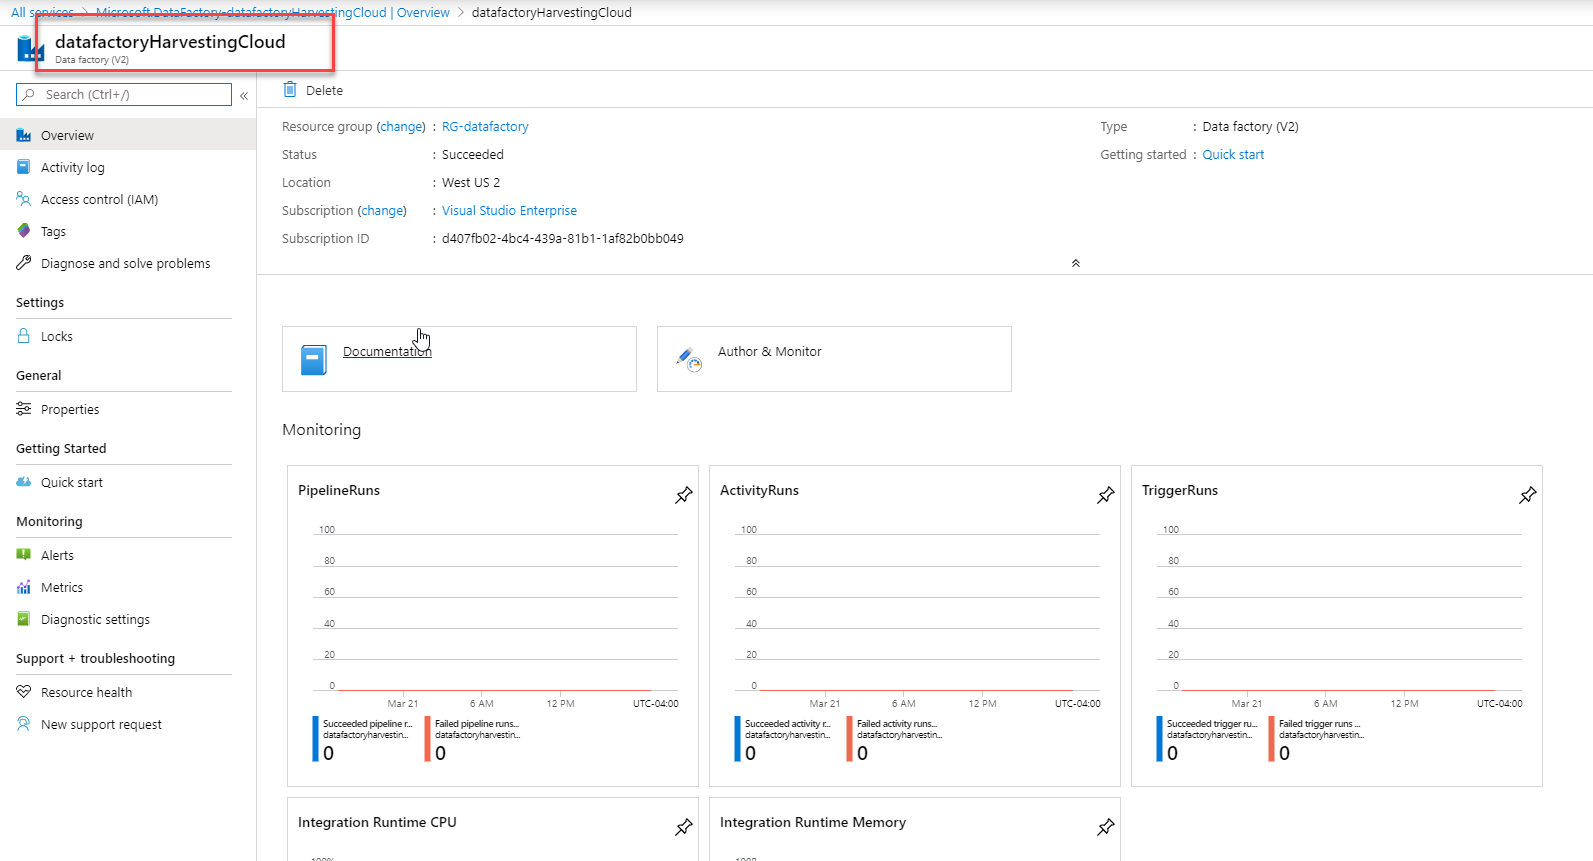
You can see we have created the Data Factory. Now you are ready to create the workflow pipelines for this Azure data factory.

I will be explaining about its monitoring section and how to create pipelines in my next blogs. So keep tuning in!