Azure for AWS professionals - Batch Services - AWS - Working with AWS Batch Service
@20aman Jul 08, 2019Note that this post is a part of the series. You can view all posts in this series here: Azure for AWS professionals - Index
AWS Batch Service
AWS Batch Service has below main concepts:
- Job - This is what is sent for execution to the Job Queue. This is the main work that you are trying to accomplish e.g. processing an image.
- Job Queue - When you submit a job, it is sent to a job queue. This has linked compute resources. AWS Batch Scheduler places the job on a compute resource within a compute resource environment
- Compute Environment - This is the logical grouping of compute resources i.e. EC2 instances that can receive jobs from a job queue
AWS Batch automatically scales out your compute resources when there are jobs to work upon. It later scales it back when the job queue is empty.
Working with the Service
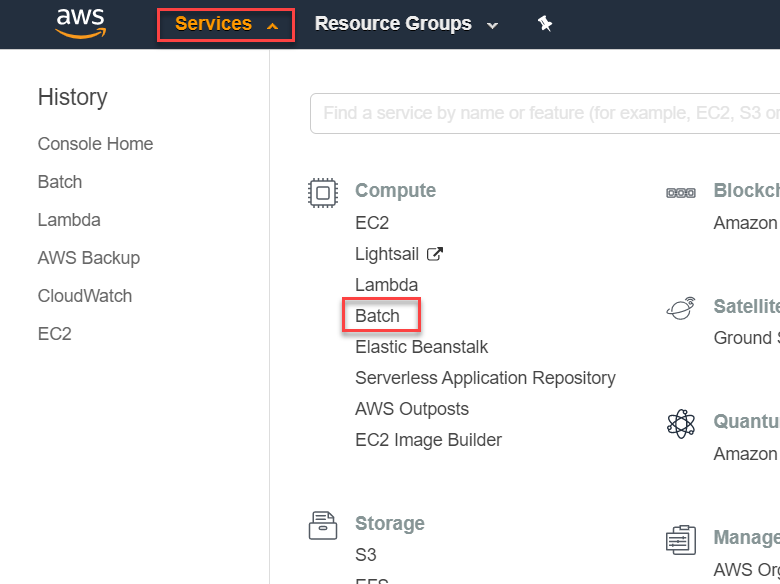
AWS Batch service can be found under all Services and then navigating to the Compute category. Click on Batch to launch the AWS Batch service.
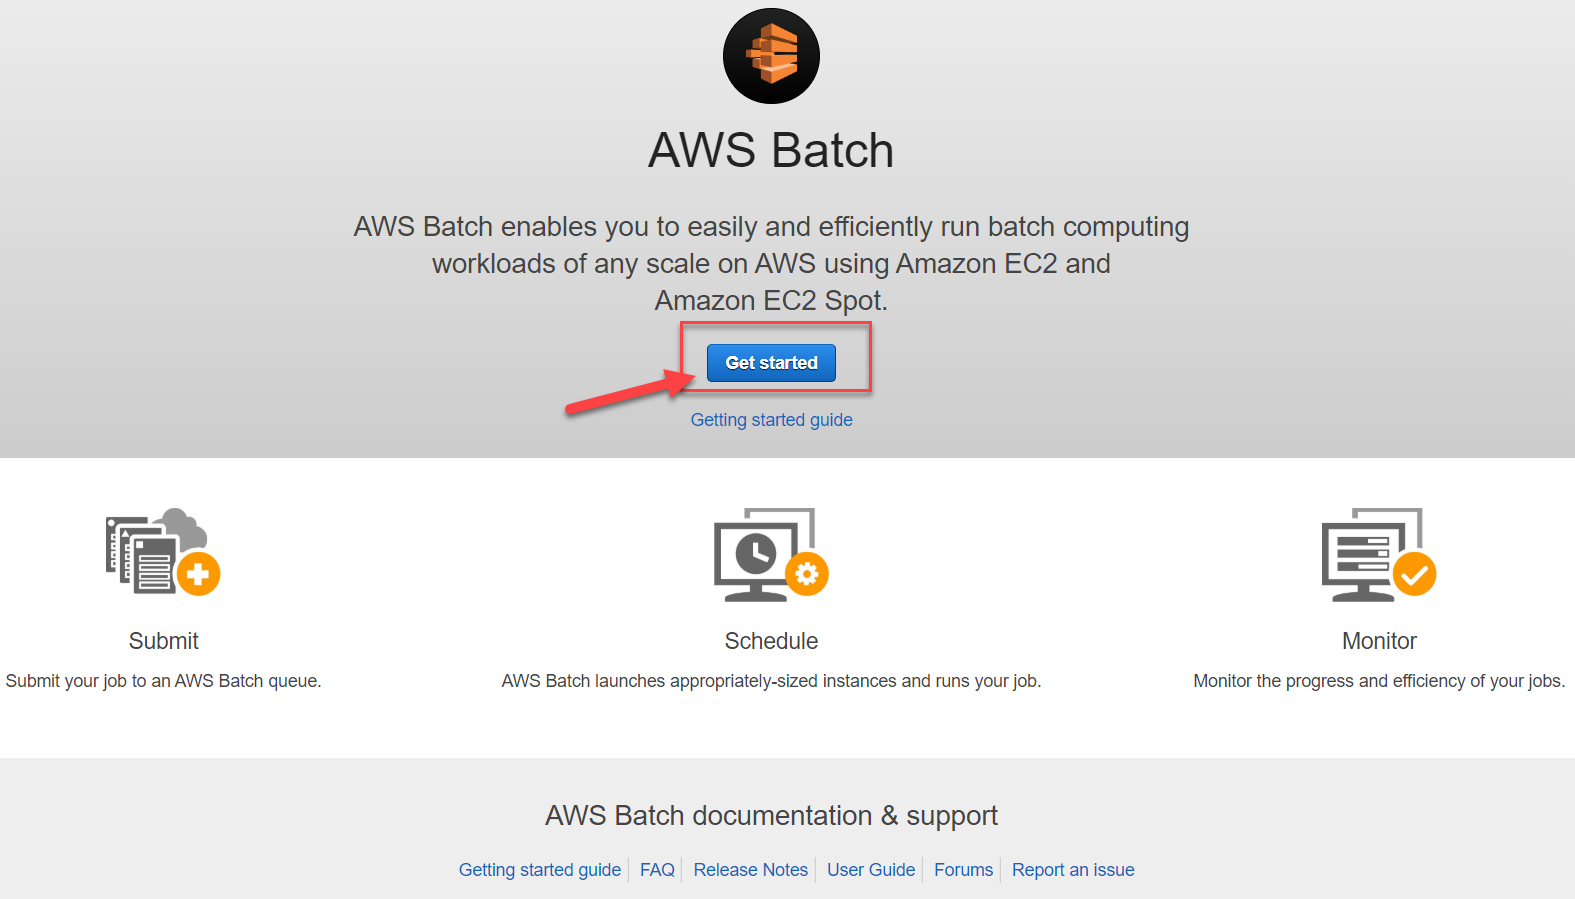
Here you are presented with the default "Getting Started" screen. It gives you an overview of how the service works.
Clicking on the Getting Started button takes you to the wizard to set up the service.
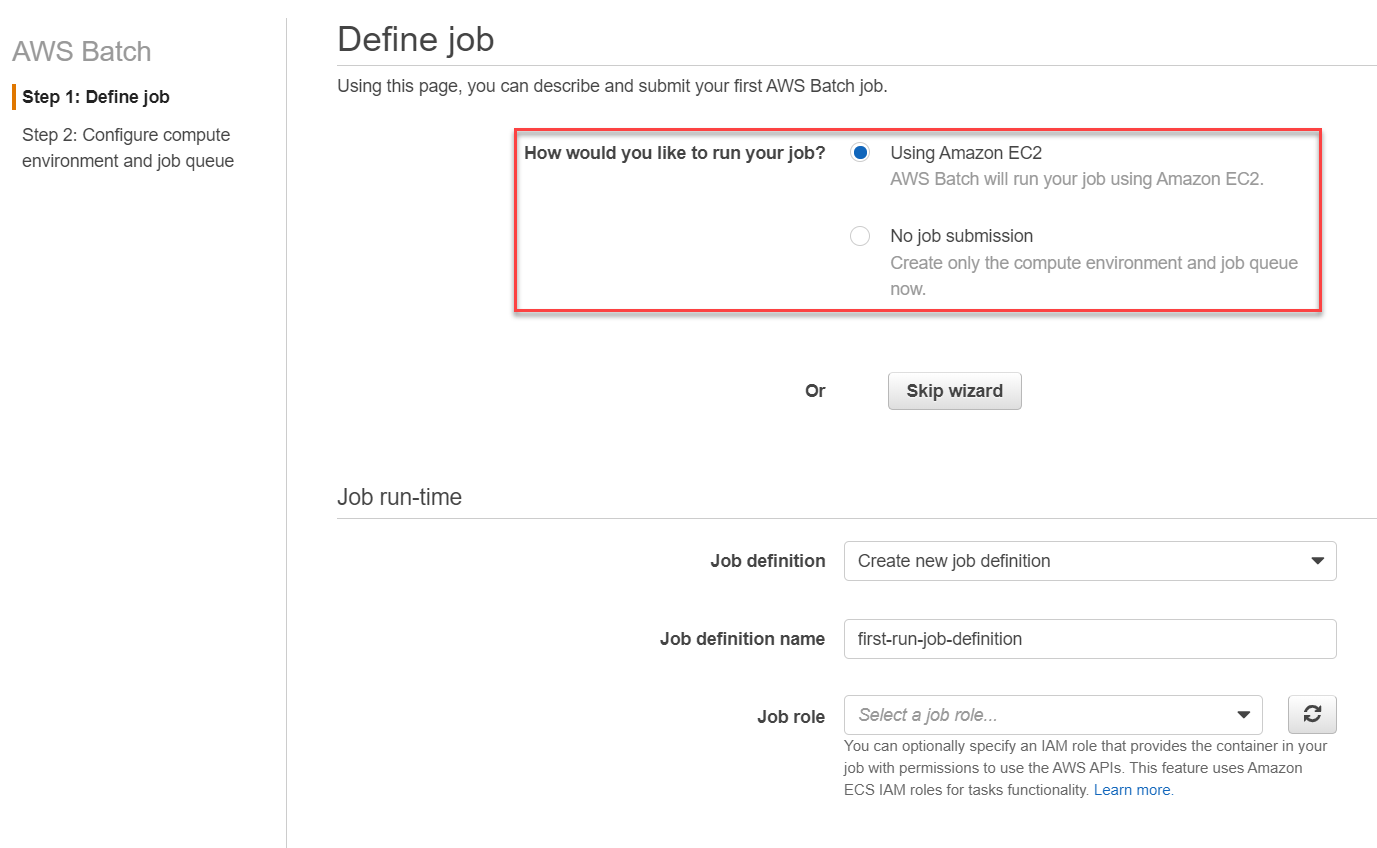
First, you define the Job and its details. You start with where you want to run your job and defining a run time for the job.
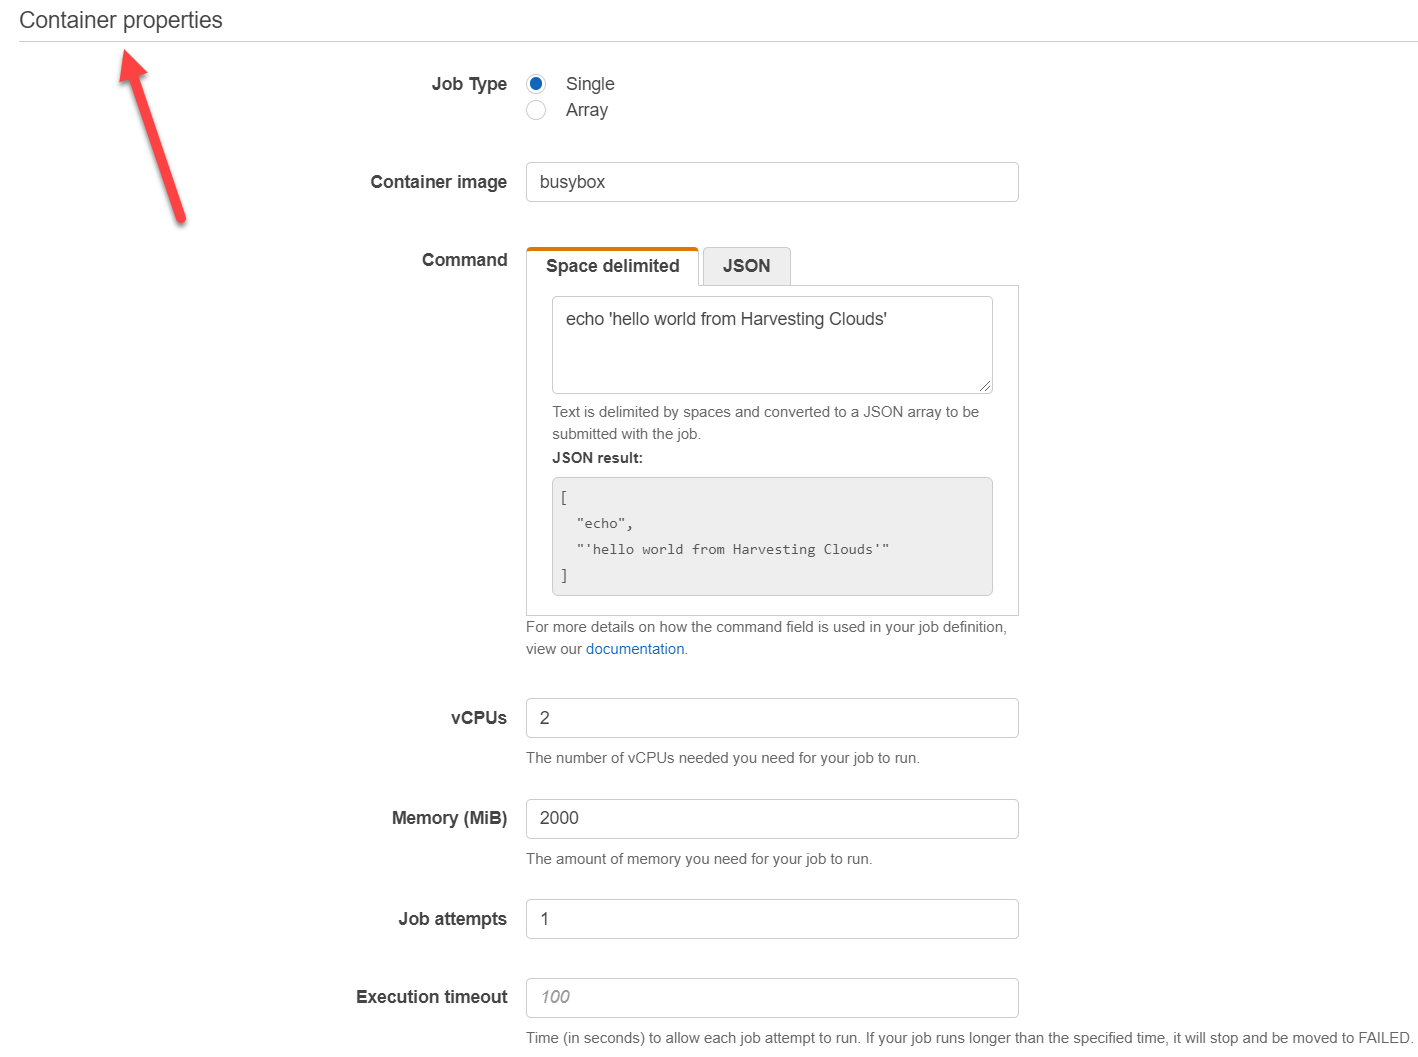
Next, you provide the container properties for the job. The command you define is what is executed when this job is run. This is where you define what compute power will be required to run the job. E.g. 2 vCPUs and 2000 MiB of Memory. You also define the number of attempts to be made to run the job successfully. Job Execution timeout is another thing you define here in the number of seconds. If the job does not finish up in this time then it is stopped and moved to the Failed queue.
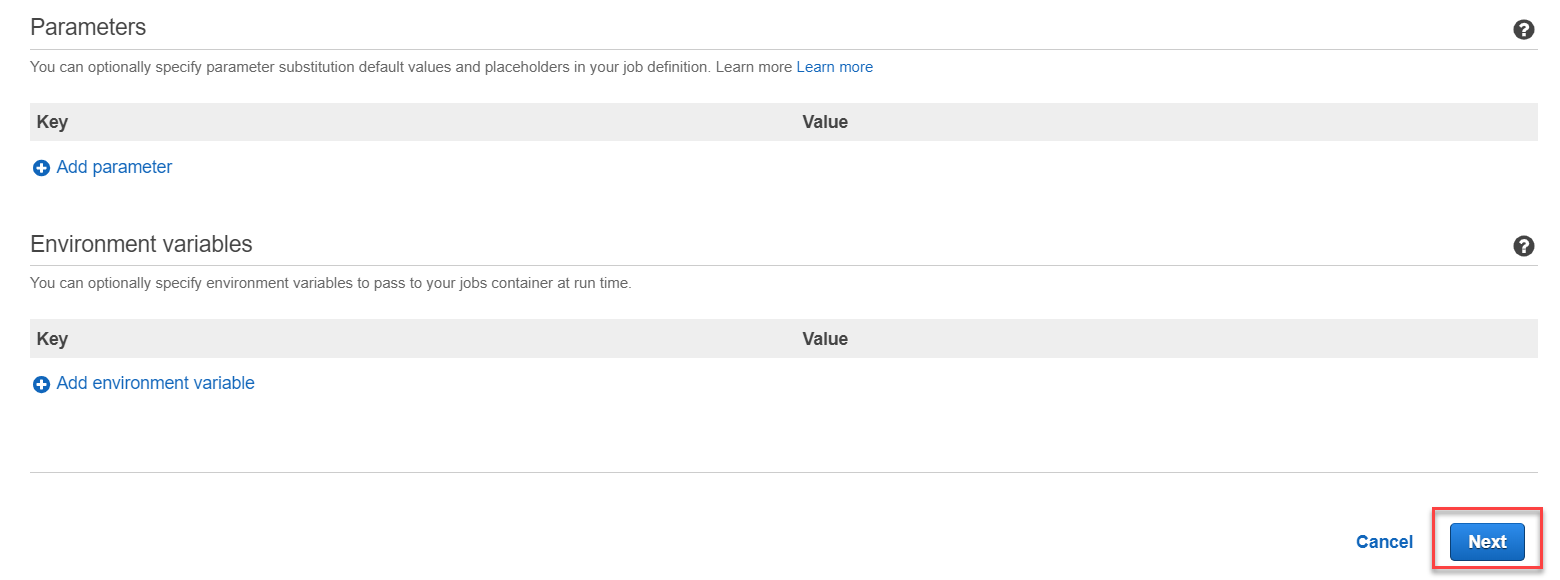
You can optionally define parameters and environment variables as well.
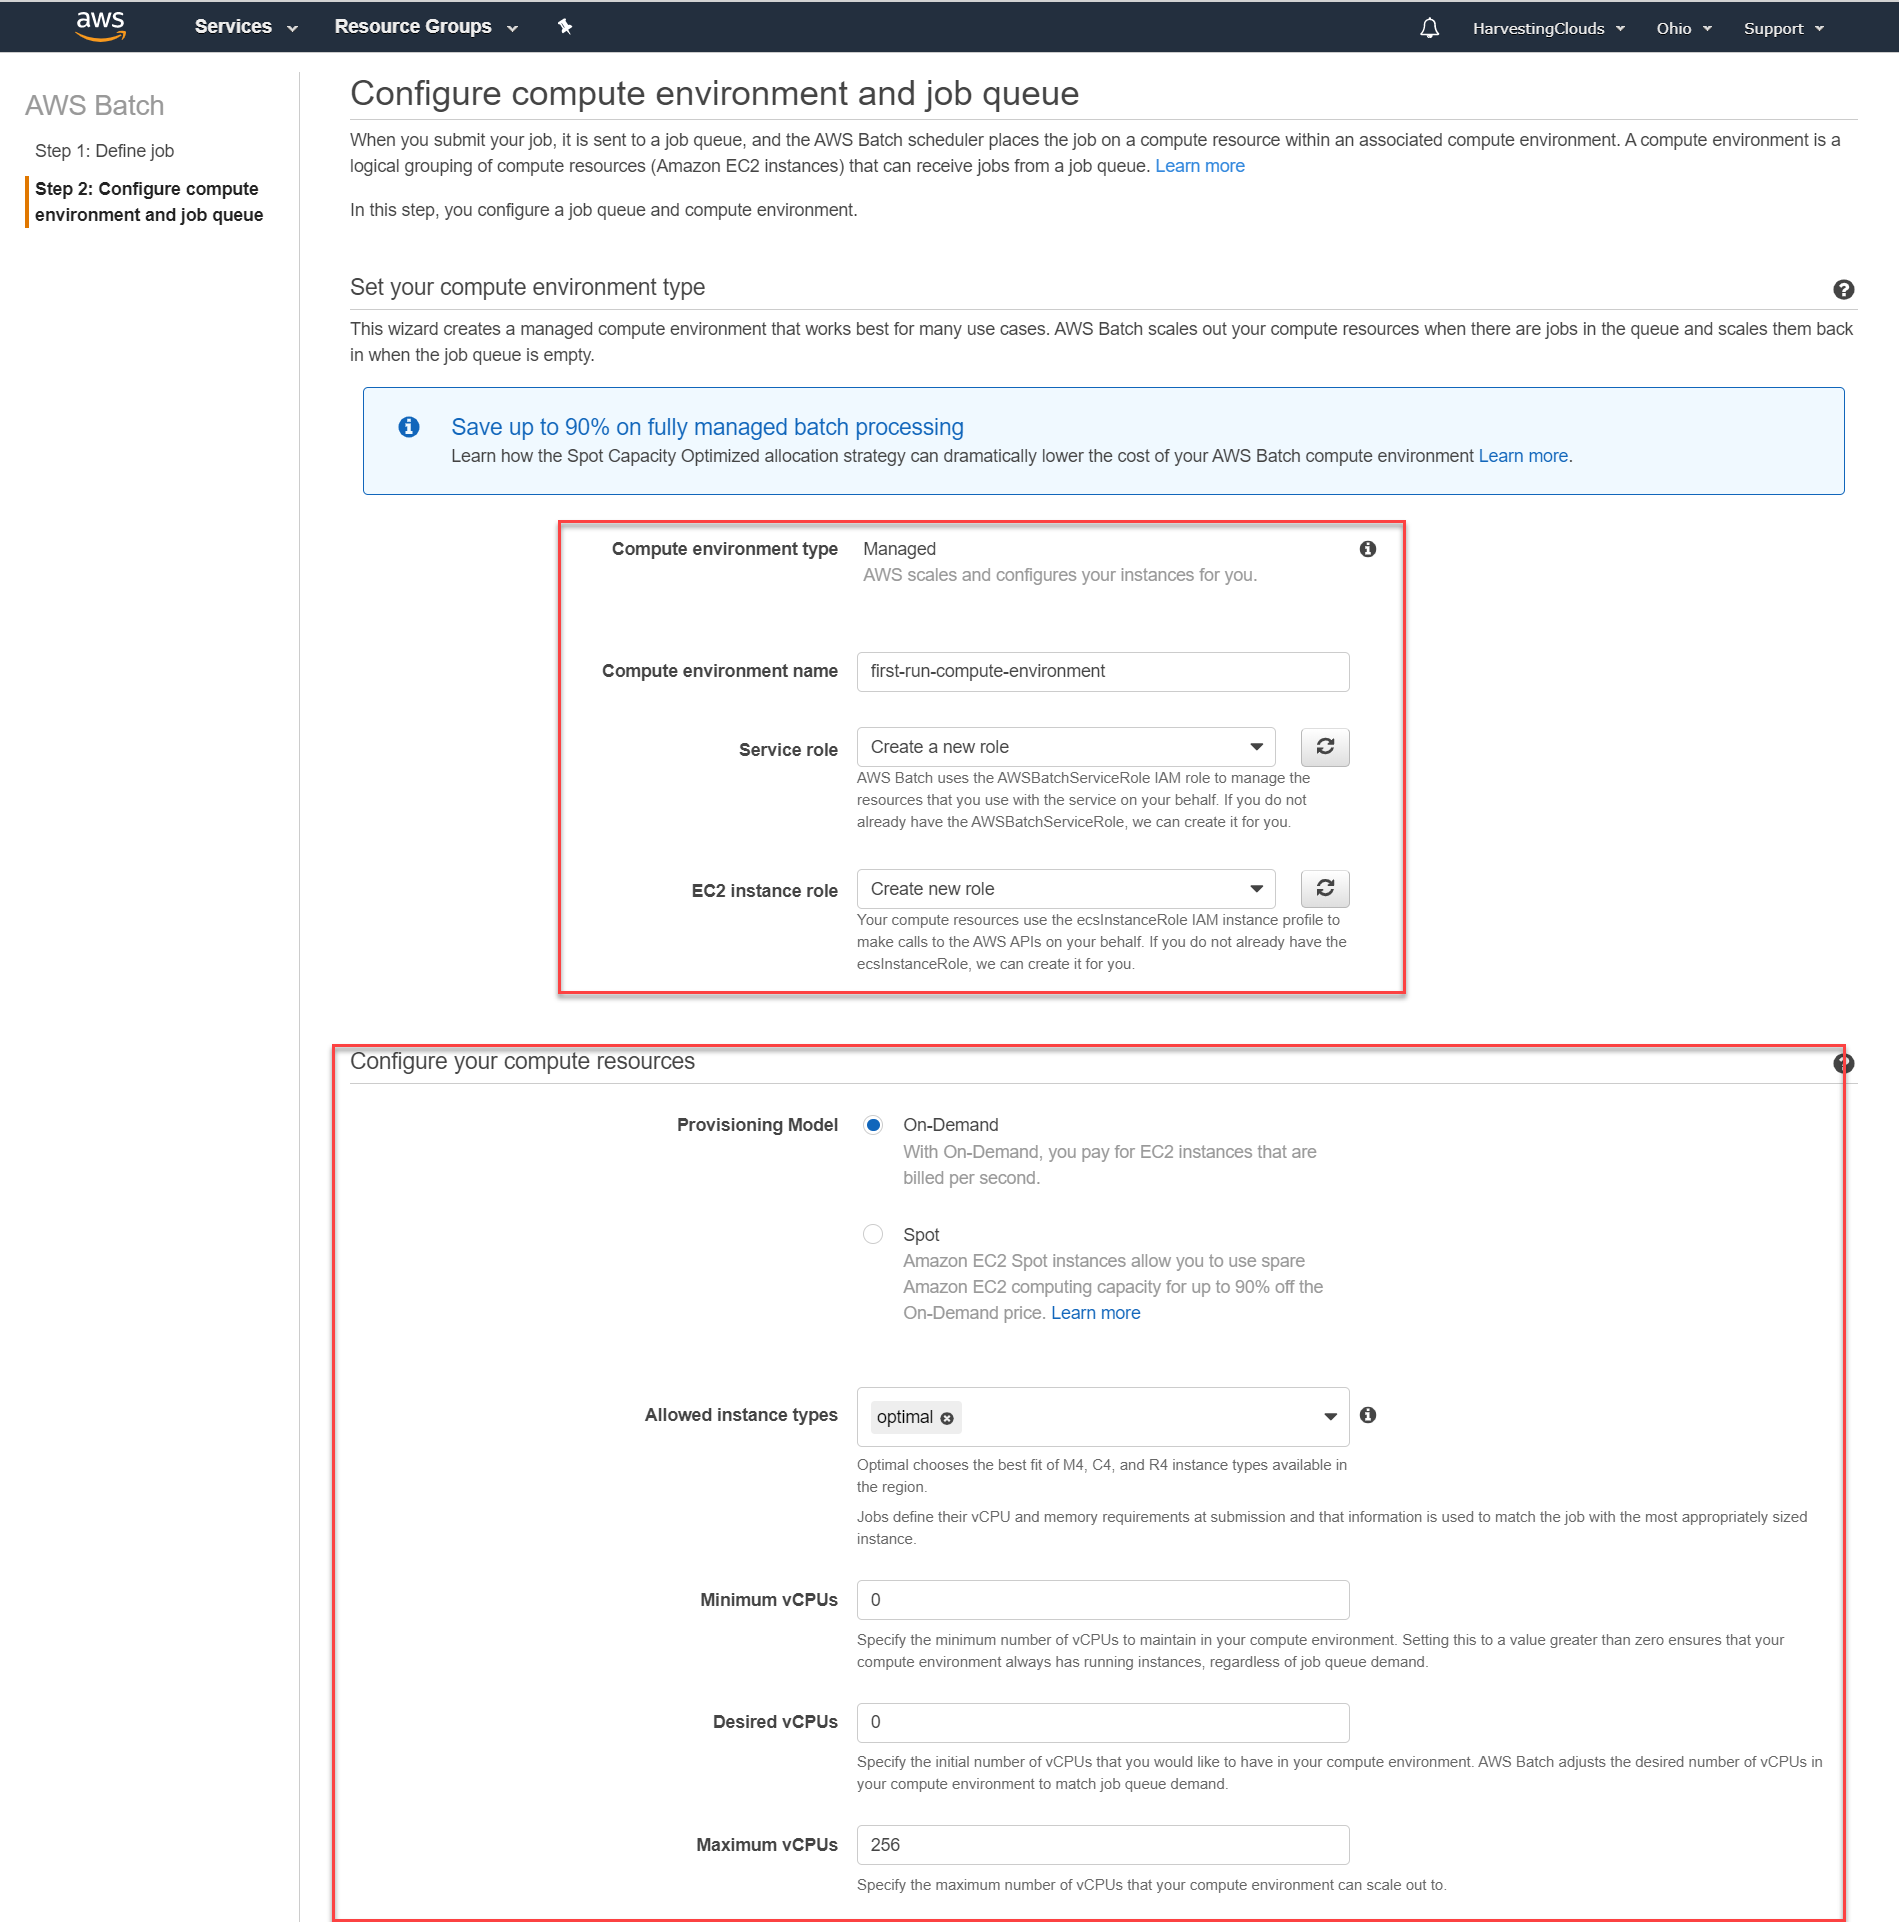
Under Step 2, you define the compute environment and set up the Job queue. Compute environment is where the job is run. You define its behavior in this section. You can choose between:
- On-Demand - for any critical and business impacting jobs. This is most predictable
- Spot - very cost-effective option. The cost savings are up to 90% of the On-demand option. It uses the EC2 Spot instances to do so.
You can also define a minimum, desired and a maximum number of vCPUs here.
You set up your networking next. Also, this is where you define the Job Queue and link it to the Compute environment.
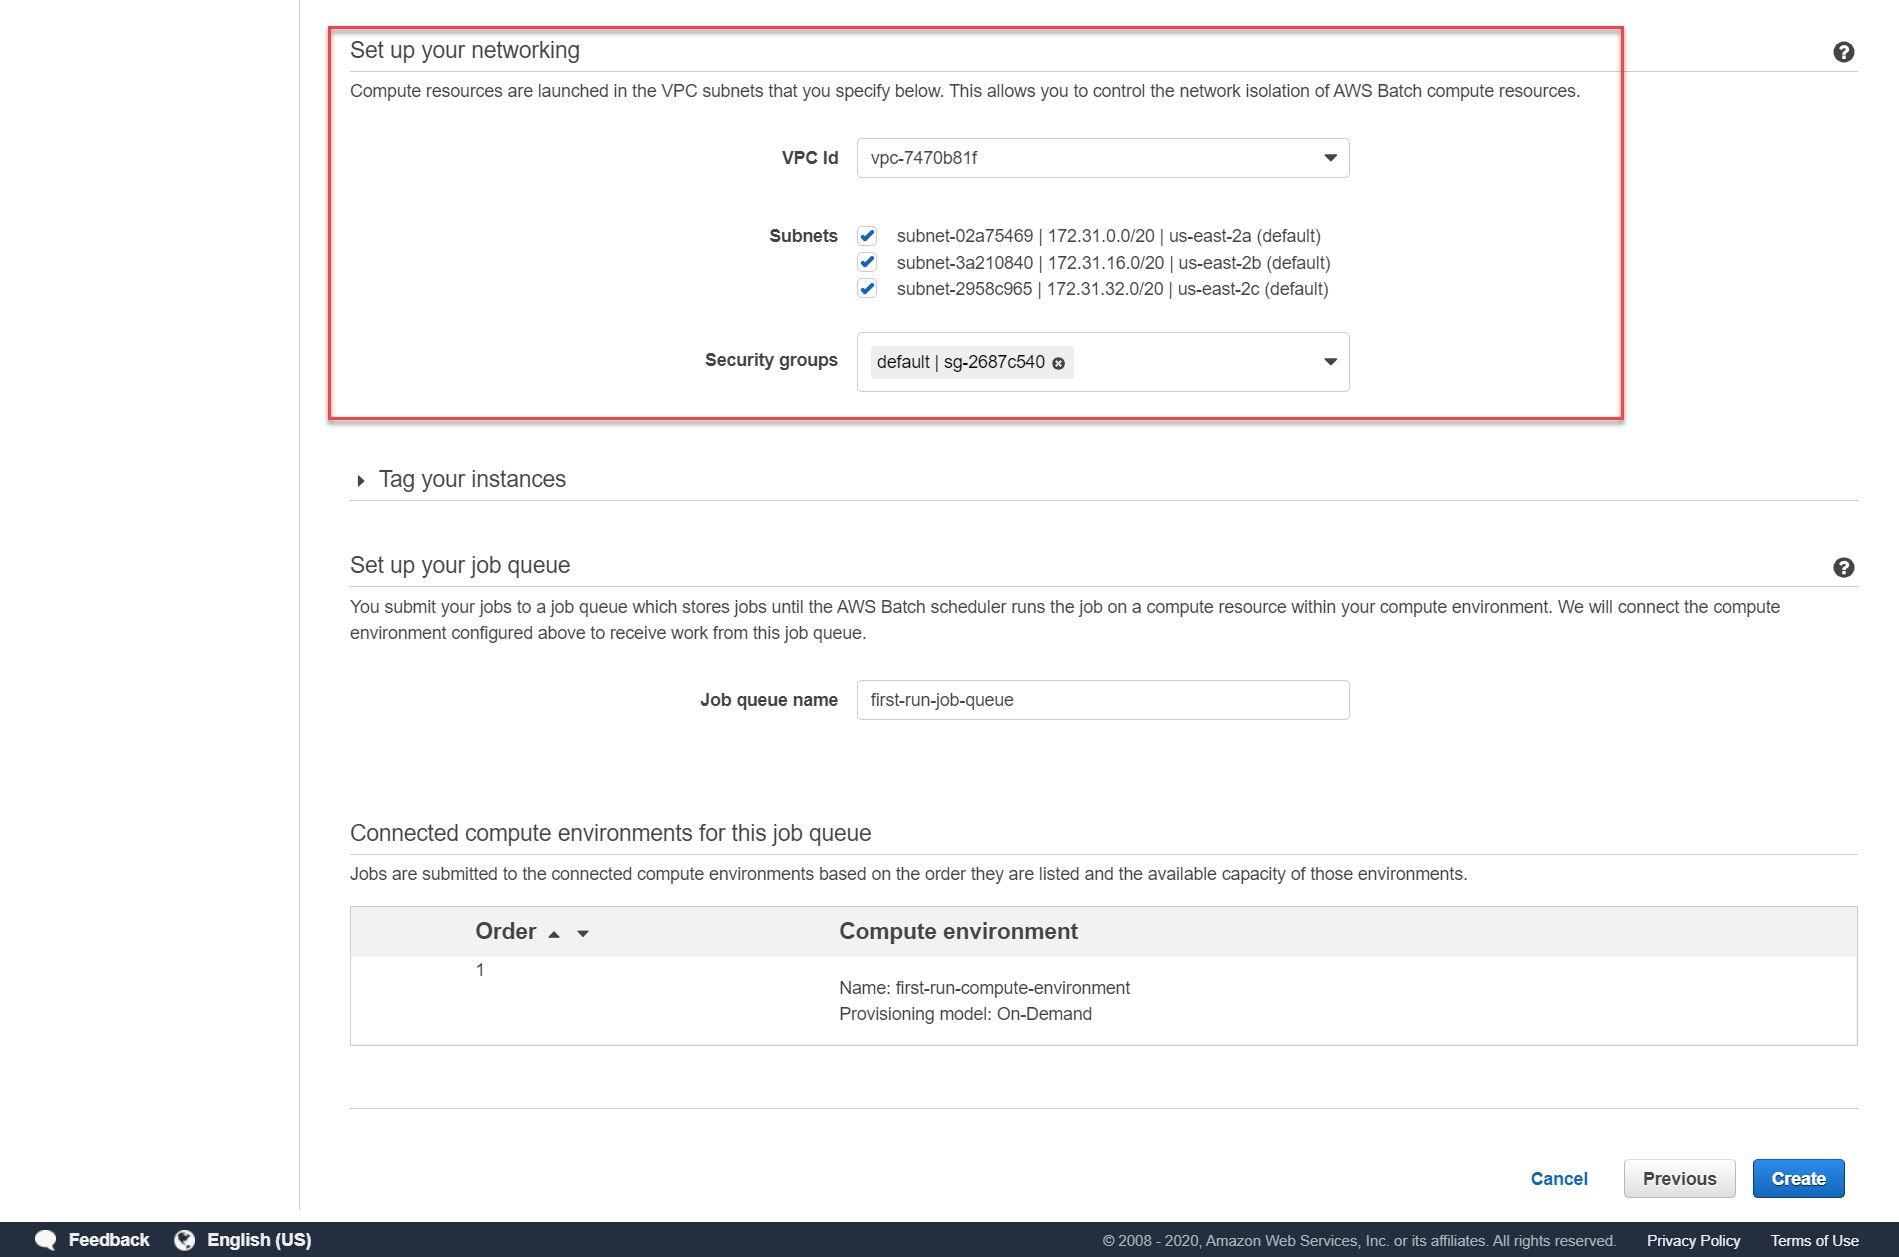
Hit Create and you should be all set. AWS creates the underlying resources and shows you the status.
Viewing the Resources and Logs
You can now navigate to the Dashboard and view the newly created resources.
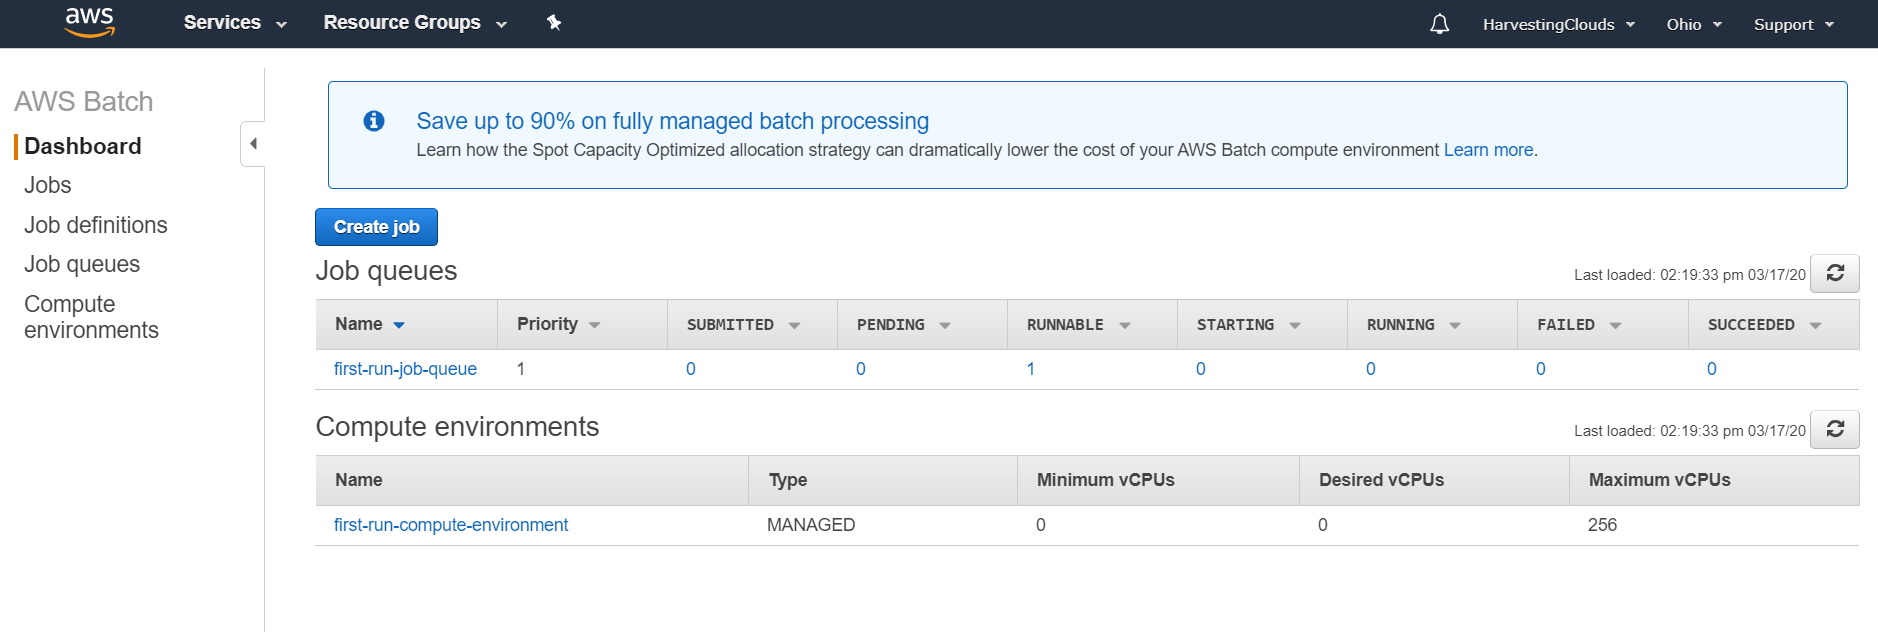
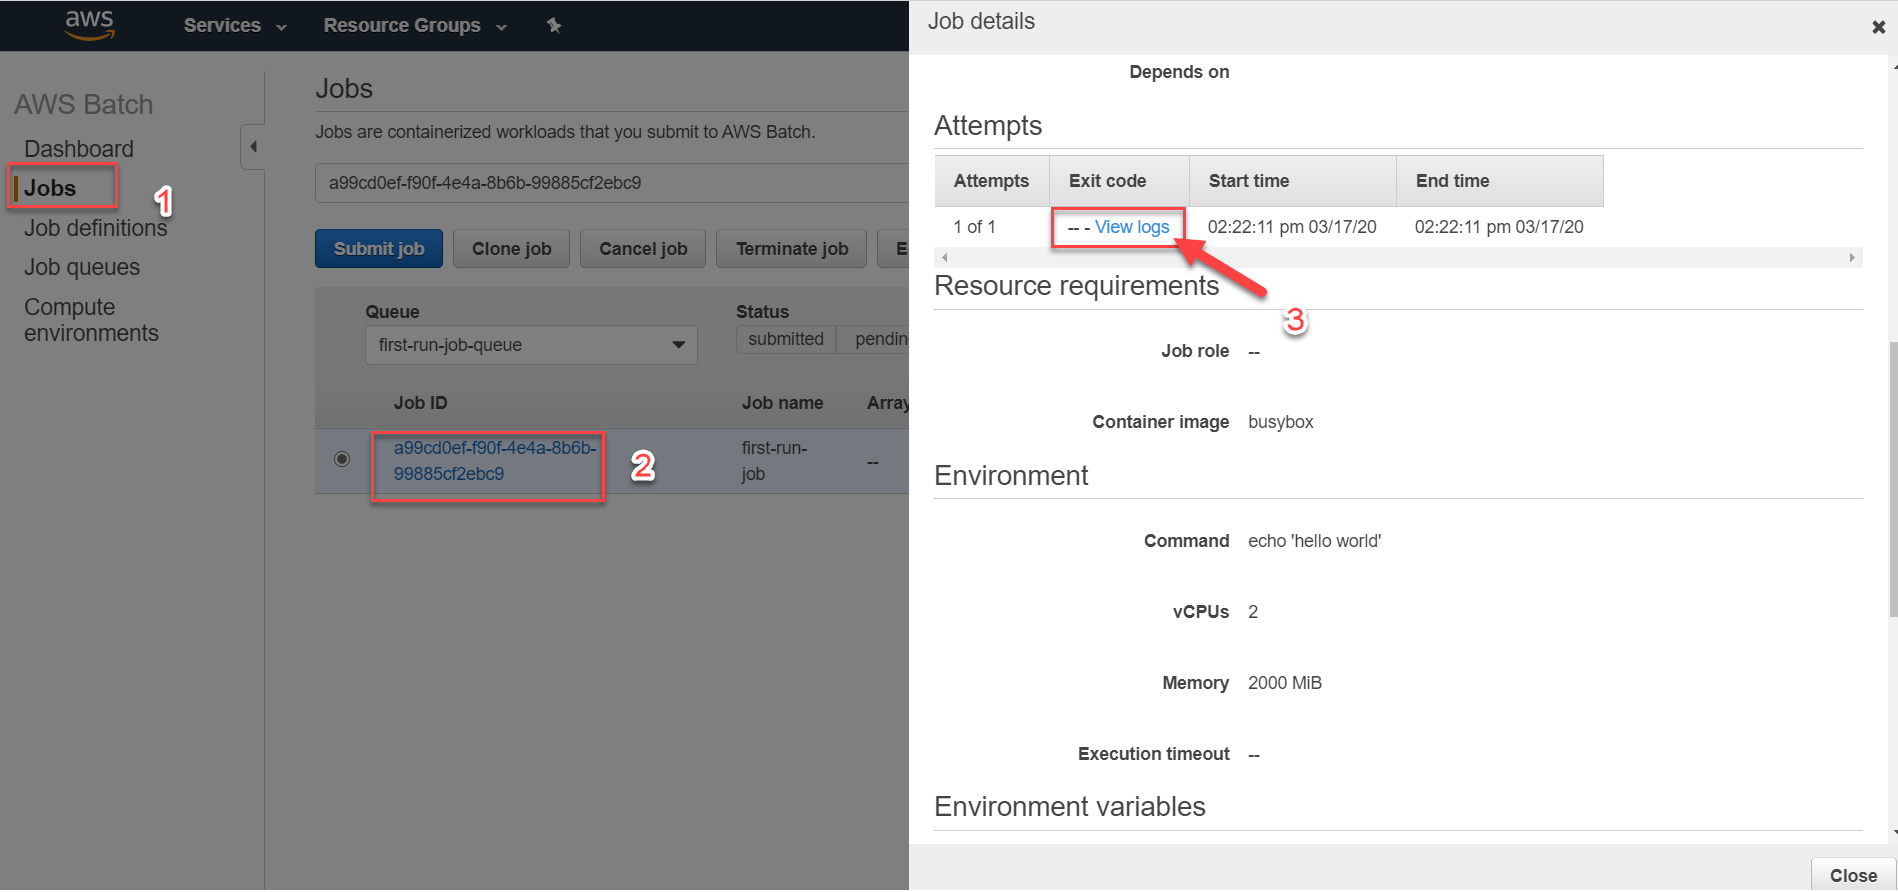
You can navigate to the Jobs section and find your job that was executed. It will look like a guid. Click on this job. In the popup, click on "View logs". This will take you to the CloudWatch window and will show you the logs.
That's all there is to it. You can define simple jobs like execute some applications to very complex jobs like image and video processing.
For more information check these link: