Azure for AWS professionals - Networking - AWS - 01 Creating Virtual Private Cloud (VPC)
@20aman Sep 30, 2019Note that this post is a part of the series. You can view all posts in this series here: Azure for AWS professionals - Index
Virtual Private Cloud or VPC is Amazon's virtual network capabilities as part of the Infrastructure as a Service (IaaS) offerings. It provides connectivity between various EC2 instances in that network. It can also extend the connectivity to other networks or even on-premises.
Accessing VPCs and Launching Create Wizard
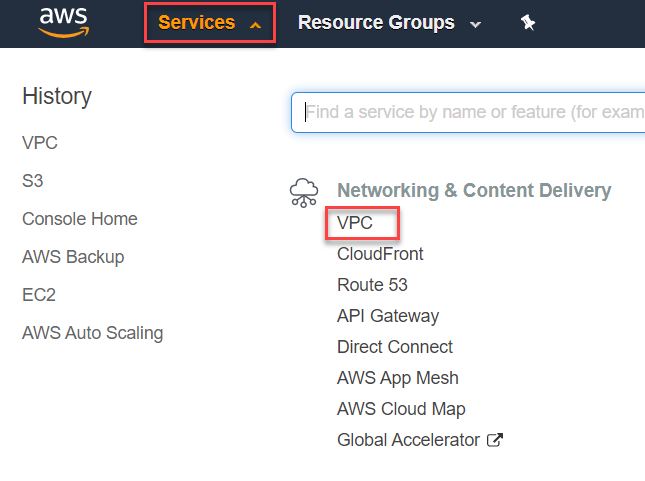
Let's start by creating one in AWS. We will first need to navigate to VPC from All services and then the "Network & Content Delivery" category.
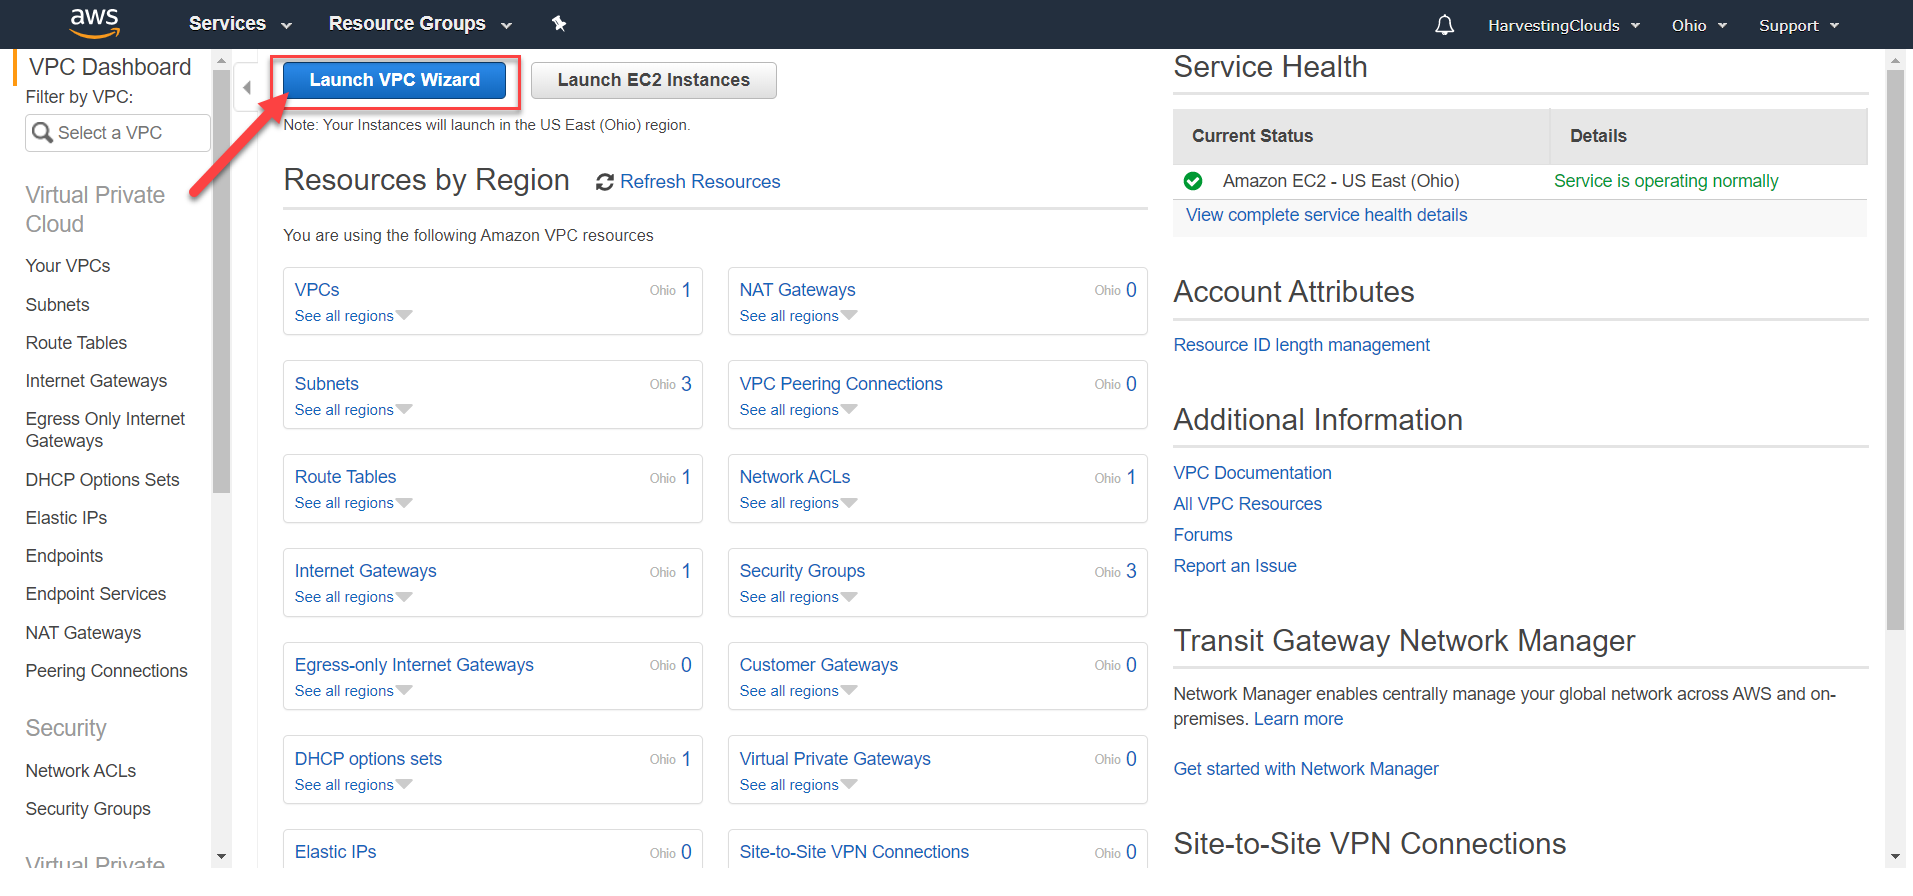
Here in the Dashboard (or even the VPC tab), click on the "Launch VPC Wizard" button to launch the wizard to create a new VPC.
Different Pre-packaged Networking Scenarios
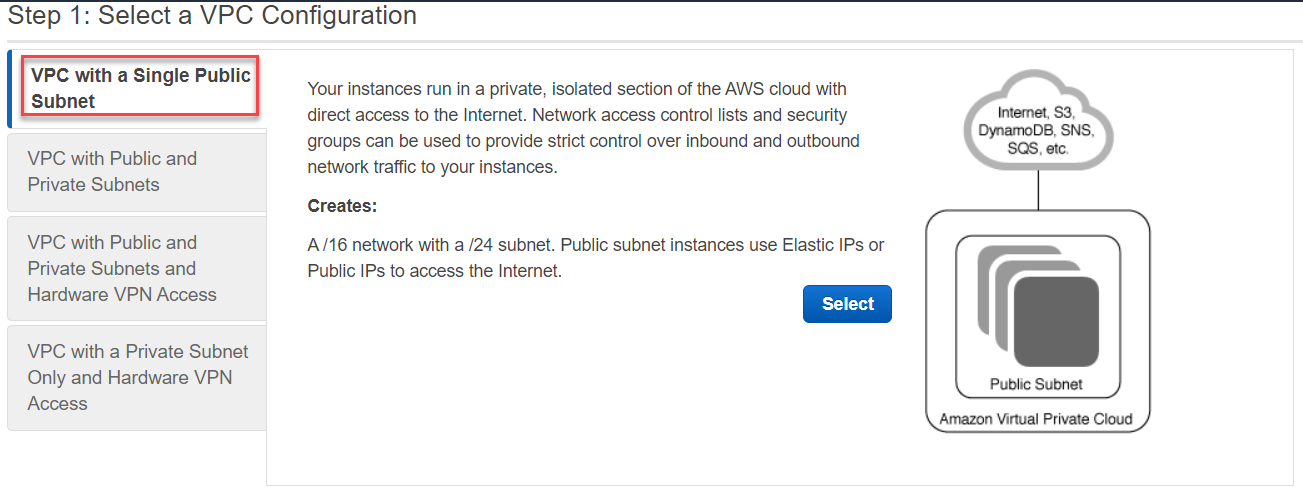
When the wizard launches to create a VPC, there are 4 pre-packaged scenarios to choose from. Note that these scenarios can be built by performing the settings manually and building VPCs separately. These are just like the starter packs (or pre-baked templates) to get you started.
The first one is to build a VPC with a Single Public Subnet. Here is the official description: "Your instances run in a private, isolated section of the AWS cloud with direct access to the Internet. Network access control lists and security groups can be used to provide strict control over inbound and outbound network traffic to your instances."
When you select this option it creates: A /16 network with a /24 subnet. Public subnet instances use Elastic IPs or Public IPs to access the Internet.
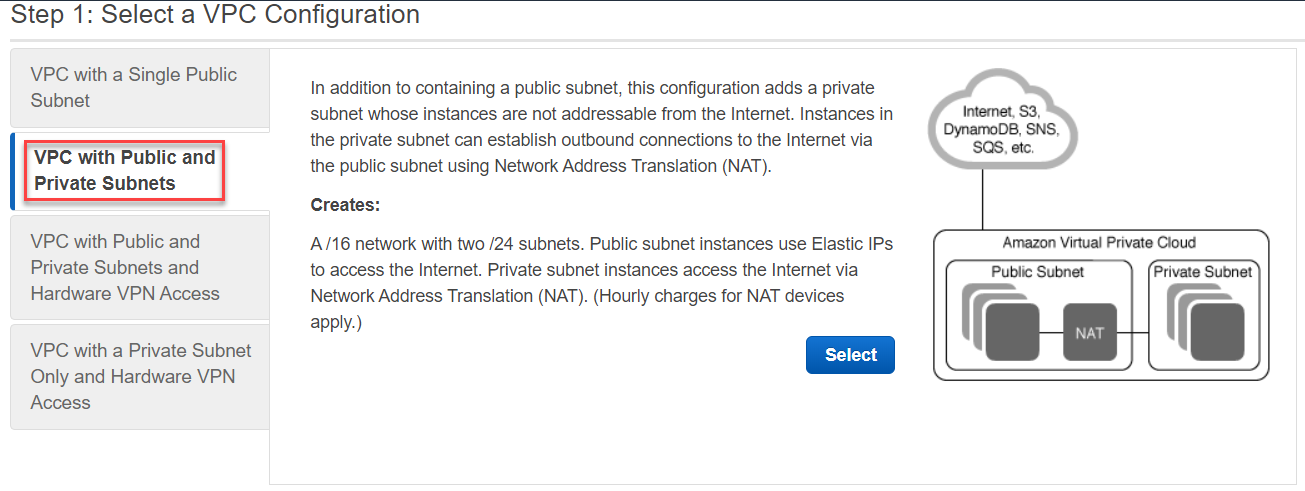
The next one is to build a VPC with Public and Private subnets. Here is the official description: "In addition to containing a public subnet, this configuration adds a private subnet whose instances are not addressable from the Internet. Instances in the private subnet can establish outbound connections to the Internet via the public subnet using Network Address Translation (NAT)."
When you select this option it creates: A /16 network with two /24 subnets. Public subnet instances use Elastic IPs to access the Internet. Private subnet instances access the Internet via Network Address Translation (NAT). (Hourly charges for NAT devices apply.)
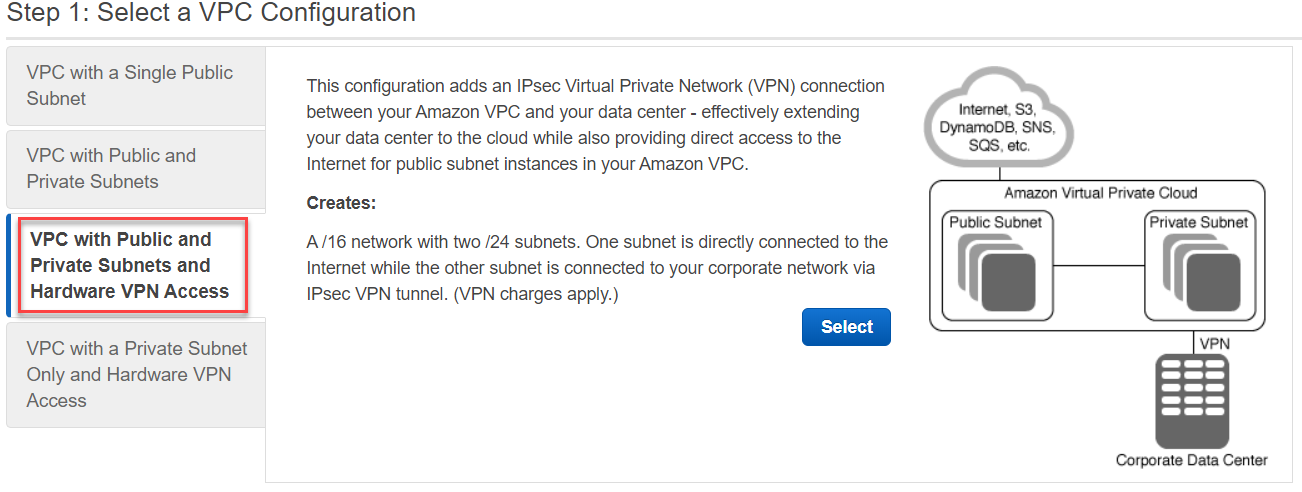
The 3rd one is to build a VPC with Public and Private subnets and Hardware VPN access. Here is the official description: "This configuration adds an IPsec Virtual Private Network (VPN) connection between your Amazon VPC and your data center - effectively extending your data center to the cloud while also providing direct access to the Internet for public subnet instances in your Amazon VPC."
When you select this option it creates: A /16 network with two /24 subnets. One subnet is directly connected to the Internet while the other subnet is connected to your corporate network via IPsec VPN tunnel. (VPN charges apply.)
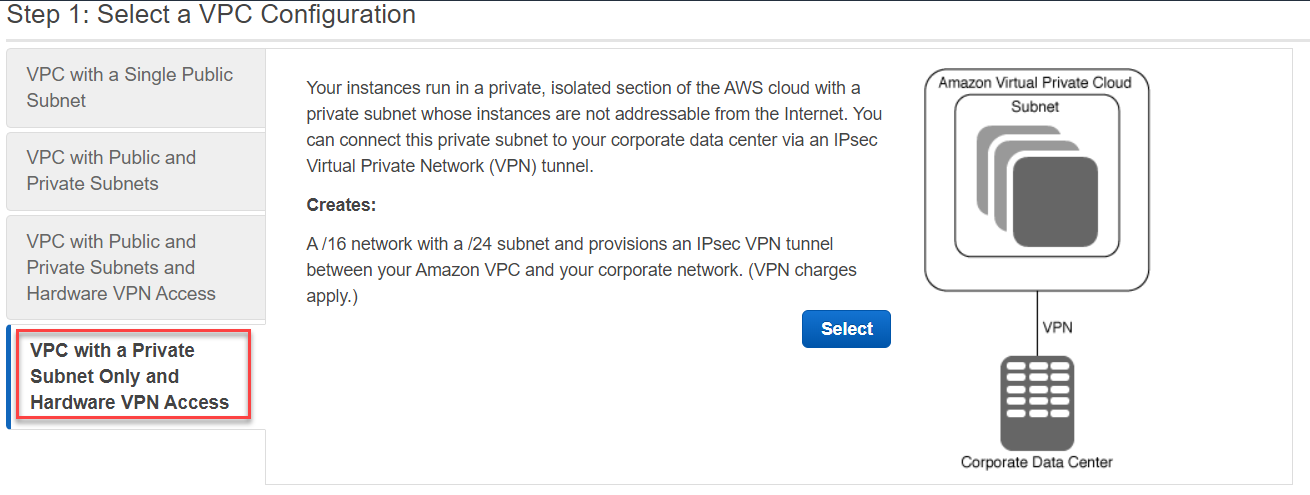
The last one is to build a VPC with a Private subnet only and Hardware VPN access. Here is the official description: "Your instances run in a private, isolated section of the AWS cloud with a private subnet whose instances are not addressable from the Internet. You can connect this private subnet to your corporate data center via an IPsec Virtual Private Network (VPN) tunnel."
When you select this option it creates: A /16 network with a /24 subnet and provisions an IPsec VPN tunnel between your Amazon VPC and your corporate network. (VPN charges apply.)
For this post, I have selected the first scenario and clicked Next.
Providing Key Details for VPC
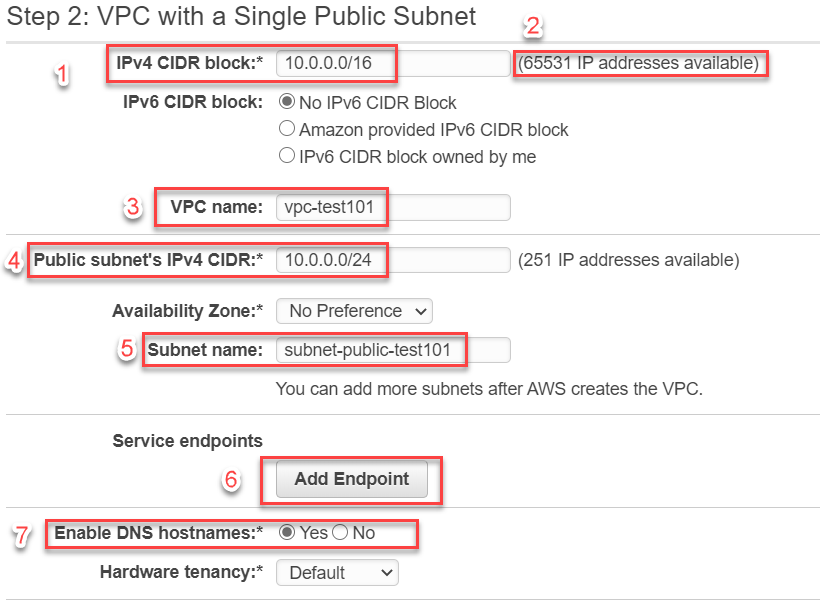
In the next screen, you provide all the essential details to create your VPC along with the dependent resources like it's subnets etc. These settings are as follows (numbering follows the numbers in the screenshot below):
- IPv4 address space for the whole VPC. This is provided in the CIDR notation.
- Once you enter the IP address space for the VPC, this area shows you the number of available IP addresses. These are the maximum number of network interfaces that can join this virtual network (or EC2 instances that have these network interfaces). Note that this number is a little less than total number of IP addresses in the CIDR notation. This is because some IP addresses are reserved by AWS for it's own functionality.
- A name for the VPC to identify it
- Subnet's IPv4 CIDR address space. This should be contained inside the CIDR for the VPC and should be smaller than that. A subnet is a sub-part of the VPC and therefore will have lesser number of IP addresses than the complete VPC.
- A name for the subnet
- Service Endpoint, that allows your VPC to connect to a service like S3. You can set this up at a later point if you need.
- Enable DNS hostnames to allow DNS hostnames for the instances that can be connected using these hostnames instead of just IP addresses.
Once you are done configuring, hit create to create the VPC. Now that we have a VPC we will start working with it next.