Azure SQL Basics - Creating Elastic Pool in Azure SQL Server
@20aman Nov 23, 2019Note that this post is a part of the series. You can view all posts in this series here: Azure SQL and Data Factory Basics - Index
Azure SQL Database Elastic Pools are a simple, cost-effective solution for managing and scaling multiple databases that have varying and unpredictable usage demands. The databases in an elastic pool are on a single Azure SQL Database server and share a set number of resources at a set price.
Elastic Pools exist only at the SQL Server level in Azure. These help to pool resources when you are building multiple databases on the same server. In this post, we will be checking how to create the elastic pool in the Azure SQL Server.
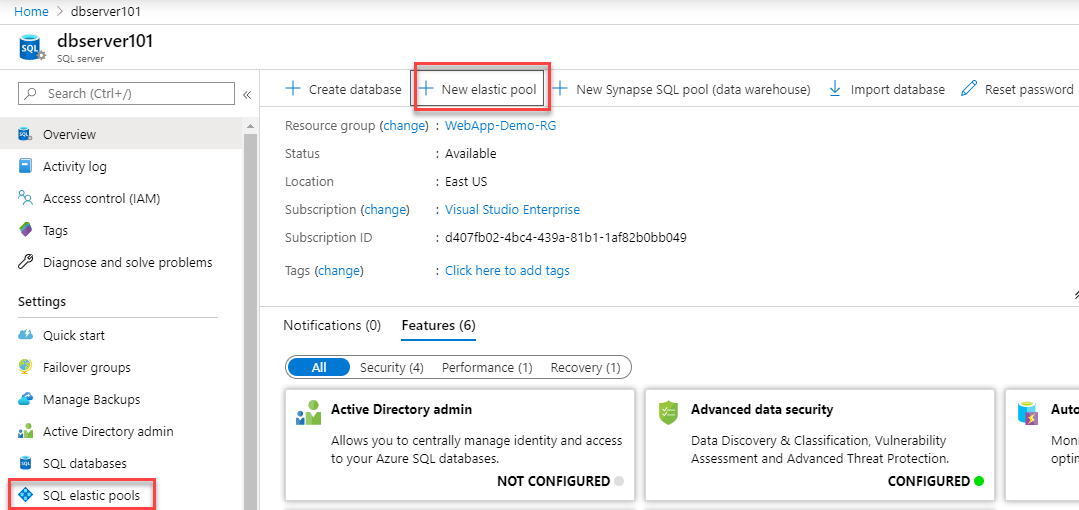
To Navigate to the creation of an elastic pool, go to the server under which you want to create the elastic pool.

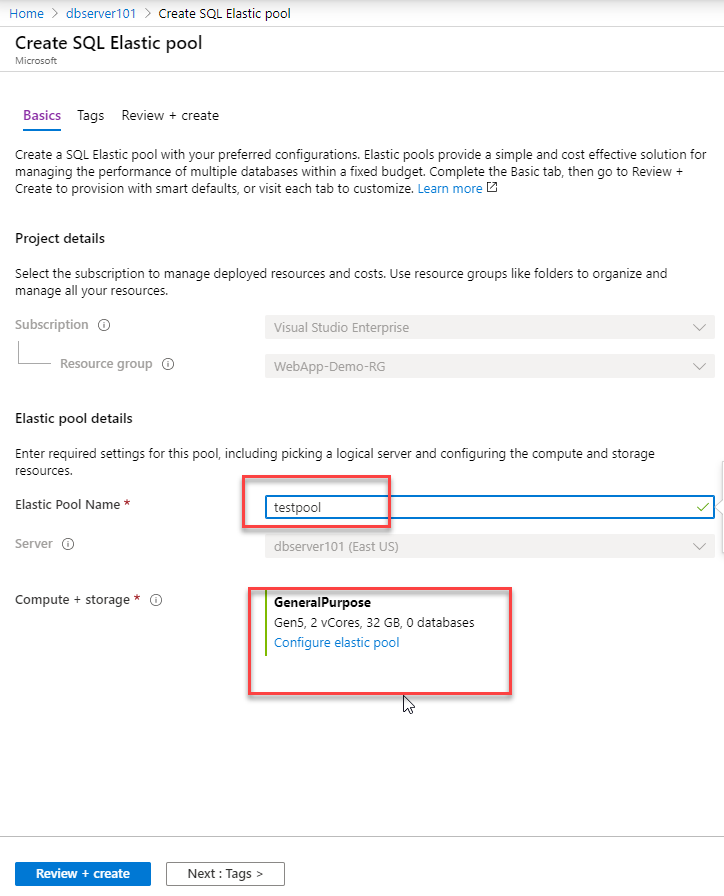
To create the elastic pool, mention the valid name in the Elastic pool name section. To select the compute and storage, click on the configure elastic pool and it will show below the blade.

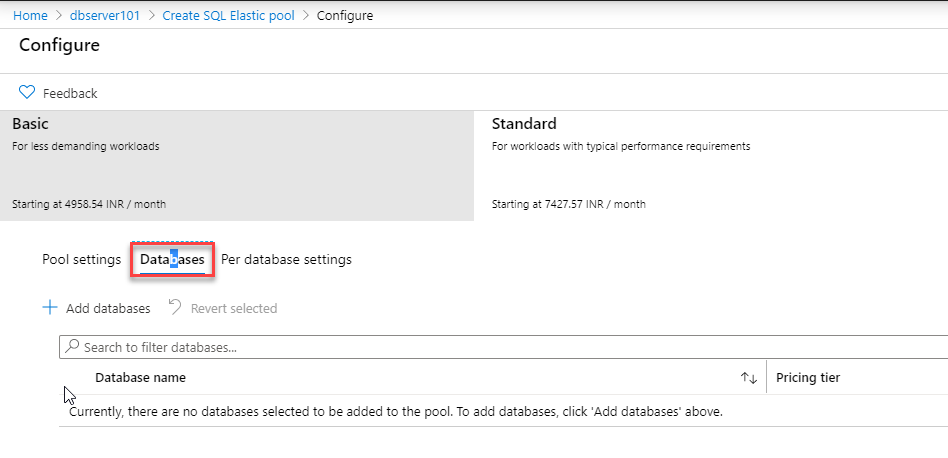
Here you assign the total number of DTU’s and max database size of all the databases in the elastic pool.

In the Databases section, you can add the databases which you want to add into this elastic pool that we are creating.

In the ‘Per database settings’ section, you can provide the min and max DTU assigned to each database added in the elastic pool.

You can also apply Tags during the creation (which is highly recommended). Finally, you review and create the resources. The deployment will be submitted and the pool created for you.