Demystifying Azure Security - Azure Policies - 2 - Assigning a Policy
@20aman Dec 27, 2017This blog post is part of the Demystifying Azure Security series. All posts in the series can be found here: Demystifying Azure Security - Series Index
In this post, we will view the policies in action. Policy assignment is very easy on the Azure Portal. We will be assigning a built-in policy at a subscription scope.
Accessing the Policies in the Azure portal
Begin by accessing the Policies in the Azure Portal. To do this follow the below steps:
- Navigate to Subscriptions (via All Services or the navigation sidebar)
- Select the subscription for which you want to view the Policies
- Scroll down to the "Settings" category in the menu of the subscription
- Click on "Policies" to access the policies in Azure
Assigning the Built-in Policies
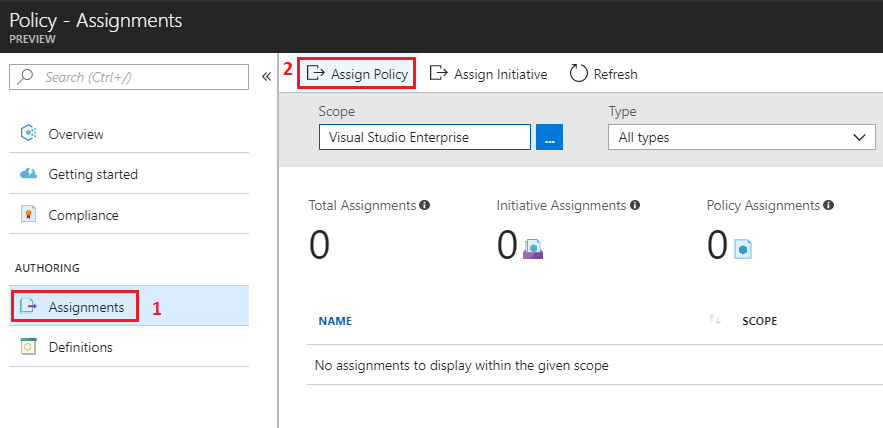
To perform the assignment, click on "Assign Policy" from either Compliance or the Assignment tabs.

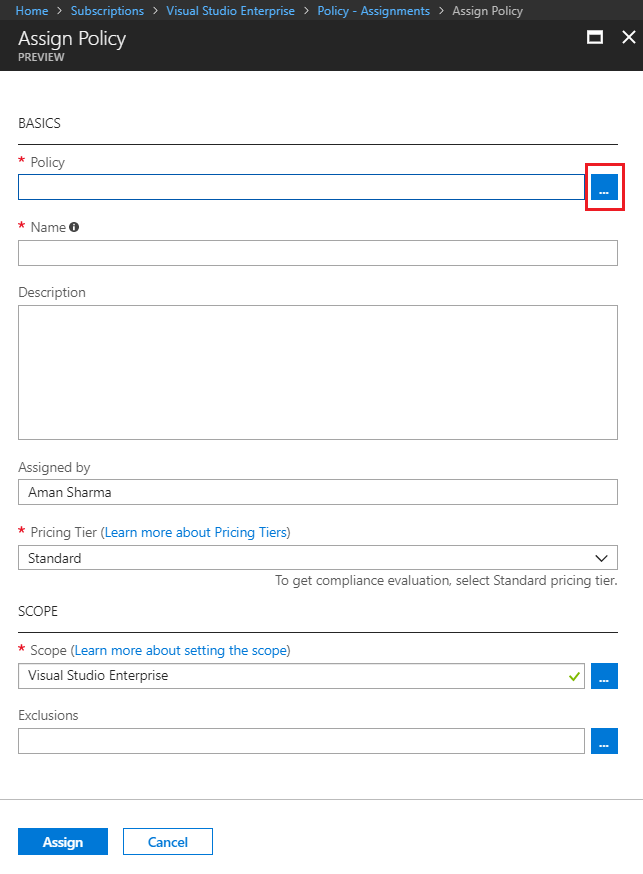
In the new blade, provide the value for the:
- Policy to be applied
- Name and Description of the Policy. The name will be the name of the policy selected by default. As a best practice ensure to provide the detailed description.
- Assigned by will be your name by default
- You can select the pricing tier between Free and Standard. You will get the compliance evaluation of the resources in your environment against the policy with the Standard pricing tier
- Scope for the Policy
- Exclusions from the Policy
- Any additional parameters related to the policy
To select from the policies, click on the blue button with an ellipse (i.e. 3 dots) in front of the Policy box. This will popup another blade for all the Policy definitions.

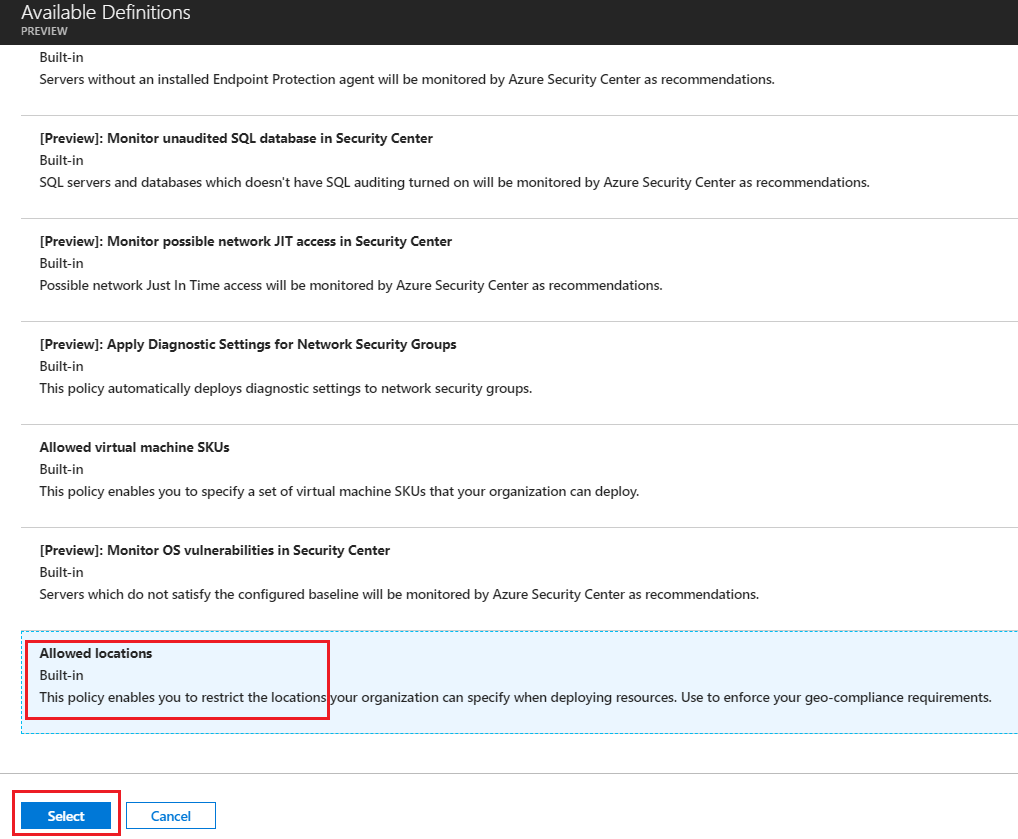
Scroll through various Built-in policies. Once we define any custom user-defined policies, they will also be displayed here. Select the policy "Allowed locations" from the list of the policies as an example. Click on "Select" once done.

Select the Scope for applying the policy. You can leave the default to the Subscription level. Or you can click on the blue button in front of scope text box and select the Resource Groups under the subscription on which you want to apply the policy.
You can also select the Exclusions if you require. These Resource Group or resources will not be evaluated against the policy.

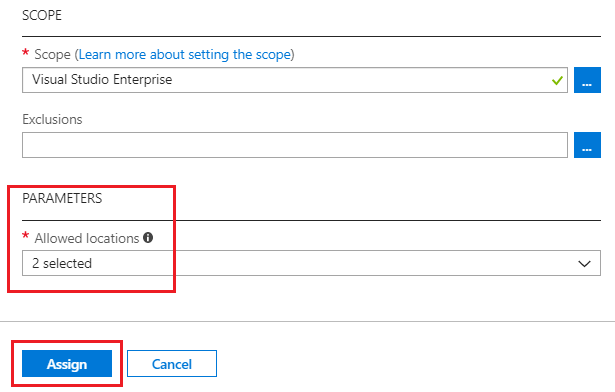
Lastly, you will have additional parameters for the policy related values. These parameters will vary and will depend on the policy you have selected. E.g. For "Allowed locations" policy, you will see the parameter for allowed locations. Select "East US" and "East US 2" for the locations as an example.

Once you complete the configurations, click on the "Assign" button to apply the policy
Validating the Policy
To validate the policy for "Allowed locations" follow these steps:
- Try to deploy a Storage Account or a VM or any other resource in a location that is NOT allowed. E.g. try deploying a storage account in the "West US" location. This should fail with the validation error stating the policy id.
- Perform the same deployment but to one of the allowed location. E.g. try deploying a storage account in the "East US" location. This should succeed without any erros.