Simplifying Azure Bastion - 2 Create an Azure Bastion Host
@20aman Apr 07, 2021This blog is a part of the Azure Bastion series. You can find the Index of this series here: Azure Bastion Series.
In the previous post, we looked at what the Azure Bastion service is. We discuss its architecture, how it works, key benefits, pricing, etc. In this post, we will look at how to create the Azure Bastion service in the Azure portal.
As we noted in the previous post, the Azure Bastion host is linked to a particular virtual network. In this post, when we will perform the deployment, you will notice that the deployment will be done related to a particular virtual network that we will need to select. This should be the virtual network into which your virtual machines are also deployed which you want to RDP or SSH into via the Azure Bastion service.
Pre-requisites
Before you start setting up the Azure Bastion host, you need to have a subnet in your Virtual network where you are deploying it.
- The subnet must be named AzureBastionSubnet.
- The subnet must be at least /26 or larger.
In order to make a connection, the following roles are required:
- Reader role on the virtual machine
- Reader role on the NIC with private IP of the virtual machine
- Reader role on the Azure Bastion resource
Creating the Azure Bastion host
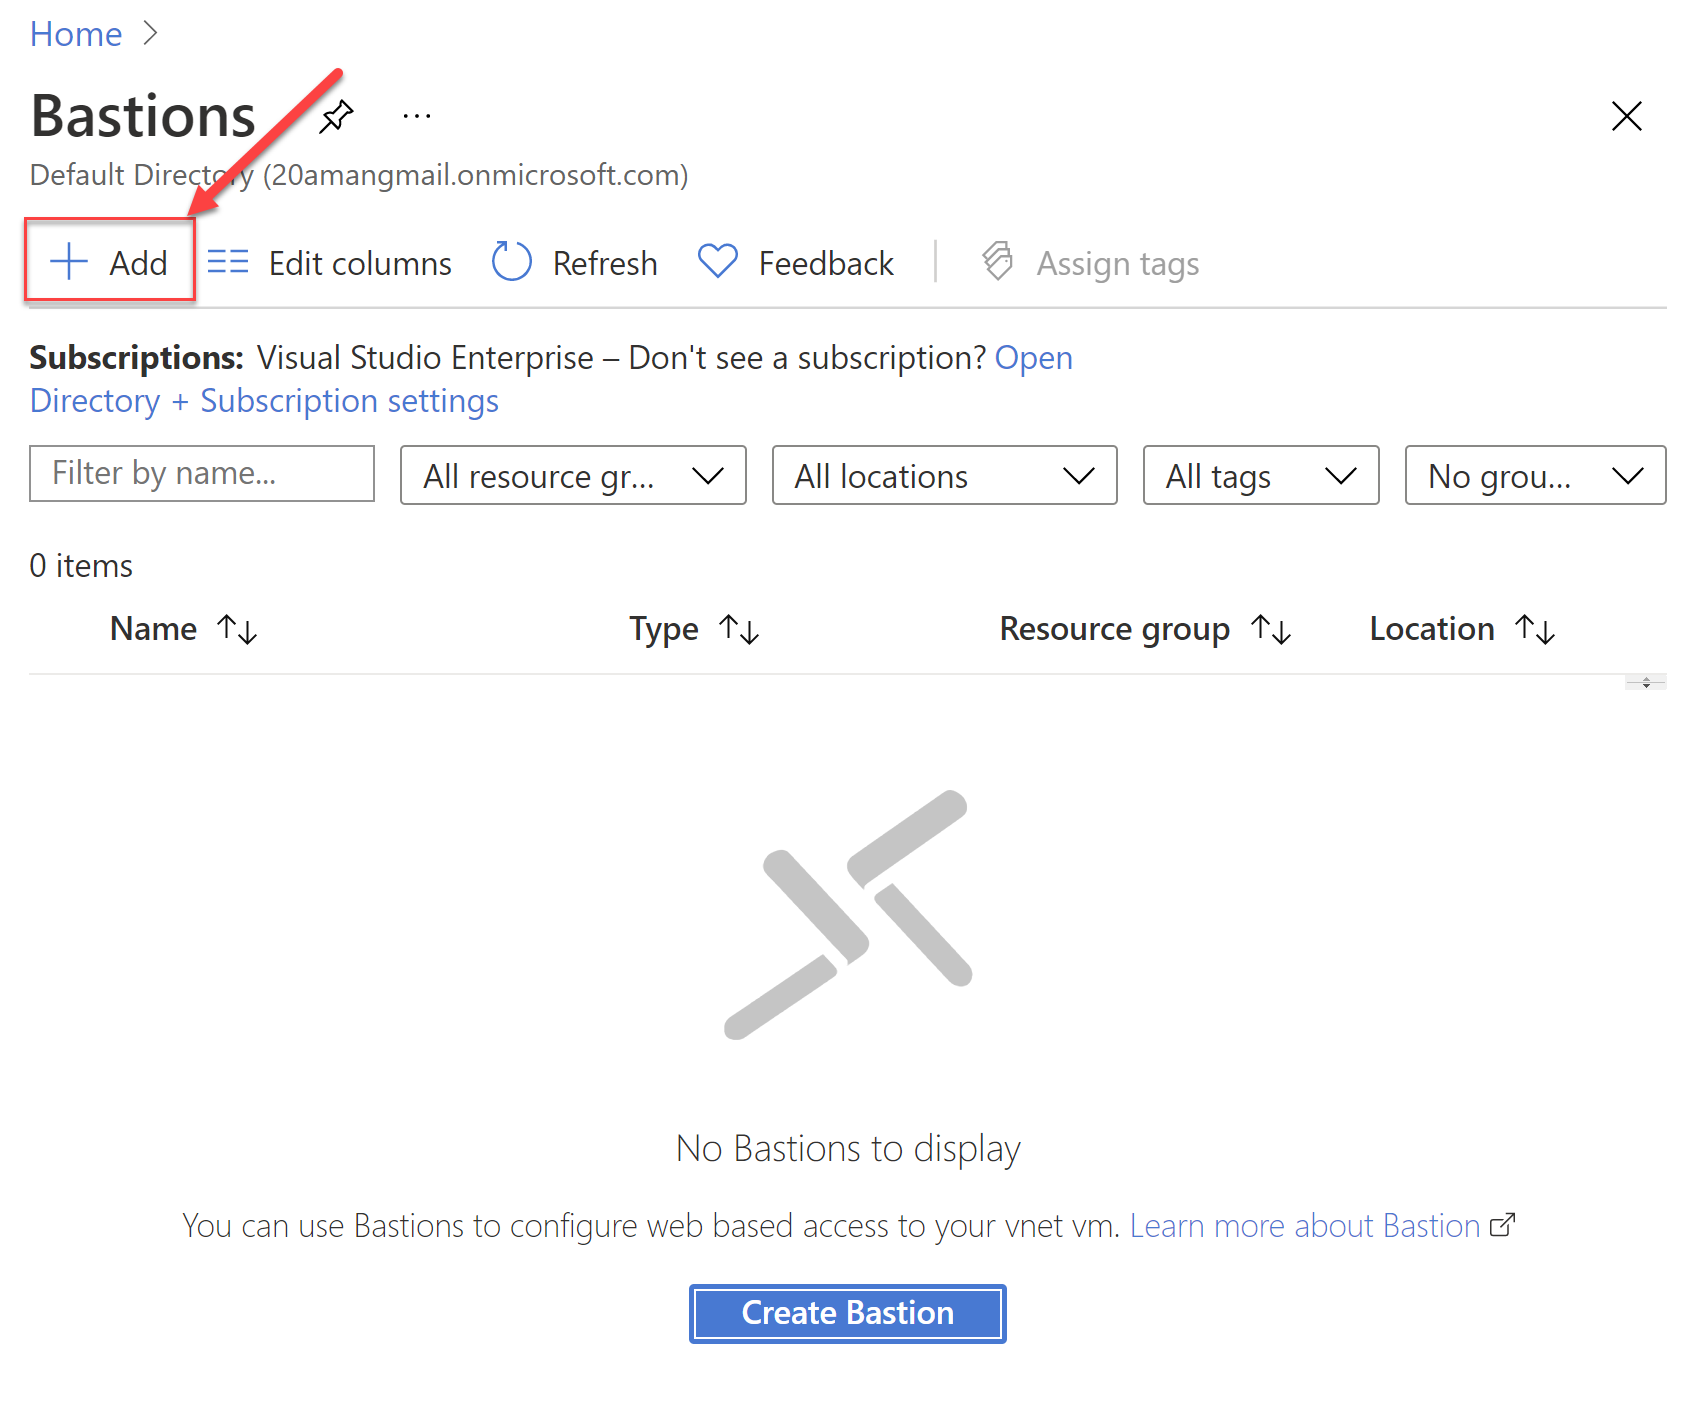
To create a Bastion host, you can navigate to the Bastions section in the Azure portal. Click on the "+ Add" button to add a new Bastion host.
A new blade for "Create a Bastion" will open up. In this new blade, provide the details for:
- Subscription and the Resource Group where you want to deploy the Bastion service.
- Provide a name for the Bastion host and the region where it should be deployed. Note that the region should be the same as where the Virtual Network and the VMs are located.
- Next, select the target Virtual network. It will automatically select the subnet with the name as AzureBastionSubnet. Note that this subnet should have the size as /27 or larger. If there is no such subnet then you will get an error.
- Next, either create a new public IP address or use an existing public IP for the Bastion host.
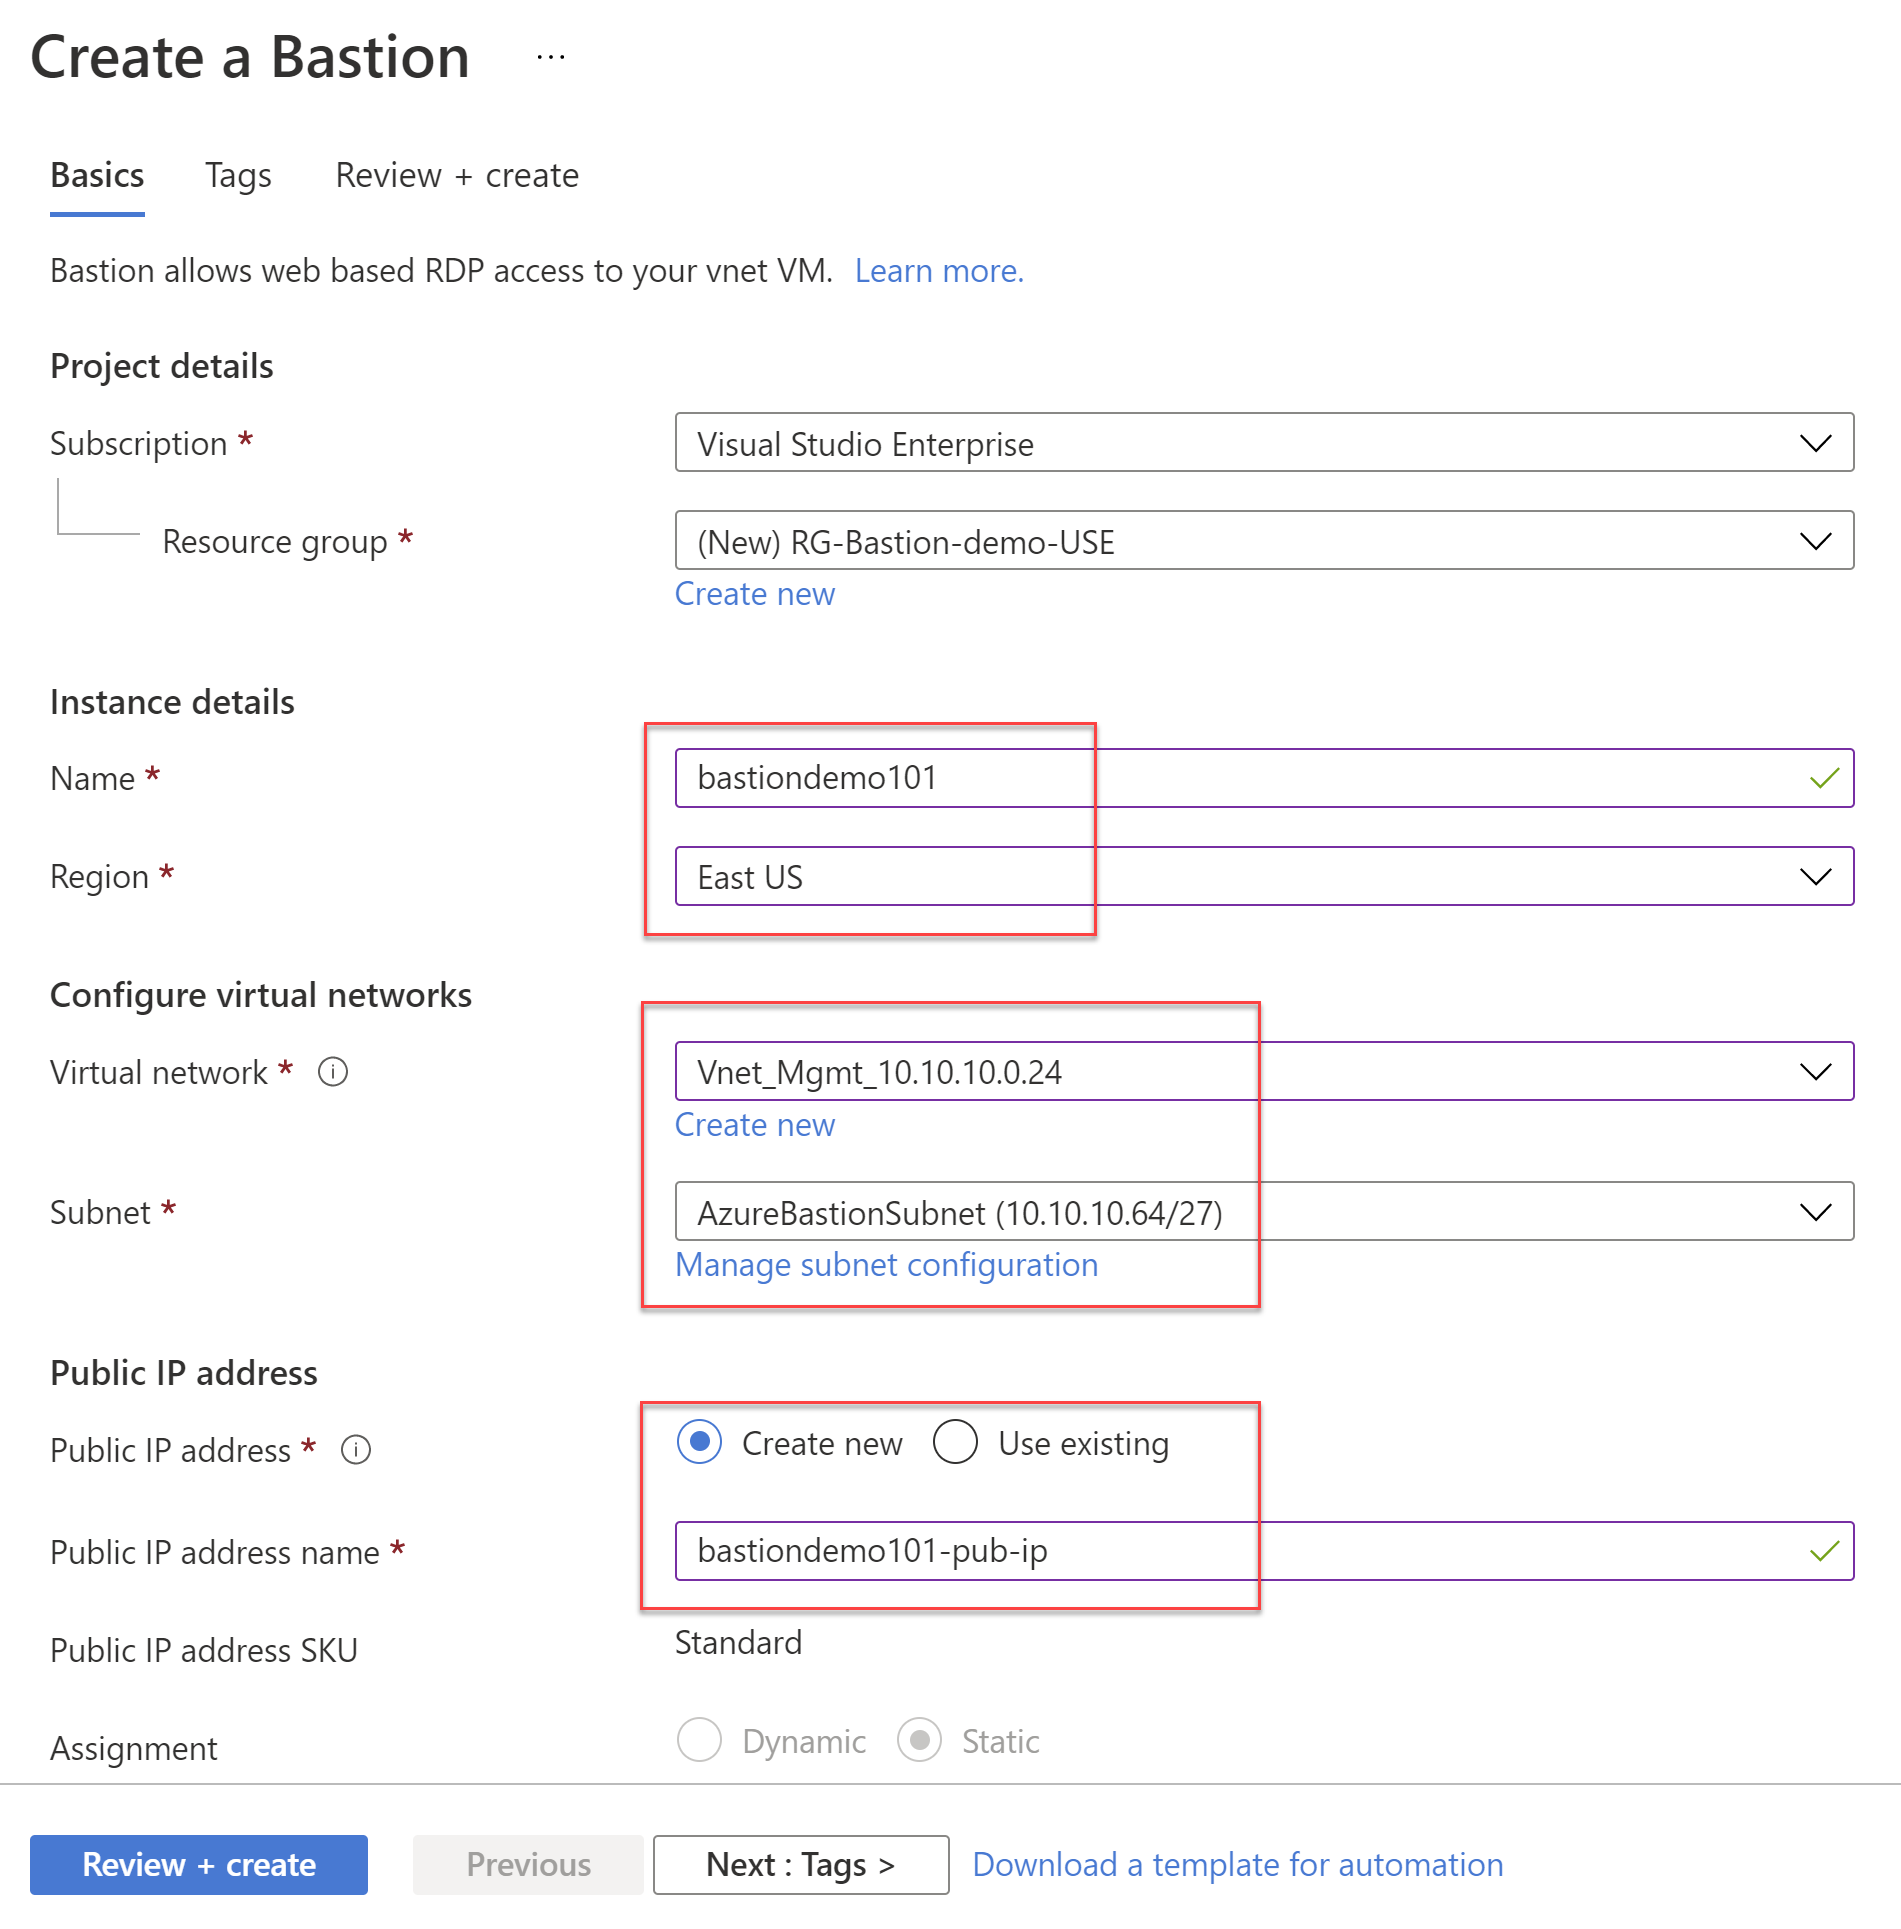
In the next screen provide the Tags. Review all the settings and then create the Bastion host.
That's all there is to it. Once the deployment is complete we will be ready to leverage this to connect to the other VMs in the virtual network.
Note that we will not be able to connect to the Bastion host itself. It is a fully managed service and is used under the hood to connect to the VMs via RDP or SSH internally. We will be able to connect to other VMs in the network, over port 443 directly from the Azure portal, directly in the browser.
In the next post, we will look at how to connect to VMs using the Azure Bastion host.