Step by Step ARM Templates - Using Key Vault to Securely Provide Information in ARM Templates
@20aman Oct 18, 2016Index of all blogs in this Step by Step ARM Templates series is located here: Step by Step Azure Resource Manager (ARM) Templates - Index
When providing passwords and other secure and confidential information in ARM Templates, you need to ensure that you don't hard code these values anywhere. You don't need to compromise the security of the system while trying to automate deployments. Your end goal is to try to automate as much as possible and reduce manual involvement.
Key Vaults are there to solve this problem without compromising any security. In fact, they make the whole solution more secure with least manual intervention.
Setting up the Key Vault
We first need to setup the Key Vault in Azure to be able to use it via ARM Template parameters.
-
Create a Key Vault in Azure by going to New -> Security + Identity -> Key Vault. Provide a name, subscription, resource group etc. and provision the Key Vault. Once it is created navigate to it by clicking on "More Services" and searching for Key Vault. Click on the name of the vault you created. E.g. In this example we have named the key vault to "TestKeyVault101".
Note that this feature is in Preview at the time of writing of this blog. -
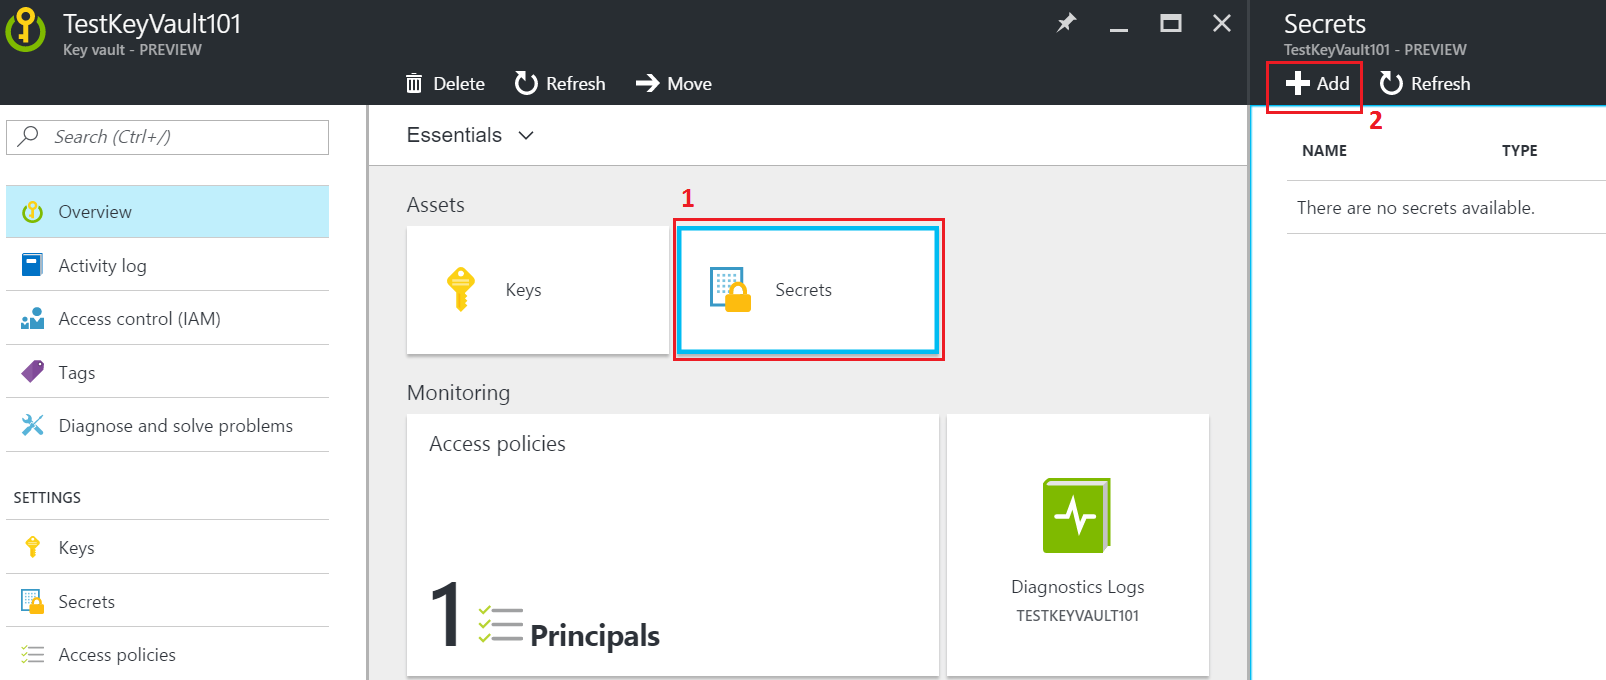
Next, we need to Add a Secret in the key vault. Click on the Secrets and then the + Add button at the top, as shown below:
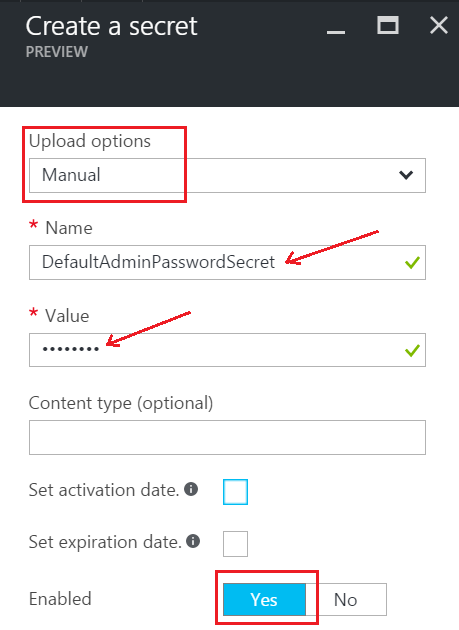
Next, in the "Create a secret" blade, set the Upload Options to Manual. Provide a name and value to the secret. Value is the password you want to securely save. Ensure that the Enabled is set to Yes. Optionally you can set the activation and expiration dates. In this example, we are setting the Secret Name to "DefaultAdminPasswordSecret".
-
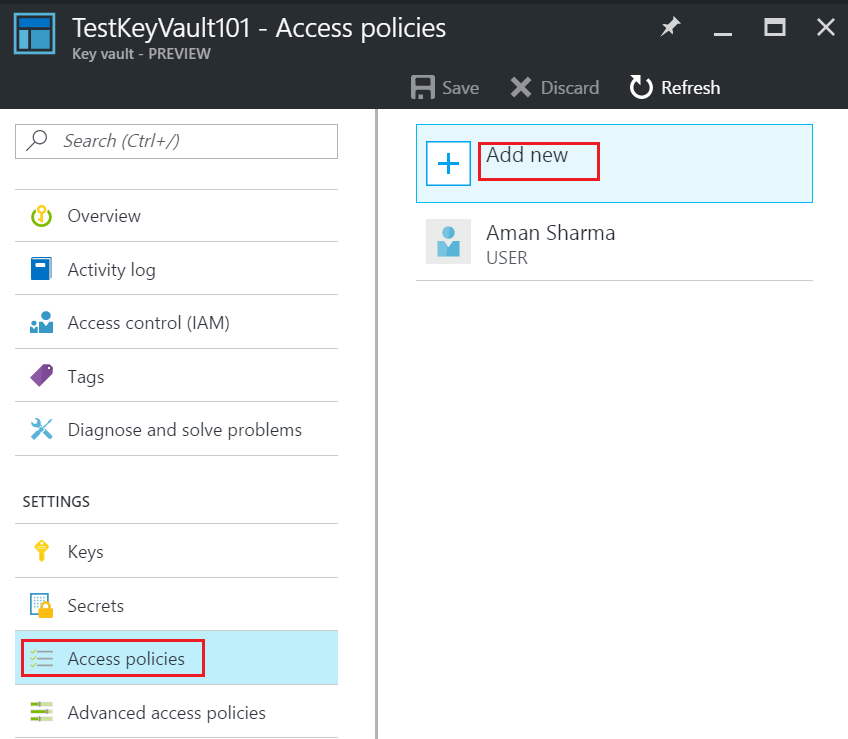
Next, we will set the Access Policies to provide access to the user under the context of which the template will be deployed. This is the user which will be accessing the Key Vault. Go to Key Vault settings and select Access Policies. Add the new user as shown below:
-
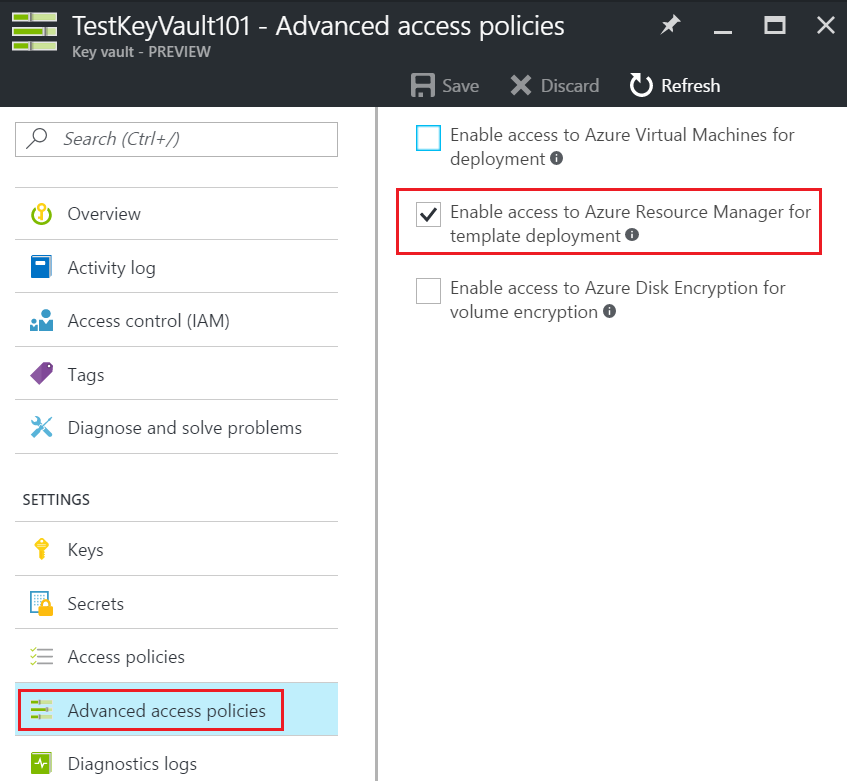
Next, we will set the Advanced Access Policies to indicate that this key vault can be accessed via ARM Templates. Go to Key Vault settings and select Advanced Access Policies. Ensure that the checkbox for "Enable access to Azure Resource Manager for template deployment" is checked as shown below:
We are now all set with our Key Vault. Next, we will be using the secret we created to set the local Administrator user's password.
Using the Key Vault Secret in ARM Template
Let us assume that you have a JSON ARM Template which deploys a VM. One of the parameters in this template is AdminPassword. You want to use the Key Vault Secret to provide the value for this parameter.
First, ensure that the parameter is declared as securestring as shown below:
"adminPassword": {
    "type": "securestring",
    "metadata": {
        "description": "Password for local admin account."
    }
}Next, we need to use the parameters file for this template. If you don't have one already create a new one. We can provide the reference to the Key Vault Secret as the value of admin user's password parameter in this file. General Syntax of providing reference is as shown follow:
"adminPassword": {
  "reference": {
    "keyVault": {
      "id": "Key Vault Id Here"
    },
    "secretName": "Name of the secret in Azure Key Vault"
  }
}
Now the ID in the above Syntax can be provided as:
/subscriptions/{guid}/resourceGroups/{group-name}/providers/Microsoft.KeyVault/vaults/{vault-name}.
Note to replace the {guid} with actual GUID for the subscription (without the curly braces), replace {group-name} with the actual name of the resource group and {vault-name} with the actual name of the Key Vault.
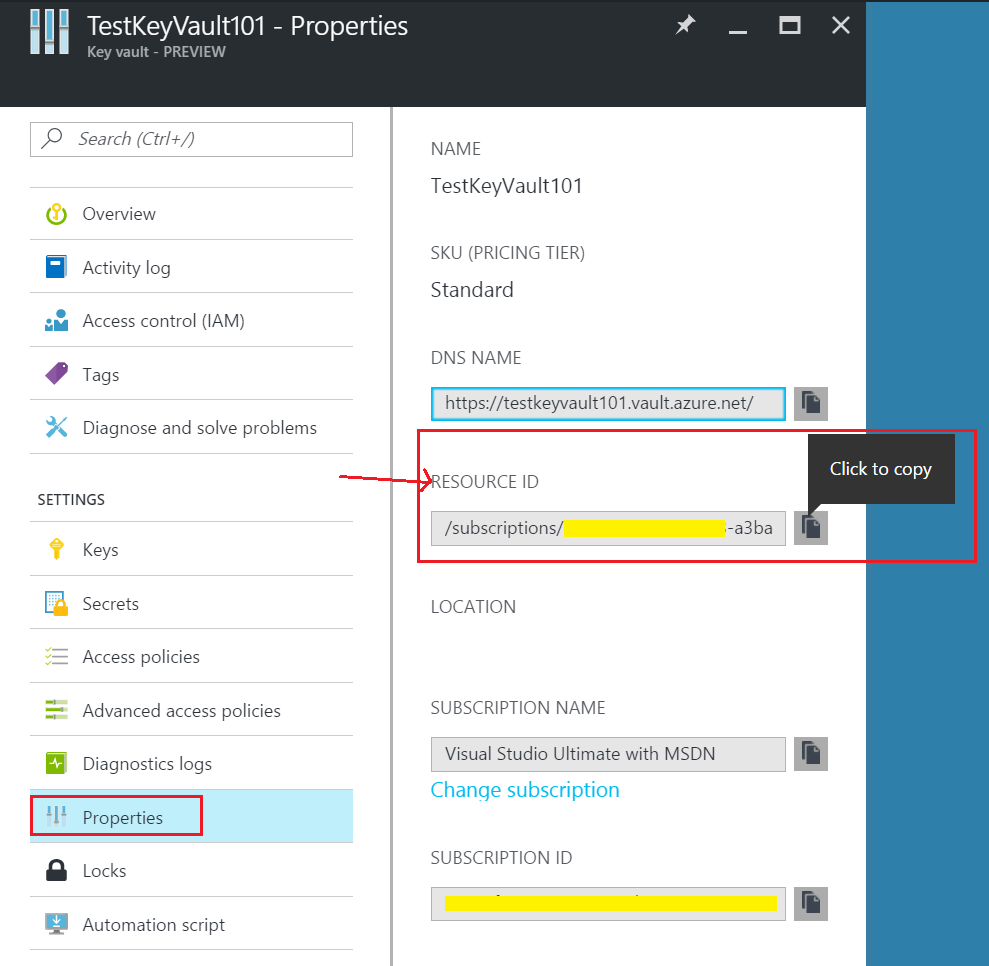
You can also find the Resource ID for the Key Vault by navigating to it in the Azure Portal and then checking it's properties as shown below:
The complete parameter file looks like below:
{
  "$schema": "http://schema.management.azure.com/schemas/2015-01-01/deploymentParameters.json#",
  "contentVersion": "1.0.0.0",
  "parameters": {
    "OtherParameter": {
      "value": "otherValue"
    },
    "adminPassword": {
      "reference": {
        "keyVault": {
          "id": "/subscriptions/11111aaa-1a11-1a11-a1aa-1a1111a111a1/resourceGroups/TestRG101/providers/Microsoft.KeyVault/vaults/TestKeyVault101"
        },
        "secretName": "DefaultAdminPasswordSecret"
      }
    }
  }
}
Next, deploy the template using PowerShell and pass this parameters file as explained here: Deploying Template Using Azure PowerShell.
Example PowerShell cmdlet to deploy will look like:
New-AzureRmResourceGroupDeployment -Name ExampleDeployment -ResourceGroupName TestResourceGroup01 -TemplateFile .\TemplateFile.json -TemplateParameterFile .\ParametersFile.jsonNow that you know how to use values from Key Vaults, you can make the automated deployment of resources more secure in your environment.