Windows Admin Center in the Azure portal - 2 Setting it up
@20aman Feb 26, 2022This blog is a part of the Windows Admin Center in the Azure portal series. You can find the Index of this series here: Windows Admin Center in the Azure portal.
In the previous blog, we talked about what is Windows Admin Center. In this blog, we will look at setting it up in the Azure portal.
Setup
The setup for Windows Admin Center is very easy and most of the stuff is automated for you. Just navigate to the VM after ensuring that it meets the pre-requisites (as detailed in the previous blog). It can only be from one of these OS: Windows Server 2016, Windows Server 2019 or Windows Server 2022 and needs to have at least 3 GiB of memory. Right now it is available only in the Azure public cloud.
Follow these steps to set it up:
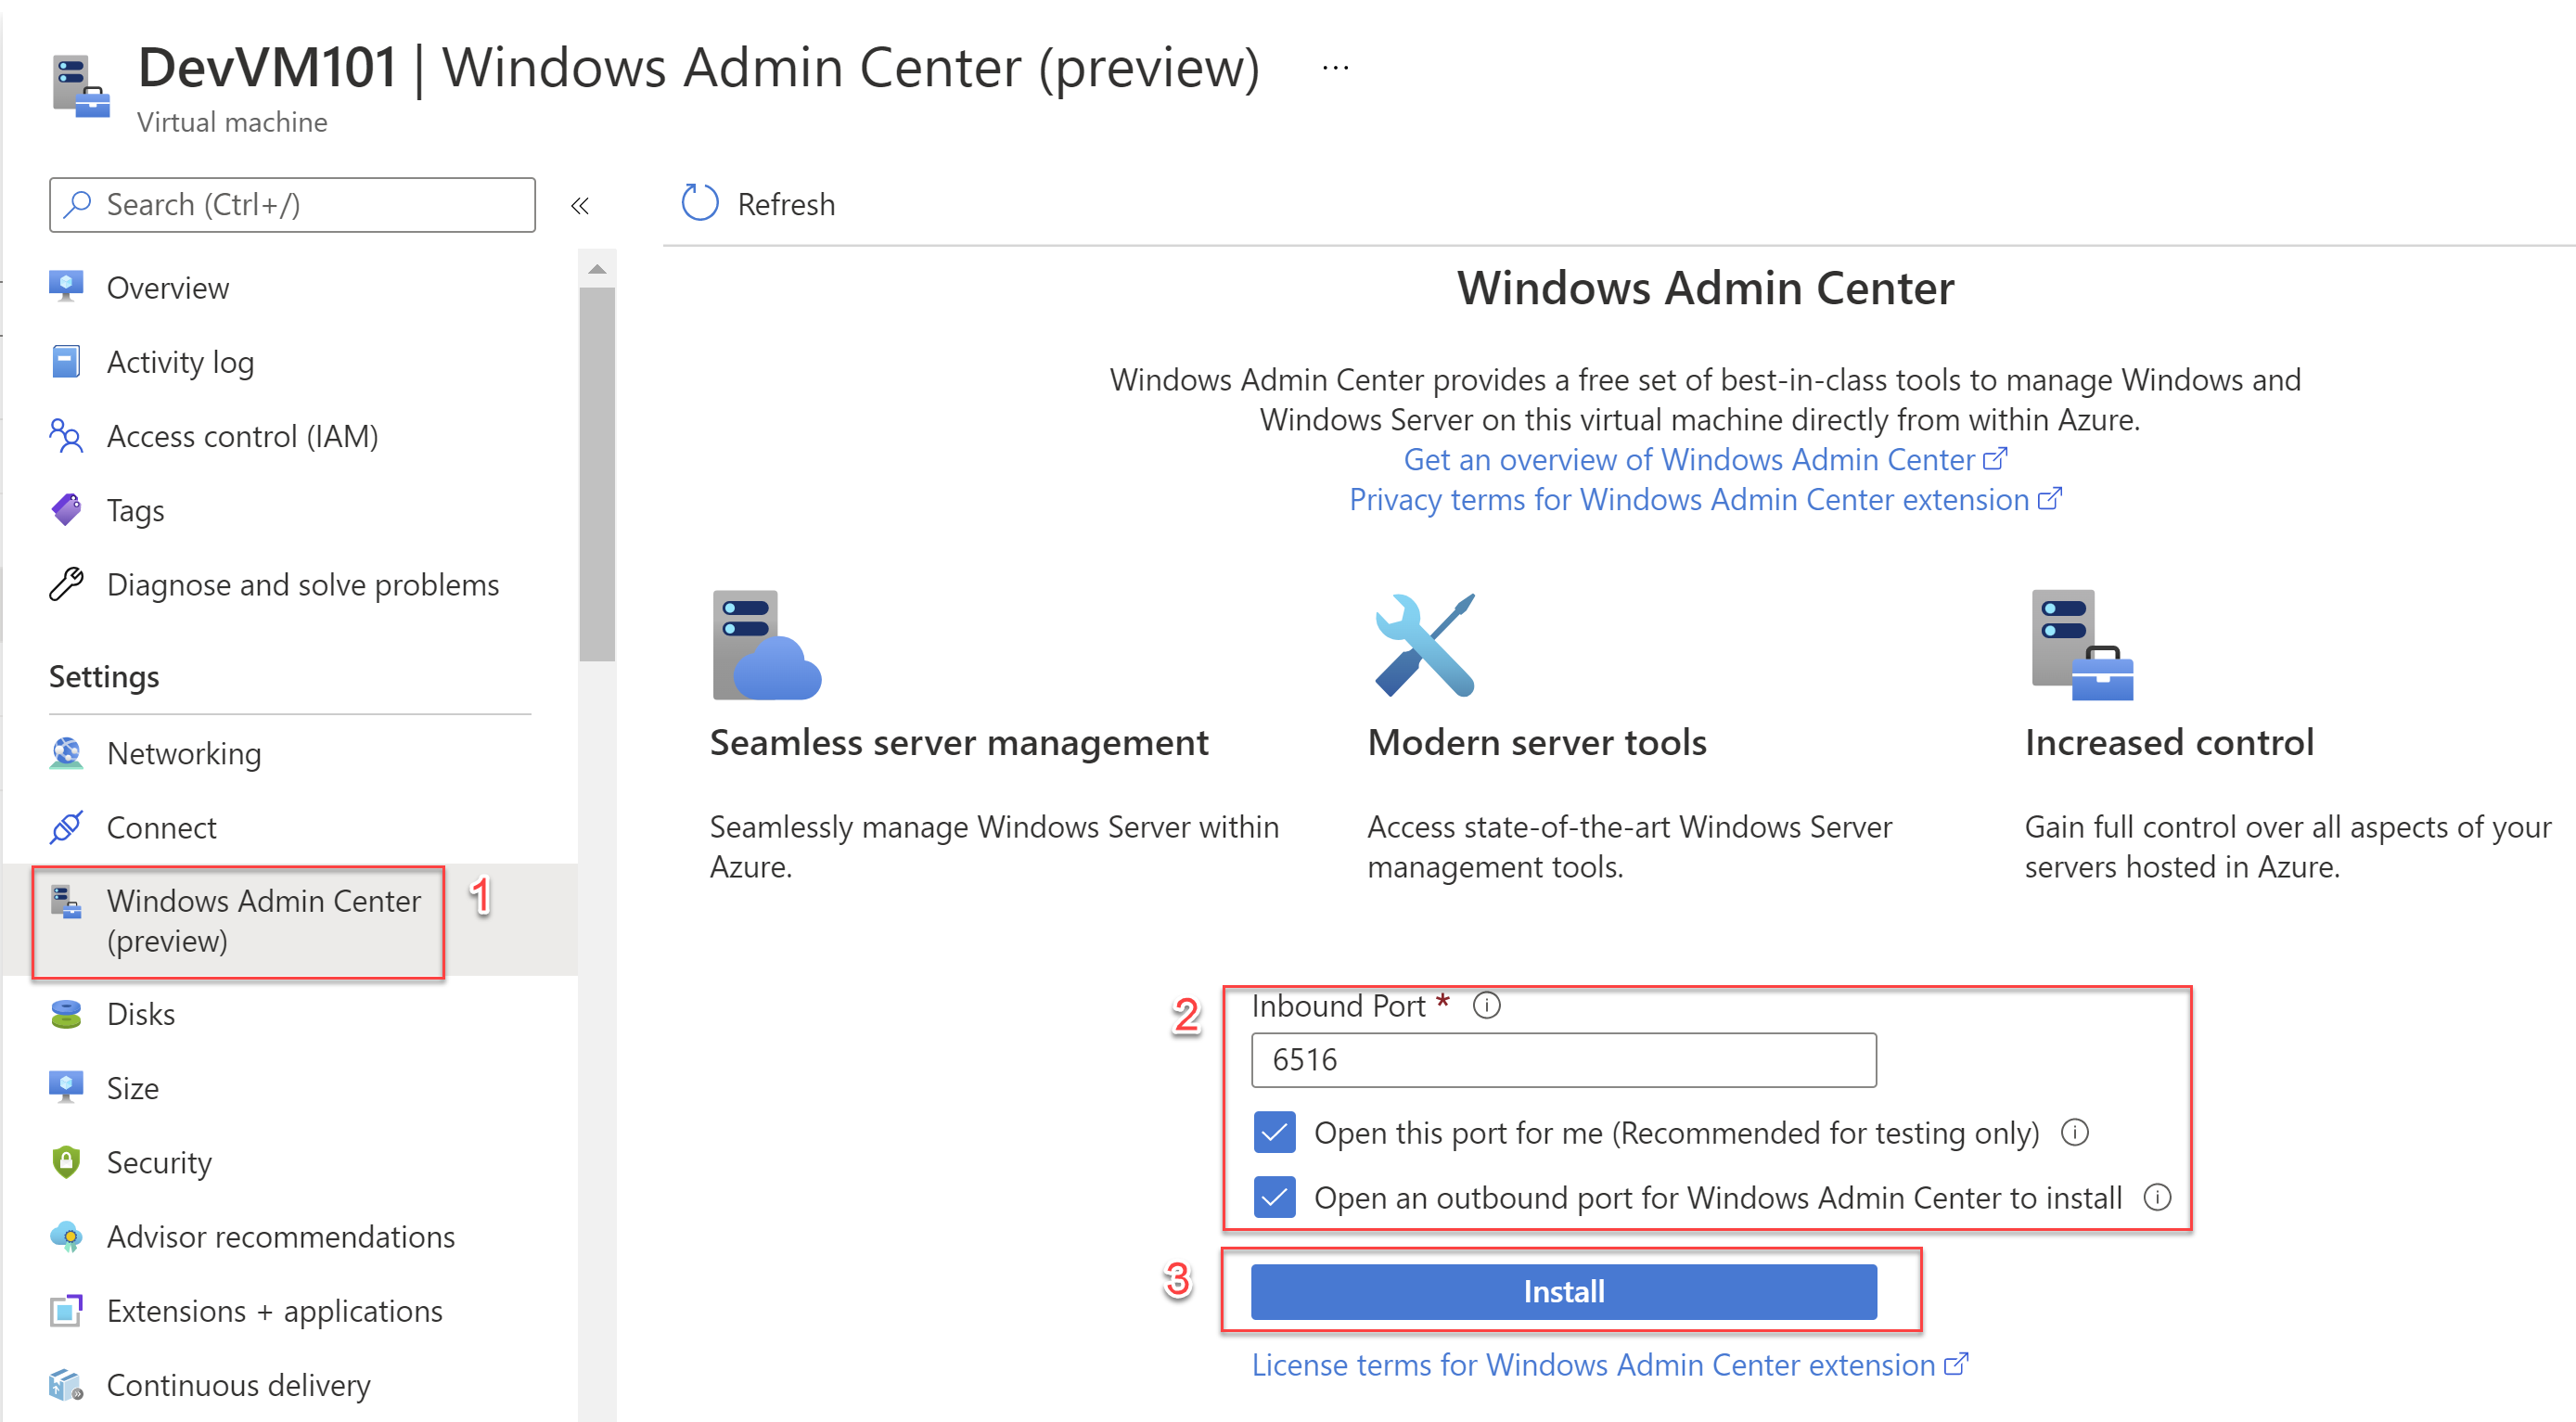
- Under settings, navigate to the option for "Windows Admin Center" as shown below.
- Select the Inbound port for connectivity to the Windows Admin Center. Also, select the first check box for opening inbound connectivity to this port. NOTE: This is only required if you don't have connectivity to the virtual network of the VM. Select the second check box to open the outbound connectivity for Windows Admin Center to install.
- Once selections are made, click on the Install button.

That's all there is to the setup. Next, we will see what it does under the hood and how to connect to and work with the Windows Admin Center.